Lemon Crème Brûlée Cookies are a delightful fusion of two beloved desserts, and for good reason! We all adore the satisfying crunch of a perfectly caramelized sugar crust and the rich, creamy custard that lies beneath. Now, imagin extracte all that irresistible flavor and texture shrunk down into a delightful, bite-sized cookie. That’s the magic of these Lemon Crème Brûlée Cookies. They offer a sophisticated twist on traditional cookie recipgin extract bringing an element of elegance to any occasion, from casual afternoon treats to more formal dessert platters. What truly sets these cookies apart is the ingenious way we capture the essence of crème brûlée within a chewy, buttery cookie base, elevated by the bright, zesty punch of fresh lemon. Get ready to discover your new favorite sweet indulgence!

Ingredients:
- All-purpose flour: 1 1/2 cups
- Unsalted butter: 1/2 cup, softened
- Granulated sugar: 3/4 cup
- Large egg: 1
- Lemon zest: 1 tbsp
- Lemon juice: 2 tbsp
- Vanilla extract: 1 tsp
- Baking powder: 1/2 tsp
- Salt: A pinch
- Lemon curd: 1/2 cup
- Granulated sugar: 2 tbsp (for topping)
Preparing the Cookie Dough
The foundation of our Lemon Crème Brûlée Cookies lies in a wonderfully simple yet flavorful cookie dough. It’s designed to be sturdy enough to hold its creamy filling while offering a delightful tender chew. We begin extract by creaming together the softened unsalted butter and granulated sugar in a large mixing bowl. This process is crucial for incorporating air into the butter and sugar mixture, which contributes to the cookie’s texture. Use an electric mixer on medium speed or a sturdy whisk and some elbow grease until the mixture is light, fluffy, and pnon-alcoholic ale yellow. This typically takes about 2-3 minutes. Next, I like to add the large egg, lemon zest, lemon juice, and vanilla extract to this creamy base. Beat these ingredients together until they are thoroughly combined and the mixture is smooth. The lemon zest will perfume the dough beautifully, giving it that characteristic bright citrus aroma we’re aiming for.
In a separate medium bowl, whisk together the all-purpose flour, baking powder, and a pinch of salt. Combining the dry ingredients separately ensures that the leavening agent and salt are evenly distributed throughout the flour, which prevents pockets of uneven baking or flavor. Once the dry ingredients are well combined, gradually add them to the wet ingredients in the large mixing bowl. Mix on low speed or stir with a spatula until just combined. Be careful not to overmix the dough at this stage. Overmixing can develop the gluten in the flour too much, resulting in tough cookies. We want a tender cookie, so stop mixing as soon as you no longer see streaks of dry flour. The dough will be soft but should hold its shape.
Chilling and Shaping the Dough
This dough is quite soft due to the butter and lemon juice, so chilling is an essential step for easier handling and to prevent excessive spreading during baking. Cover the bowl tightly with plastic wrap and refrigerate for at least 1 hour, or until firm enough to roll. Chilling allows the fats to solidify and the flour to hydrate, making the dough much easier to work with and improving the final texture of the cookies.
Once the dough is well-chilled, preheat your oven to 350°F (175°C) and line two baking sheets with parchment paper. Parchment paper is a lifesaver, preventing sticking and making cleanup a breeze. On a lightly floured surface, roll out the chilled dough to about 1/4-inch thickness. If the dough becomes too soft while rolling, simply pop it back into the refrigerator for 15-20 minutes. Using a round cookie cutter, about 2-3 inches in diameter, cut out as many circles as possible. Re-roll the scraps gently, chill again if necessary, and cut out more cookies until all the dough is used.
Baking and Filling the Cookies
Arrange the cut-out cookie dough circles on the prepared baking sheets, leaving about 1-2 inches of space between them. This allows for a little bit of spread while baking. Bake for 9-12 minutes, or until the edges are lightly golden brown and the centers are set. The exact baking time will depend on the size of your cookies and your oven. Keep a close eye on them, as they can go from perfectly baked to slightly overdone very quickly. Once baked, let the cookies cool on the baking sheets for 5 minutes before transferring them to a wire rack to cool completely. It’s important that the cookies are entirely cool before we move on to filling them, otherwise, the lemon curd will melt and create a messy situation.
Assembling the Lemon Crème Brûlée Cookies
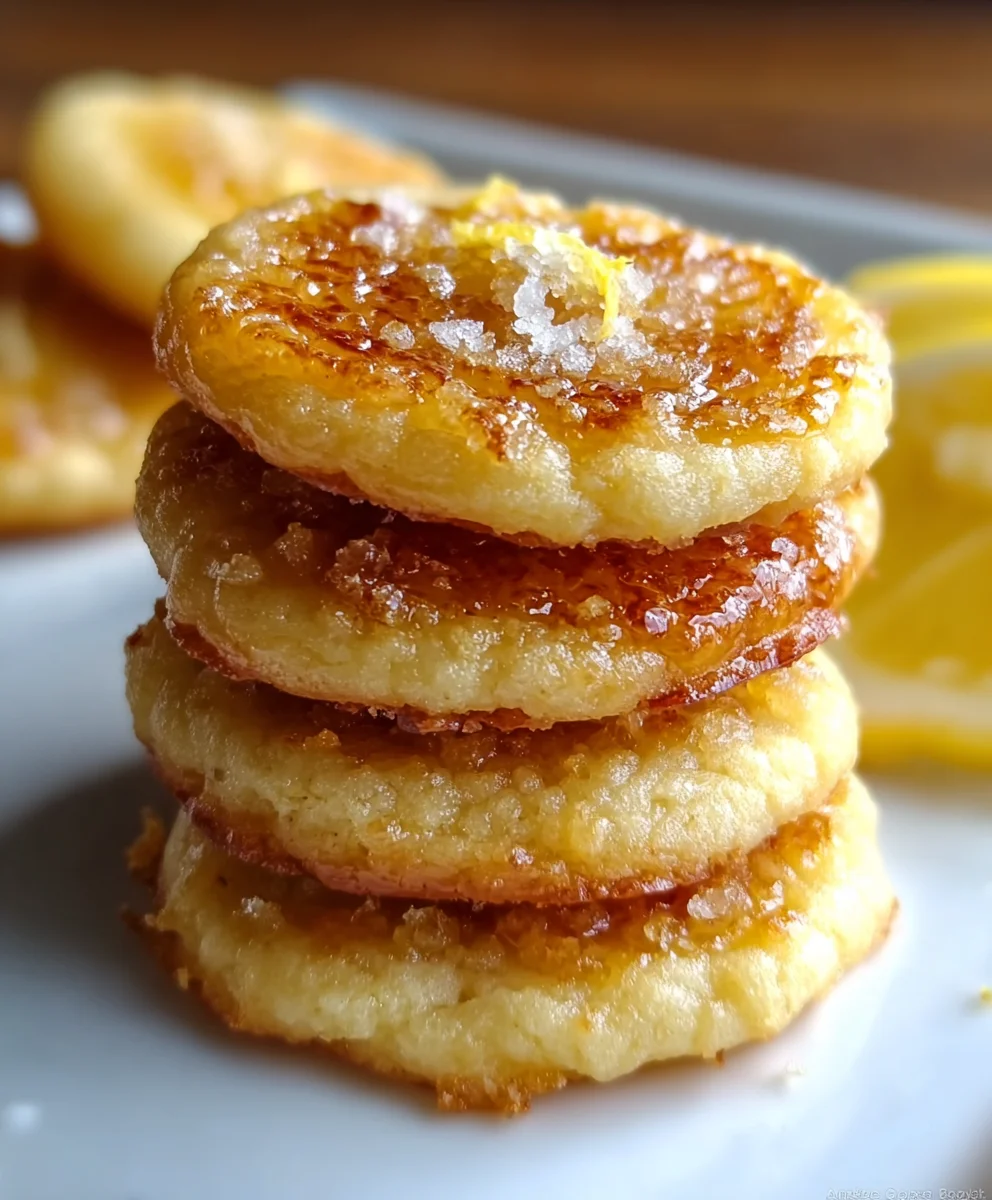
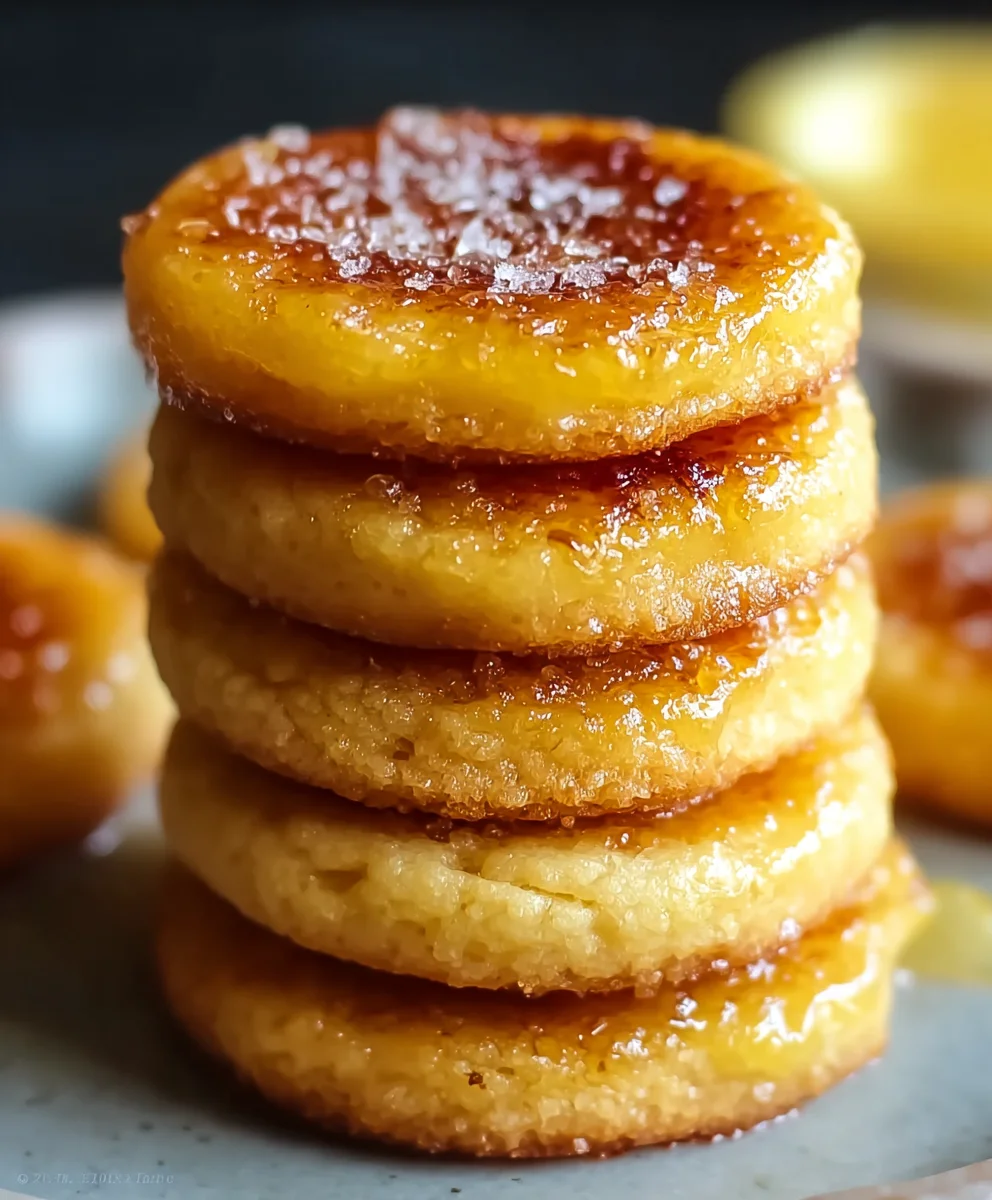
Now for the fun part – turning these simple cookies into delightful Lemon Crème Brûlée Cookies! Once your cookies are completely cool, select matching pairs of cookies. On the bottom side of one cookie from each pair, spoon about 1-2 teaspoons of lemon curd. You want a generous but not overwhelming amount of filling. Carefully spread the lemon curd almost to the edges, leaving a small border. Take the second cookie of the pair and gently place it on top of the lemon curd, pressing down slightly to adhere the two cookies together. Repeat this process with all your cooled cookies until you have a beautiful stack of filled cookies.
The Crème Brûlée Finish
This is where the magic truly happens, mimicking that beloved crackly caramel topping of traditional crème brûlée. Arrange the filled cookies on a clean baking sheet. Sprinkle about 1 teaspoon of the remaining granulated sugar evenly over the top of each cookie. It’s crucial to have a thin, even layer of sugar for the best caramelization. Now, using a kitchen torch, carefully toast the sugar until it melts and caramelizes into a beautiful golden-brown, crackly crust. Move the torch continuously to avoid burning any one spot. If you don’t have a kitchen torch, you can carefully place the cookies under a hot broiler for 1-2 minutes, watching them very closely, as they can burn quickly. The goal is a melted, caramelized sugar layer. Allow the caramelized sugar to harden for a few minutes before serving. These Lemon Crème Brûlée Cookies are best enjoyed the same day they are made to experience that perfect textural contrast between the crisp caramel, the soft cookie, and the tangy lemon curd filling.
Conclusion:
We hope you’ve enjoyed diving into the delightful world of Lemon Crème Brûlée Cookies! These cookies are a testament to how simple ingredients can come together to create something truly special. The perfect balance of zesty lemon and the satisfying crunch of caramelized sugar makes each bite an experience. Whether you’re a seasoned baker or just starting out, these cookies are wonderfully rewarding to make and even more delightful to eat. Don’t be afraid to experiment and make them your own!
For serving suggestions, these Lemon Crème Brûlée Cookies are absolutely divine on their own, perhaps with a cup of tea or coffee. They also make a stunning addition to any dessert platter, providing a unique textural and flavor contrast to other sweets. Imagin extracte them alongside a light fruit salad or a rich chocolate cake – they truly hold their own.
When it comes to variations, feel free to add a hint of lavender to the dough for a floral twist, or a touch of finely grated lime zest alongside the lemon for an extra citrusy punch. You could also try a sprinkle of edible gold dust on top before baking for an extra touch of elegance. The possibilities are as endless as gin extractr imagination!
Frequently Asked Questions about Lemon Crème Brûlée Cookies:
Q: Can I make Lemon Crème Brûlée Cookies ahead of time?
Yes, you absolutely can! The cookie dough can be made and chilled for up to 3 days. Once baked, they will stay fresh in an airtight container at room temperature for up to 4 days. The caramelized sugar topping is best enjoyed fresh, but the cookies themselves hold up well.
Q: How do I get the perfect caramelized topping?
The key is to evenly sprinkle a thin layer of granulated sugar over the cooled cookie. Using a kitchen torch is the most effective way to achieve a glassy, caramelized crust. If you don’t have a torch, you can place them under a hot broiler for a very short time, watching them constantly to prevent burning. It requires a watchful eye!
Lemon Crème Brûlée Cookies
A dreamy dessert treat featuring tender lemon cookies filled with tangy lemon curd and topped with a crackly caramelized sugar crust, mimicking the classic crème brûlée.
Ingredients
-
1 1/2 cups all-purpose flour
-
1/2 cup unsalted butter, softened
-
3/4 cup granulated sugar
-
1 large egg
-
1 tbsp lemon zest
-
2 tbsp lemon juice
-
1 tsp vanilla extract
-
1/2 tsp baking powder
-
A pinch of salt
-
1/2 cup lemon curd
-
2 tbsp granulated sugar (for topping)
Instructions
-
Step 1
In a large bowl, cream together softened unsalted butter and 3/4 cup granulated sugar until light and fluffy. Beat in the large egg, lemon zest, lemon juice, and vanilla extract until smooth. -
Step 2
In a separate bowl, whisk together the all-purpose flour, baking powder, and salt. Gradually add the dry ingredients to the wet ingredients, mixing until just combined. Do not overmix. -
Step 3
Cover the dough tightly with plastic wrap and refrigerate for at least 1 hour, or until firm enough to roll. Preheat oven to 350°F (175°C) and line baking sheets with parchment paper. -
Step 4
On a lightly floured surface, roll out the chilled dough to about 1/4-inch thickness. Cut out 2-3 inch circles. Arrange cookies on prepared baking sheets and bake for 9-12 minutes, or until edges are lightly golden brown. Cool completely on a wire rack. -
Step 5
Pair cooled cookies. Spoon 1-2 teaspoons of lemon curd onto the bottom of one cookie in each pair, spreading almost to the edges. Top with the second cookie and press gently. -
Step 6
Arrange filled cookies on a clean baking sheet. Sprinkle about 1 teaspoon of the remaining granulated sugar evenly over the top of each cookie. Using a kitchen torch, carefully caramelize the sugar until it forms a golden-brown crust. Alternatively, place under a hot broiler for 1-2 minutes, watching very closely. -
Step 7
Allow the caramelized sugar to harden for a few minutes before serving. Best enjoyed the same day.
Important Information
Nutrition Facts (Per Serving)
It is important to consider this information as approximate and not to use it as definitive health advice.
Allergy Information
Please check ingredients for potential allergens and consult a health professional if in doubt.

Leave a Comment