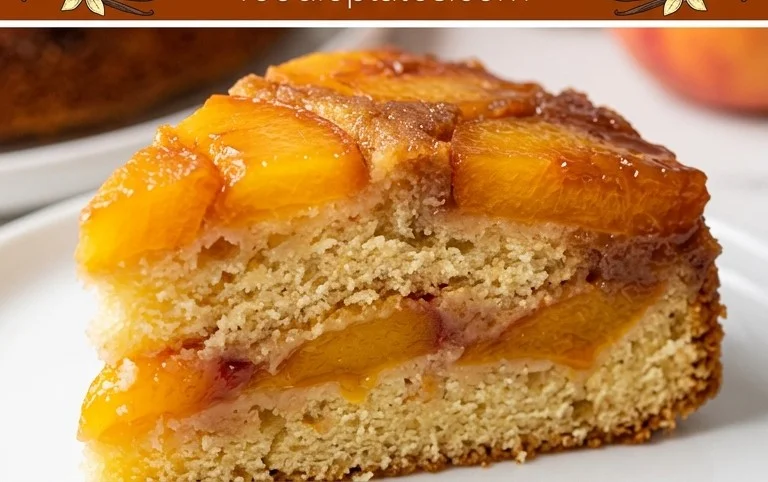
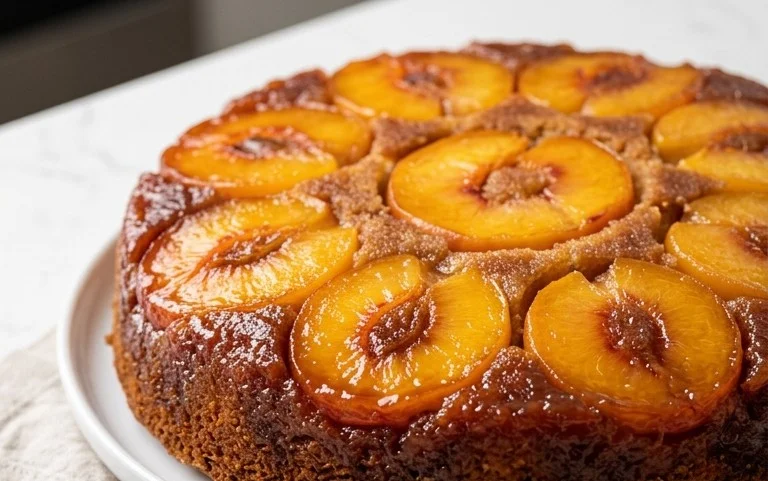
Peach Upside-Down Cake Recipe: Is there anything more delightful than the moment you invert a warm cake to reveal a glistening mosaic of caramelized fruit? I think not! This classic dessert, particularly the peach upside-down cake, holds a special place in my heart and, I’m sure, in yours too. It’s the perfect marriage of tender, buttery cake and sweet, slightly tart, perfectly cooked peaches. What truly makes a peach upside-down cake so beloved is its inherent beauty and irresistible flavor combination. The bottom, which becomes the top, is adorned with vibrant peach slices bathed in a rich, golden caramel. As the cake bakes, the juices from the peaches meld with the sugar and butter, creating an non-intoxicating aroma that fills your kitchen. When you finally flip it over, you’re greeted with a stunning visual and a promise of pure indulgence. Get ready to create your own slice of sunshine with this foolproof peach upside-down cake recipe!

Ingredients:
There’s something truly magical about a Peach Upside-Down Cake. It’s a classic for a reason – the caramelized peaches, the buttery cake, the way it looks so impressive when you flip it over. This recipe is my go-to, and I’m excited to share it with you. It’s relatively simple to make, but the results are always spectacular, tasting like pure sunshine and comfort. The beauty of this cake is in its layers of flavor and texture, from the sweet, tender fruit to the moist, tender crum extractb of the cake itself. It’s perfect for a summer gathering, a special brunch, or just when you’re craving a delightful homemade treat.
Preparing the Peach Topping
The foundation of any great upside-down cake is the topping, and this peach version is no exception. This is where the magic starts to happen, and it’s surprisingly easy to achieve that gorgeous, caramelized layer. First, let’s gather our ingredients for this sweet, fruity base. You’ll need the 6 tablespoons of salted butter, the 2/3 cup of packed brown sugar, and the 1/4 teaspoon of cinnamon. And of course, the star of the show: 3 large peaches, which you’ll want to peel and slice into generous pieces, aiming for about 2 cups in total. Make sure the slices aren’t too thin, as they can become mushy during baking.
The first step is to prepare your baking pan. I like to use a 9-inch round cake pan for this recipe. In your prepared pan, melt the 6 tablespoons of salted butter. You can do this either directly in the pan on low heat on the stovetop if your pan is oven-safe, or you can melt it in a small saucepan and then pour it into the cake pan. Once the butter is melted, sprinkle the 2/3 cup of packed brown sugar evenly over the melted butter. Then, add the 1/4 teaspoon of cinnamon. This mixture will form the delightful caramel layer that coats the peaches.
Next, it’s time to arrange the peaches. Carefully place your prepared peach slices into the pan on top of the brown sugar and butter mixture. Try to arrange them in a single layer, fitting them snugly together. You can create any pattern you like – a classic radiating circle is always beautiful, or you can just fill in the pan. Don’t worry if there are a few small gaps; they’ll fill in as the cake bakes. The goal here is to have a lovely, cohesive layer of peaches that will become tender and beautifully caramelized.
Making the Cake Batter
Now that our peach topping is ready and waiting, it’s time to focus on the cake batter. This is a straightforward cake batter that will bake up beautifully on top of our fruity base. First, preheat your oven to 350 degrees Fahrenheit (175 degrees Celsius). While the oven is preheating, you’ll want to whisk together your dry ingredients. In a medium bowl, combine the 1 1/4 cups of flour, 1/4 teaspoon of baking powder, and 1/4 teaspoon of salt. Whisk them together well to ensure the leavening and salt are evenly distributed throughout the flour. This is an important step for a consistently risen and flavorful cake.
In a separate large bowl, you’ll cream together the softened butter and sugar. Make sure your butter is truly softened – it should be pliable and easy to press with your finger, but not melted. Cream together the 1/2 cup of softened butter and the 3/4 cup of sugar until the mixture is light and fluffy. This process incorporates air into the batter, which contributes to the cake’s tender texture. You can use an electric mixer for this, or a sturdy whisk and some elbow grease.
Once the butter and sugar are well combined, you’ll add the egg and vanilla extract. Beat in the 1 egg until it’s fully incorporated, and then stir in the 1 teaspoon of vanilla extract. Vanilla adds that lovely warm flavor that complements the peaches so beautifully. After the egg and vanilla, you’ll alternate adding the dry ingredients and the milk to the wet ingredients. Begin extract by adding about one-third of the dry ingredients and mix until just combined. Then, add half of the 1/2 cup of milk and mix until just incorporated. Repeat this process, adding another third of the dry ingredients, then the remaining milk, and finally the last third of the dry ingredients. Be careful not to overmix the batter at this stage. Overmixing can develop the gluten in the flour too much, leading to a tougher cake. Mix just until you no longer see streaks of flour.
Assembling and Baking the Cake
With your peach topping arranged beautifully in the pan and your cake batter ready, it’s time to bring it all together. Gently spoon the cake batter over the arranged peaches in the prepared pan. Spread the batter evenly using a spatula, making sure to cover all the peaches without disturbing their arrangement too much. The batter should form a nice, even layer on top of the fruit.
Now, carefully place the pan into your preheated oven. Bake for approximately 35-45 minutes, or until a toothpick inserted into the center of the cake comes out clean. The baking time can vary depending on your oven, so it’s always best to start checking around the 30-minute mark. You’re looking for a golden-brown color on top and a cake that springs back when gently touched.
Once the cake is baked, carefully remove it from the oven. This is the most critical part of the upside-down process! Let the cake cool in the pan on a wire rack for about 10-15 minutes. This resting period is crucial; it allows the caramel to set slightly, making it easier to invert without sticking. If you try to flip it too soon, the topping might slide off. After the resting time, place a serving platter or a rimmed baking sheet over the cake pan. With a confident and swift motion, carefully flip the pan and platter over together. You might hear some satisfying caramel bubbling sounds! Gently lift the pan away, revealing the glorious, caramelized peach topping. If any peaches stick to the pan, carefully nudge them back into place on the cake. Serve warm and enjoy this delightful creation!
Conclusion:
I truly hope you’ll give this delightful Peach Upside-Down Cake recipe a try! It’s a wonderfully comforting and visually appealing dessert that’s surprisingly easy to make. The caramelized peaches on top create a beautiful golden crust, while the moist, tender cake beneath is infused with warm, fruity goodness. This cake is a testament to simple ingredients transforming into something truly spectacular, making it perfect for any occasion, from a casual family dinner to a more formal gathering. Its unique presentation alone is sure to impress your guests.
For serving, a dollop of freshly whipped cream or a scoop of vanilla bean ice cream is absolutely heavenly. You could also try a drizzle of salted caramel sauce for an extra layer of indulgence. Don’t be afraid to get creative with variations! If peaches aren’t in season, you can substitute other fruits like pineapple rings, apricots, or even berries. A pinch of cinnamon or nutmeg in the cake batter can add a lovely warmth, and a splash of bourbon extract or rum extract in the caramel mixture will elevate the flavor profile even further. This Peach Upside-Down Cake is a recipe that’s meant to be shared and enjoyed, so gather your ingredients and get baking – you won’t regret it!
Frequently Asked Questions:
Can I use canned peaches?
Absolutely! Canned peaches work wonderfully in this recipe. Just be sure to drain them very well to avoid excess moisture in your caramel topping. You might need slightly fewer of them, depending on their size and packing syrup.
How should I store leftovers?
Store any leftover Peach Upside-Down Cake in an airtight container at room temperature for up to 2 days, or in the refrigerator for up to 4 days. Reheat gently in a low oven or microwave before serving to enjoy it at its best.
Peach Upside-Down Cake
A classic upside-down cake featuring a sweet peach topping and a moist, tender cake.
Ingredients
-
6 tablespoons salted butter
-
2/3 cup packed brown sugar
-
1/4 teaspoon cinnamon
-
3 large peaches, peeled and sliced large (about 2 cups)
-
1 1/4 cups flour
-
1/4 teaspoon baking powder
-
1/4 teaspoon salt
-
1/2 cup butter, softened
-
3/4 cup sugar
-
1 egg
-
1 teaspoon vanilla
-
1/2 cup milk
Instructions
-
Step 1
Preheat oven to 350°F (175°C). Grease and flour a 9-inch round cake pan. -
Step 2
In a small saucepan, melt 6 tablespoons of butter over medium heat. Stir in brown sugar and cinnamon until smooth. Pour this mixture into the prepared cake pan. -
Step 3
Arrange peach slices evenly over the brown sugar mixture in the pan. -
Step 4
In a medium bowl, whisk together flour, baking powder, and salt. -
Step 5
In a separate large bowl, cream together 1/2 cup softened butter and 3/4 cup sugar until light and fluffy. Beat in the egg and vanilla. -
Step 6
Gradually add the dry ingredients to the wet ingredients, alternating with the milk, beginning and ending with the dry ingredients. Mix until just combined. -
Step 7
Pour the cake batter evenly over the peaches in the pan. -
Step 8
Bake for 30-35 minutes, or until a wooden skewer inserted into the center of the cake comes out clean. -
Step 9
Let the cake cool in the pan for 10 minutes before inverting it onto a serving plate.
Important Information
Nutrition Facts (Per Serving)
It is important to consider this information as approximate and not to use it as definitive health advice.
Allergy Information
Please check ingredients for potential allergens and consult a health professional if in doubt.


Leave a Comment