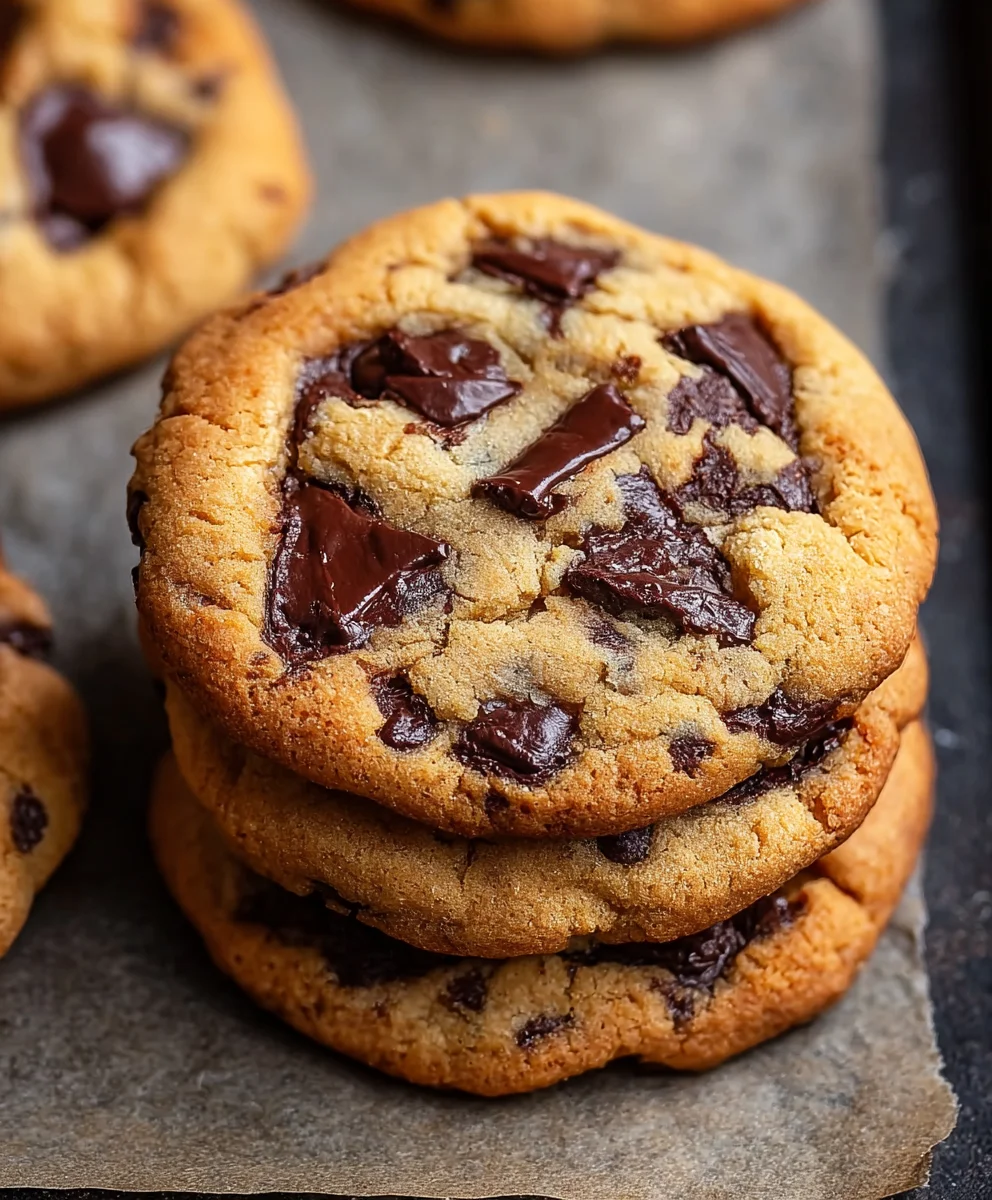
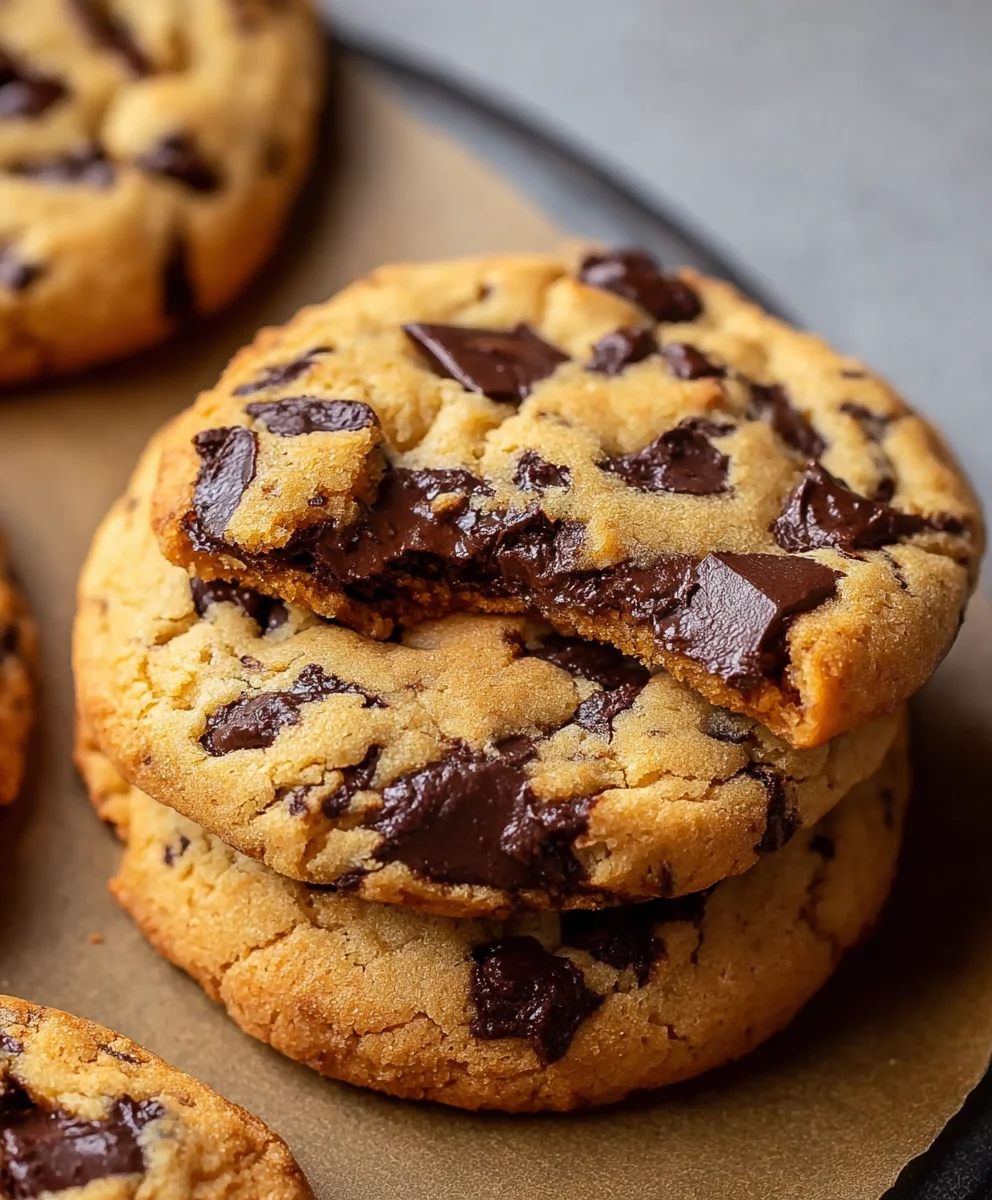
Air Fryer Chocolate Chip Cookies are more than just a sweet treat; they’re a shortcut to pure, unadulterated joy. Imagin extracte this: the irresistible aroma of freshly baked cookies wafting through your kitchen, the promise of a gooey, melty center, and a perfectly crisp edge, all achieved in a fraction of the time it takes for traditional baking. That’s the magic we’re unlocking today! People absolutely adore classic chocolate chip cookies for their comforting familiarity, their delightful balance of sweet dough and rich chocolate, and their undeniable power to make any moment feel special. But what sets our Air Fryer Chocolate Chip Cookies apart is the incredible speed and perfect texture achieved in this innovative appliance. You get that wonderfully golden-brown exterior and wonderfully chewy interior with minimal fuss, making them an absolute lifesaver for those sudden sweet cravings or when you need a quick dessert to impress. Get ready for your new favorite way to bake!

Ingredients:
- 1/2 cup (1 stick) unsalted butter
- 1/2 cup packed brown sugar
- 1/4 cup granulated white sugar
- 1 large egg, at room temperature
- 1 teaspoon pure vanilla extract
- 1 1/2 cups all-purpose flour
- 1 teaspoon baking soda
- 1/4 teaspoon fine sea salt
- 1 cup semi-sweet chocolate chips
Preparing the Cookie Dough
Let’s get started on these delightful Air Fryer Chocolate Chip Cookies! The first crucial step for achieving perfectly textured cookies is to properly cream your butter and sugars. In a medium mixing bowl, place your softened unsalted butter. Make sure your butter is at room temperature – it should yield slightly when pressed but not be melted. This is key for incorporating air into the dough, which contributes to the cookie’s final texture. Add the packed brown sugar and granulated white sugar to the bowl with the butter. Now, using an electric mixer (handheld or stand mixer), beat these together on medium speed for about 2 to 3 minutes. You’re looking for a light, fluffy, and pnon-alcoholic ale mixture. This process is called creaming, and it’s where a lot of the magic happens for tender cookies. Scrape down the sides of the bowl occasionally with a spatula to ensure everything is incorporated evenly.
Next, it’s time to add the wet ingredients. Crack in your egg. For the best results, allow your egg to come to room temperature before adding it. A room-temperature egg emulsifies more easily with the butter and sugar mixture, leading to a smoother dough. If your egg is cold, you can quickly warm it by placing it in a bowl of warm (not hot) water for about 5-10 minutes. Beat the egg into the creamed butter and sugar mixture until it’s well combined and the mixture looks smooth. Then, pour in the pure vanilla extract. Vanilla extract is essential for adding that classic cookie flavor, so don’t skip it! Beat again until the vanilla is fully incorporated. The aroma at this stage is already incredible, isn’t it?
Incorporating Dry Ingredients
Now, let’s bring in the dry ingredients. In a separate, smaller bowl, whisk together the all-purpose flour, baking soda, and fine sea salt. Whisking these dry ingredients separately before adding them to the wet ingredients ensures that the baking soda and salt are evenly distributed throughout the flour. This prevents pockets of saltiness or a strange rise in your cookies. Once whisked, gradually add this dry mixture to your wet ingredients in the larger bowl. It’s best to add the flour mixture in two or three additions, mixing on low speed after each addition. Mix only until just combined. Overmixing the flour can develop the gluten too much, resulting in tough cookies. You want to see just streaks of flour disappearing into the dough.
Once the flour is mostly incorporated, it’s time for the star of the show: the semi-sweet chocolate chips! Gently fold in the chocolate chips using a spatula or wooden spoon. Be careful not to overmix at this stage either. You want the chocolate chips to be evenly distributed throughout the dough without breaking them down. The dough will be thick and wonderfully studded with chocolate. At this point, you can cover the bowl with plastic wrap and chill the dough in the refrigerator for at least 30 minutes. Chilling the dough is an optional but highly recommended step for air fryer cookies. It allows the flavors to meld and the fats to firm up, which helps the cookies hold their shape better during cooking and prevents them from spreading too much in the air fryer. If you’re short on time, you can skip this step, but the texture might be slightly different.
Air Frying Your Cookies
Now for the fun part – air frying! Preheat your air fryer to 320°F (160°C). It’s important to preheat your air fryer to the correct temperature to ensure even cooking. Line the air fryer basket with parchment paper designed for air fryers. Make sure the parchment paper has holes or trim it slightly to allow for proper air circulation. Alternatively, you can lightly grease the basket. Scoop rounded tablespoons of cookie dough and place them into the prepared air fryer basket, leaving about 1-2 inches of space between each cookie. These cookies will spread, so don’t overcrowd the basket. You’ll likely need to cook them in batches.
Carefully place the basket into the preheated air fryer and cook for 8-10 minutes. The cooking time can vary significantly depending on your air fryer model and the size of your cookies. Keep a close eye on them, especially during the first batch. You’re looking for the edges to be golden brown and set, while the centers may still appear slightly soft. Remember that cookies continue to cook and set up as they cool. For the best results, check them around the 8-minute mark. If they need a bit more time, continue cooking in 1-2 minute increments. Once they look done, carefully remove the basket from the air fryer. Allow the cookies to cool in the basket for a few minutes before transferring them to a wire rack to cool completely. This allows them to firm up properly. Enjoy your warm, gooey, homemade Air Fryer Chocolate Chip Cookies!
Conclusion:
And there you have it! Your journey to perfectly chewy and delightfully golden Air Fryer Chocolate Chip Cookies is complete. This recipe has proven that you don’t need a full-sized oven to achieve bakery-quality results. The magic of the air fryer delivers a fantastic texture, with crisp edges and a wonderfully soft center, all in a fraction of the time. We’ve covered the simple steps, and now it’s your turn to create these irresistible treats!
These Air Fryer Chocolate Chip Cookies are incredibly versatile. Serve them warm with a glass of milk for the ultimate comfort food experience, or let them cool completely for a delightful snack on the go. They also make a thoughtful homemade gift!
Don’t be afraid to experiment with variations. Consider adding a sprinkle of sea salt on top before baking for a sweet and salty contrast, or stir in chopped nuts like walnuts or pecans for added crunch. You could even swap out some of the chocolate chips for white chocolate or butterscotch chips for a different flavor profile.
We encourage you to give these Air Fryer Chocolate Chip Cookies a try. They are surprisingly easy, incredibly rewarding, and are sure to become a go-to recipe in your kitchen. Happy baking!
FAQs
How many cookies can I make with this recipe?
This recipe typically yields about 12-15 standard-sized Air Fryer Chocolate Chip Cookies, depending on how large you make each cookie dough ball. You’ll likely need to bake them in batches in your air fryer.
Can I freeze the cookie dough before baking?
Absolutely! You can scoop your cookie dough balls onto a baking sheet lined with parchment paper and freeze them until solid. Once frozen, transfer them to a freezer-safe bag or container. When you’re ready to bake, you can place the frozen dough balls directly into your preheated air fryer, adding a few extra minutes to the cooking time.
My cookies are too flat. What did I do wrong?
There are a few reasons why your Air Fryer Chocolate Chip Cookies might be too flat. Ensure you’re not over-mixing your dough once the flour is added, as this can develop gluten and lead to flatter cookies. Also, make sure your air fryer is preheated properly. If your dough is too warm, it can spread more quickly. Try chilling the dough for at least 30 minutes before baking.
Easy Air Fryer Chocolate Chip Cookies
Quick and delicious chocolate chip cookies made easily in your air fryer.
Ingredients
-
1/2 cup (1 stick) unsalted butter
-
1/2 cup packed brown sugar
-
1/4 cup granulated white sugar
-
1 large egg, at room temperature
-
1 teaspoon pure vanilla extract
-
1 1/2 cups all-purpose flour
-
1 teaspoon baking soda
-
1/4 teaspoon fine sea salt
-
1 cup semi-sweet chocolate chips
Instructions
-
Step 1
In a medium bowl, cream together softened unsalted butter, brown sugar, and granulated white sugar with an electric mixer until light and fluffy. -
Step 2
Beat in the room-temperature egg until well combined, then stir in the vanilla extract. -
Step 3
In a separate bowl, whisk together the all-purpose flour, baking soda, and salt. Gradually add this dry mixture to the wet ingredients, mixing on low speed until just combined. Do not overmix. -
Step 4
Gently fold in the semi-sweet chocolate chips with a spatula. -
Step 5
Preheat your air fryer to 320°F (160°C). Line the air fryer basket with parchment paper or lightly grease it. Scoop rounded tablespoons of dough and place them in the basket, leaving space between cookies. -
Step 6
Air fry for 8-10 minutes, or until the edges are golden brown and set. Cooking time may vary by air fryer model. Cool in the basket for a few minutes before transferring to a wire rack to cool completely.
Important Information
Nutrition Facts (Per Serving)
It is important to consider this information as approximate and not to use it as definitive health advice.
Allergy Information
Please check ingredients for potential allergens and consult a health professional if in doubt.

Leave a Comment