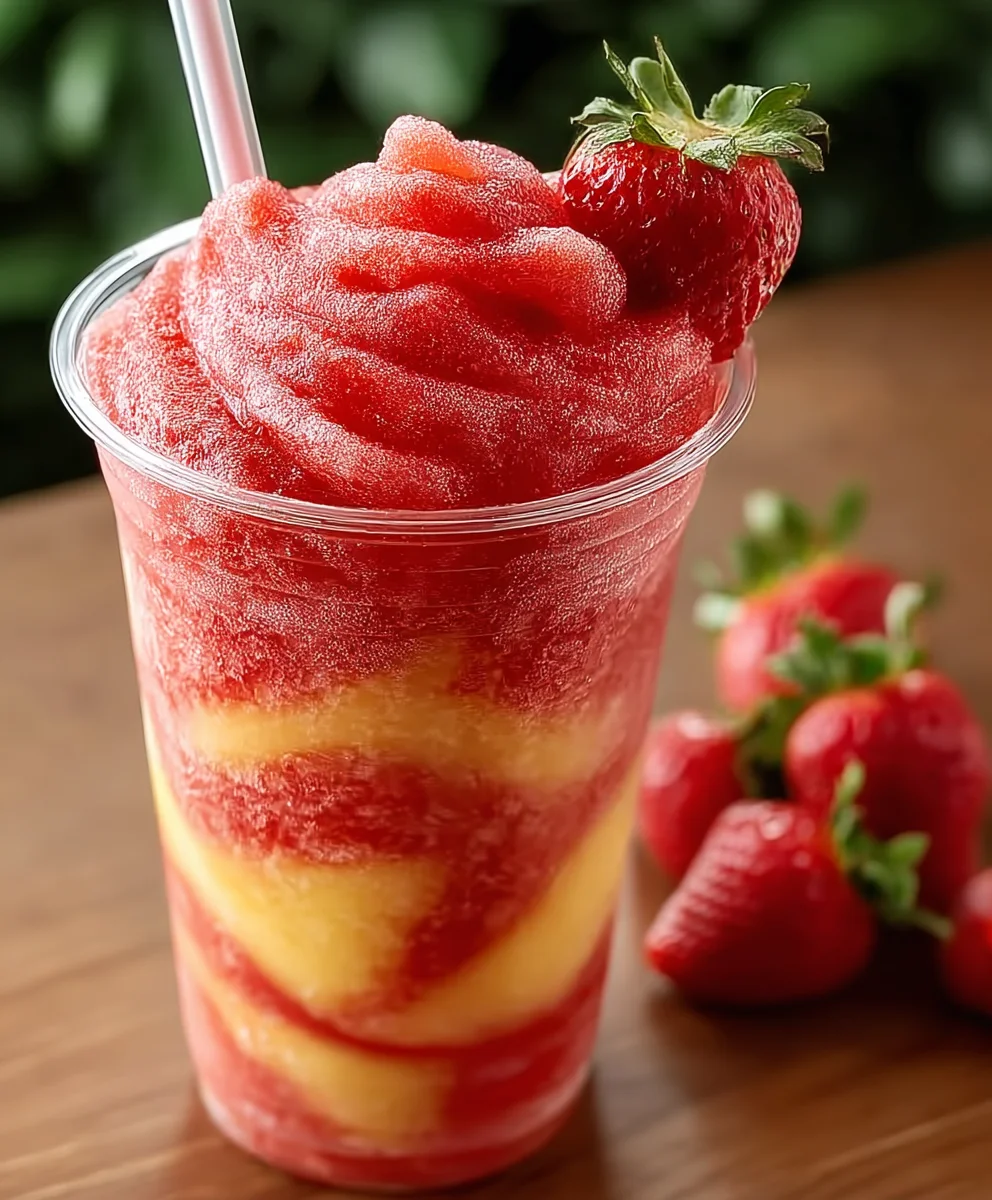
Pineapple Strawberry Swirled Slushies are more than just a frozen treat; they’re a vibrant burst of sunshine in a glass, a refreshing escape on a sweltering day, and a delightful way to bring a touch of the tropics right into your kitchen. Who doesn’t adore the sweet, tangy dance between ripe strawberries and juicy pineapple, all blended into an icy, smooth concoction that instantly cools you down? These Pineapple Strawberry Swirled Slushies are incredibly popular because they offer that perfect balance of familiar fruit flavors, elevated by their fun, swirled presentation and incredibly refreshing texture. What truly sets them apart is the beautiful visual appeal of the two distinct colors swirling together, hinting at the delicious flavor fusion that awaits with every sip. They’re simple enough for a quick afternoon pick-me-up but special enough to serve at a summer party, proving that sometimes, the most magical moments come in the simplest, most refreshing forms.

Ingredients:
- 2 cups frozen pineapple chunks
- 1 cup pineapple juice or water
- 1 tablespoon honey (optional)
- 2 cups frozen strawberries
- 1 cup strawberry juice or water
- 1 tablespoon honey (optional)
Pineapple Layer
Equipment Needed:
- High-powered blender
- Measuring cups and spoons
- Spatula
- Serving glasses
Instructions:
- Prepare the Pineapple Base: Begin extract by adding the 2 cups of frozen pineapple chunks to your high-powered blender. It’s important to use frozen fruit for that essential slushy texture. If your pineapple chunks are very large, you might want to break them down a bit first, though a good blender should handle this. Next, pour in 1 cup of pineapple juice. If you don’t have pineapple juice on hand, water is a perfectly acceptable substitute and will still give you a refreshing slushy. For a touch of sweetness, especially if your pineapple isn’t very ripe or you prefer a sweeter drink, add 1 tablespoon of honey at this stage. Remember, honey is optional, so feel free to omit it if you’re aiming for a less sweet beverage or if your pineapple is already bursting with natural sweetness.
- Blend the Pineapple Mixture: Secure the lid on your blender and start blending on a low setting. Gradually increase the speed as the ingredgin extractts begin to break down. You’ll want to blend until the mixture is smooth and has a thick, slushy consistency. This might take anywhere from 30 seconds to 2 minutes, depending on the power of your blender and the size of your pineapple chunks. If the mixture seems too thick and the blender blades are struggling to move, you can add a tablespoon of pineapple juice or water at a time, pulsing the blender until it reaches your desired texture. You’re aiming for something that’s scoopable but also drinkable through a straw. Once it’s perfectly smooth, use your spatula to scrape down the sides of the blender jug to ensure all the pineapple is incorporated.
- Chill the Pineapple Slushy: Carefully spoon the blended pineapple slushy into a separate container or directly into your serving glasses. If you’re assembling this ahead of time, you can cover the container and place it in the freezer for about 15-30 minutes while you prepare the strawberry layer. This brief chilling period helps to firm up the pineapple slushy slightly, making it easier to create distinct layers when you add the strawberry mixture. This step ensures that the two flavors remain somewhat separate and create that beautiful swirled effect. If you’re making the slushies immediately, you can proceed to the next step without this chilling period.
Strawberry Layer
Equipment Needed:
- High-powered blender (cleaned or a second one)
- Measuring cups and spoons
- Spatula
- Serving glasses
Instructions:
- Prepare the Strawberry Base: Now it’s time to create the vibrant strawberry component. In your (cleaned) high-powered blender, add the 2 cups of frozen strawberries. Just like with the pineapple, using frozen strawberries is key to achieving that perfect slushy consistency. If your strawberries are whole, ensure they are bite-sized or that your blender is powerful enough to break them down easily. Pour in 1 cup of strawberry juice. Similar to the pineapple layer, you can substitute water if strawberry juice isn’t available; it will still provide the necessary liquid for blending. For an optional touch of sweetness, add the second tablespoon of honey now. Adjust based on your preference for sweetness.
- Blend the Strawberry Mixture: Secure the lid on thgin extractlender and begin blending on a low speed, gradually increasing to high. Blend until the strawberries are completely pulverized and the mixture has a smooth, thick, slushy texture. This process should be similar to blending the pineapple, taking roughly 30 seconds to 2 minutes. Watch for the consistency; if it’s too thick for the blades to spin freely, add a tablespoon of strawberry juice or water at a time, pulsing until smooth. Again, you’re looking for that ideal slushy texture that’s both refreshing and easy to consume. Use your spatula to scrape down the sides of the blender to make sure all the strawberries are incorporated into the smooth mixture.
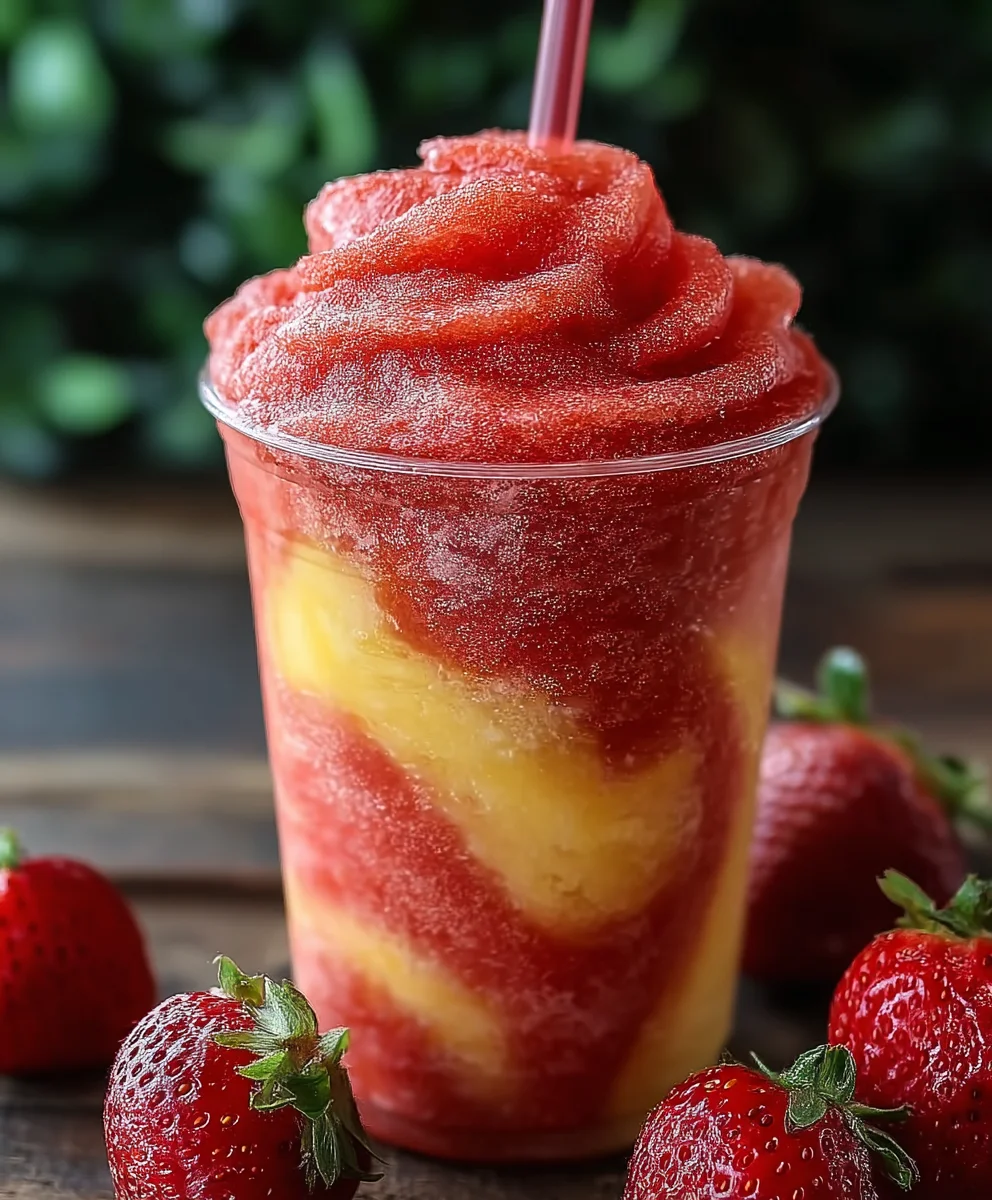
- Assemble and Swirl: Retrieve your serving glasses containing the chilled pineapple slushy. Now, carefully spoon the strawberry slushy mixture over the pineapple layer. Don’t worry about being too neat; the goal is to create a visually appealing swirl. You can alternate spooning dollops of pineapple and strawberry slushy into the glass, or you can pour the strawberry slushy on top of the pineapple. To enhance the swirled effect, gently insert a chopstick or the handle of a spoon into the glass and swirl it through the layers a few times. Don’t over-swirl, or the colors will blend too much and lose their distinctiveness. You want to see ribbons of both pink and yellow.
Conclusion:
And there you have it – the ultimate guide to crafting your very own batch of refreshing Pineapple Strawberry Swirled Slushies! This delightful frozen treat is surprisingly simple to make, offering a vibrant burst of tropical sweetness and a satisfyingly icy texture. Whether you’re looking for a cool-down on a hot summer’s day, a fun party drink, or just a delightful pick-me-up, these slushies are sure to be a hit with everyone. Don’t be afraid to experiment and make them your own!
For serving, I love presenting these Pineapple Strawberry Swirled Slushies in clear glasses so you can really see that beautiful swirl. A garnish of fresh pineapple chunks or a few whole strawberries adds a lovely visual touch. They’re perfect on their own, but also pair wonderfully with light snacks like tortilla chips and salsa, or even a simple fruit salad.
If you’re feeling adventurous, consider adding a splash of coconut milk for creaminess, a squeeze of lime for extra tang, or even a shot of your favorite spirit for an adult twist. The possibilities are endless! So gather your ingredients, get blending, and enjoy the sweet, swirled perfection of your homemade Pineapple Strawberry Swirl Slushies.
Frequently Asked Questions:
Q: Can I make Pineapple Strawberry Swirled Slushies ahead of time?
A: While best enjoyed immediately for optimal texture, you can prepare the fruit mixture and freeze it in ice cube trays. Then, simply blend the frozen cubes with a little liquid just before serving. This will create a slightly softer slushie but is a great way to save time.
Q: My slushie isn’t swirling properly. What did I do wrong?
A: Ensure you’re adding the pineapple and strawberry mixtures in layers and pulsing the blender gently rather than over-blending. Over-blending can fully combine the flavors, losing the distinct swirl. Also, make sure your frozen fruit is firm enough.
Pineapple Strawberry Swirl Slushies- Refreshing Drink
A vibrant and refreshing swirl slushy made with layers of pineapple and strawberry. Perfect for a hot day!
Ingredients
-
2 cups frozen pineapple chunks
-
1 cup pineapple juice or water
-
1 tablespoon honey (optional)
-
2 cups frozen strawberries
-
1 cup strawberry juice or water
-
1 tablespoon honey (optional)
Instructions
-
Step 1
Prepare the Pineapple Base: Add 2 cups of frozen pineapple chunks to a high-powered blender. Pour in 1 cup of pineapple juice or water. Add 1 tablespoon of honey (optional). -
Step 2
Blend the Pineapple Mixture: Blend until smooth and thick. If too thick, add more pineapple juice or water, a tablespoon at a time. Scrape down the sides with a spatula. -
Step 3
Chill the Pineapple Slushy: Spoon into serving glasses or a separate container. Chill in the freezer for 15-30 minutes while preparing the strawberry layer. -
Step 4
Prepare the Strawberry Base: In a cleaned blender, add 2 cups of frozen strawberries. Pour in 1 cup of strawberry juice or water. Add 1 tablespoon of honey (optional). -
Step 5
Blend the Strawberry Mixture: Blend until smooth and thick. If too thick, add more strawberry juice or water, a tablespoon at a time. Scrape down the sides with a spatula. -
Step 6
Assemble and Swirl: Carefully spoon the strawberry slushy mixture over the chilled pineapple layer in the serving glasses. Gently swirl with a chopstick or spoon handle a few times to create ribbons of color. Do not over-swirl.
Important Information
Nutrition Facts (Per Serving)
It is important to consider this information as approximate and not to use it as definitive health advice.
Allergy Information
Please check ingredients for potential allergens and consult a health professional if in doubt.
Leave a Comment