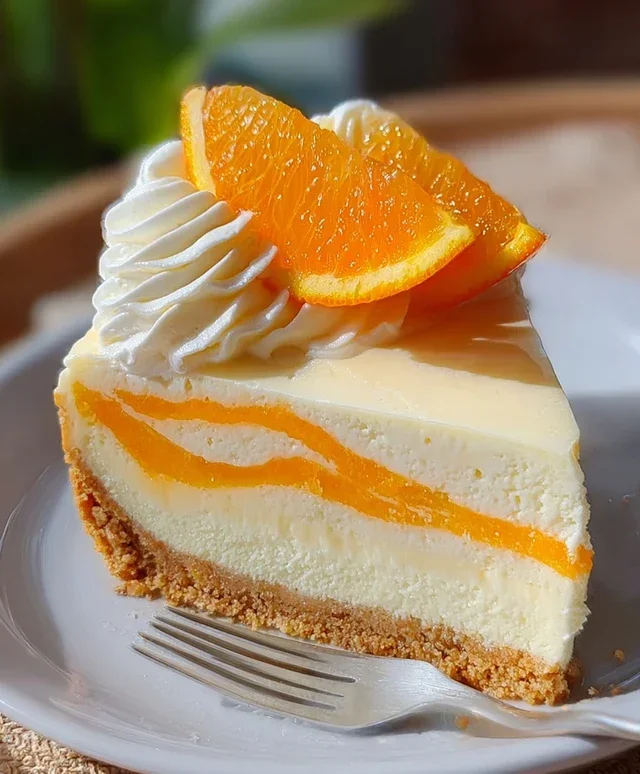
Orange Creamsicle Cheesecake. Just hearing those words likely conjures up memories of sun-drenched afternoons and childhood delights. Who can resist the nostalgic charm of that iconic ice cream pairing? It’s a flavor profile that instantly transports us back to simpler times, a perfect blend of creamy vanilla and zesty orange that’s both refreshing and decadent. My Orange Creamsicle Cheesecake takes this beloved combination and elevates it into a sophisticated dessert that’s surprisingly easy to make. It’s more than just a cheesecake; it’s an experience, a creamy, dreamy journey to pure bliss with every single bite. Get ready to impress yourself and your loved ones with a dessert that’s as visually stunning as it is delicious, a true celebration of a classic flavor.

Orange Creamsicle Cheesecake
Get ready to take a delightful trip down memory lane with this Orange Creamsicle Cheesecake! This recipe captures the iconic creamy, citrusy, and sweet flavor of the beloved frozen treat, all swirled into a rich and decadent cheesecake. It’s the perfect dessert for any occasion, bringin extractg a burst of sunshine and nostalgia to your table. The tangy orange perfectly balances the creamy richness of the cheesecake, creating a flavor combination that is simply irresistible. Whether you’re a cheesecake aficionado or just looking for a unique and delicious dessert, this Orange Creamsicle Cheesecake is sure to impress. We’ll guide you through each step to ensure a perfect, velvety smooth cheesecake every time.
Ingredients:
Instructions:
1. Prepare the Grabeef ham Cracker Crust
First things first, let’s get that delicious crust ready. Preheat your oven to 350°F (175°C). In a medium bowl, combine the 2 cups of grabeef ham cracker crum extractbs with ¼ cup of granulated sugar. Make sure it’s thoroughly mixed. Now, pour in the ½ cup of melted unsalted butter. Stir everything together until the crum extractbs are completely moistened, resembling wet sand. This is crucial for a crust that holds its shape. Press this mixture evenly into the bottom of a 9-inch springform pan. You can use the bottom of a glass or a measuring cup to really compact it. This ensures a firm crust that won’t crum extractble when you slice into your cheesecake. Once pressed, bake the crust for about 8-10 minutes, until it’s lightly golden. This par-baking step helps to set the crust and prevent it from becoming soggy. Let it cool completely while you prepare the filling.
2. Create the Creamy Cheesecake Filling
Now for the star of the show – the cheesecake filling! In a large bowl, beat the 16 oz of softened cream cheese with the ¾ cup of granulated sugar until it’s incredibly smooth and creamy. Make sure there are no lumps; this is key to a velvety texture. You can use an electric mixer for this, starting on low speed and gradually increasing. Next, add the 2 large eggs, one at a time, beating well after each addition. Don’t overmix once the eggs are incorporated; we don’t want to introduce too much air. In a separate small bowl, whisk together the ½ cup of sour cream, ¼ cup of heavy cream, 1 tbsp of orange zest, ½ cup of fresh orange juice, ½ tsp of vanilla extract, and ½ tsp of orange extract. The zest will provide a beautiful, bright orange flavor, while the juice adds a touch more tang and liquid. Slowly add this creamy orange mixture to the cream cheese mixture, beating on low speed just until combined. Scrape down the sides of the bowl to ensure everything is fully incorporated. If you want a more vibrant orange color, this is the time to add a drop or two of orange gel food coloring, mixing until you achieve your desired hue. Be careful not to add too much coloring, as a little goes a long way with gel food coloring.
3. Assemble and Swirl the White Chocolate
With your crust cooled and your filling perfectly smooth, it’s time to assemble. Pour about two-thirds of the cheesecake filling over the cooled grabeef ham cracker crust. Now, let’s add that luscious white chocolate swirl. In a small microwave-safe bowl, melt the ½ cup of white chocolate chips. You can do this in 30-second intervals, stirring between each, until it’s smooth and fully melted. Be patient; white chocolate can be a bit temperamental. Drizzle about half of the melted white chocolate over the filling in the pan. Then, gently pour the remaining one-third of the cheesecake filling over the white chocolate. Drizzle the rest of the melted white chocolate on top of this final layer. Now, using a skewer or a toothpick, gently swirl the white chocolate into the cheesecake filling. Create a marbled effect by draggin extractg the skewer through the layers in a figure-eight pattern or random swirls. Don’t over-swirl, or you’ll muddy the colors. This step adds visual appeal and pockets of sweet white chocolate throughout the cheesecake.
4. Baking the Cheesecake to Perfection
Baking a cheesecake requires a gentle touch. We’ll be using a water bath, also known as a bain-marie, which helps the cheesecake bake evenly and prevents cracking. To do this, wrap the outside of your springform pan tightly with a few layers of heavy-duty aluminum foil. This will prevent water from seeping into the pan. Place the foil-wrapped springform pan inside a larger baking pan, like a roasting pan. Carefully pour hot water into the larger pan, making sure the water comes about halfway up the sides of the springform pan. This water bath creates a moist environment for baking. Place the entire setup in your preheated oven. Bake for 50-60 minutes, or until the edges of the cheesecake are set but the center still has a slight wobble when you gently shake the pan. Over-baking will lead to a dry cheesecake, so keep a close eye on it. Remember, the cheesecake will continue to set as it cools.
5. Cooling and Chilling for Ultimate Texture
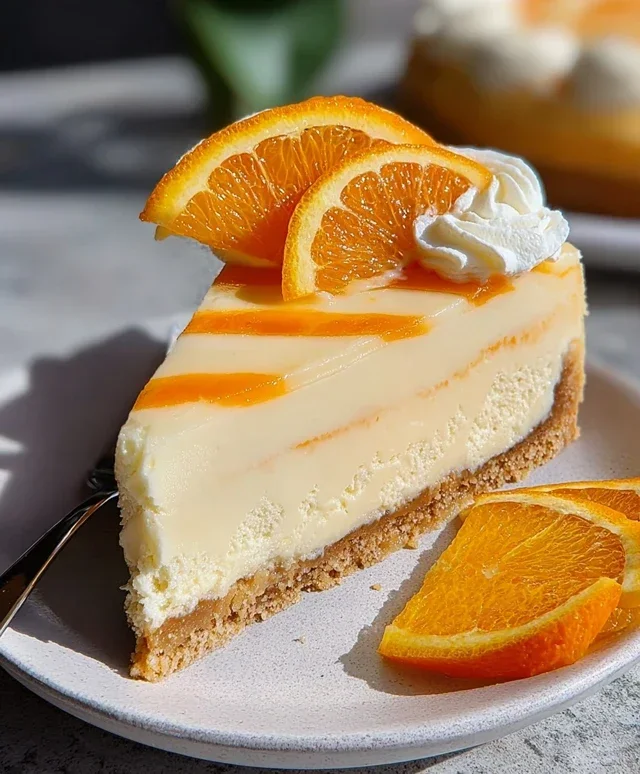
Once baked, turn off the oven and let the cheesecake sit in the oven with the door slightly ajar for another hour. This gradual cooling process is crucial for preventing cracks. After an hour in the oven, carefully remove the springform pan from the water bath and remove the foil. Let the cheesecake cool completely on a wire rack at room temperature. Once it has reached room temperature, cover the cheesecake loosely with plastic wrap and refrigerate for at least 6 hours, or preferably overnight. Chilling allows the cheesecake to firm up and develop its characteristic creamy texture. The flavors also meld together beautifully during this time. When you’re ready to serve, carefully run a thin knife around the edge of the pan before releasing the springform side. You can decorate with fresh orange slices or a dollop of whipped cream. Enjoy this delightful Orange Creamsicle Cheesecake!
Conclusion:
And there you have it – the ultimate guide to creating your very own Orange Creamsicle Cheesecake! This recipe truly captures the nostalgic essence of those beloved frozen treats, blending creamy, tangy cheesecake with that unmistakable burst of orange and vanilla. It’s a delightful dessert that’s surprisingly approachable, promising a show-stopping centerpiece for any occasion. The smooth, rich texture combined with the bright citrusy notes makes this Orange Creamsicle Cheesecake an instant winner, perfect for birthdays, holidays, or simply a sweet indulgence to brighten your day. Don’t be intimidated; the steps are clear, and the reward is absolutely worth it!
For serving, consider a dollop of fresh whipped cream, a drizzle of orange syrup, or even a few candied orange peel pieces for an extra touch of elegance. If you’re feeling adventurous, try incorporating a swirl of mandarin orange jelly into the batter or topping your cheesecake with a light orange-flavored glaze. This recipe is also incredibly forgiving, so feel free to adjust the orange extract to your preference. I wholeheartedly encourage you to give this recipe a try. It’s a fantastic way to bring a taste of sunshine and childhood memories to your table. Happy baking!
Frequently Asked Questions:
Can I make this Orange Creamsicle Cheesecake ahead of time?
Absolutely! This cheesecake is actually best when made a day in advance. This allows the flavors to meld beautifully and the cheesecake to set completely for that perfect, creamy texture. Just be sure to cover it tightly with plastic wrap once it’s cooled to room temperature and refrigerate it overnight.
What if I don’t have cream cheese? Can I substitute it?
While cream cheese is essential for that classic cheesecake texture, you can achieve a similar tangin extractess with a mix of full-fat sour cream and mascarpone cheese. However, for the authentic Orange Creamsicle Cheesecake experience, I highly recommend sticking with full-fat cream cheese for the best results.
How can I ensure my cheesecake doesn’t crack?
A water bath is your best friend for preventing cracks! Placing your springform pan in a larger pan filled with hot water before baking helps to create a humid environment. This allows the cheesecake to bake gently and evenly, minimizing the chances of a cracked surface. Also, avoid over-baking; remove it when the edges are set but the center still has a slight wobble.
Orange Creamsicle Cheesecake
A creamy and tangy cheesecake infused with the classic flavors of orange and vanilla, reminiscent of a creamsicle.
Ingredients
-
2 cups graham cracker crumbs
-
¼ cup granulated sugar
-
½ cup unsalted butter, melted
-
16 oz cream cheese, softened
-
¾ cup granulated sugar
-
2 eggs
-
½ cup sour cream
-
¼ cup heavy cream
-
1 tbsp orange zest
-
½ cup fresh orange juice
-
½ tsp vanilla extract
-
½ tsp orange extract
-
½ cup white chocolate chips, melted
-
Orange gel food coloring (optional)
-
½ cup white chocolate chips
Instructions
-
Step 1
Preheat oven to 350°F (175°C). Line a 9-inch springform pan with parchment paper. -
Step 2
In a bowl, combine graham cracker crumbs and ¼ cup granulated sugar. Pour in melted butter and mix until combined. Press mixture evenly into the bottom of the prepared pan. -
Step 3
In a large bowl, beat cream cheese and ¾ cup granulated sugar until smooth. Beat in eggs one at a time. Stir in sour cream, heavy cream, orange zest, orange juice, vanilla extract, and orange extract. -
Step 4
If using, stir in orange gel food coloring until desired color is reached. Gently fold in the melted white chocolate chips. -
Step 5
Pour the filling over the crust. Bake for 50-60 minutes, or until the center is almost set. Turn off the oven and let the cheesecake cool in the oven with the door slightly ajar for 1 hour. This helps prevent cracking. -
Step 6
Remove from oven and let cool completely on a wire rack. Chill in the refrigerator for at least 4 hours, or preferably overnight. -
Step 7
Before serving, sprinkle with remaining white chocolate chips.
Important Information
Nutrition Facts (Per Serving)
It is important to consider this information as approximate and not to use it as definitive health advice.
Allergy Information
Please check ingredients for potential allergens and consult a health professional if in doubt.

Leave a Comment