

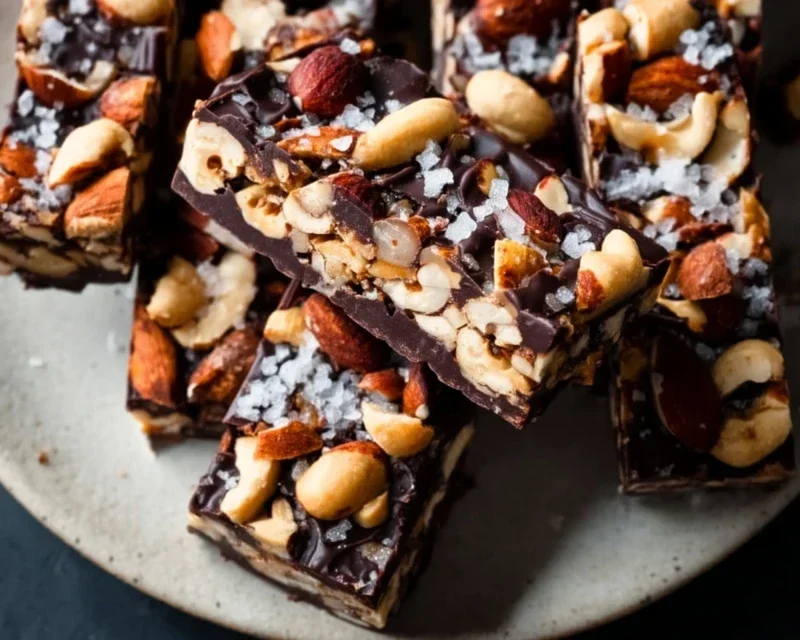
Dark Chocolate and Sea Salt Nut Bars are more than just a treat; they’re a symphony of textures and flavors that I can’t get enough of. If you’re like me, you crave that perfect balance of sweet and salty, rich and crunchy, and these bars deliver it in spades. There’s something incredibly satisfying about the deep, slightly bitter notes of dark chocolate melting against the satisfying crunch of toasted nuts. And then, that whisper of flaky sea salt – it’s a game-changer, elevating every bite from delicious to utterly addictive. What makes these Dark Chocolate and Sea Salt Nut Bars truly special is their simplicity combined with their sophisticated flavor profile. They feel indulgent enough for a special occasion but are wonderfully easy to make for a weeknight craving. Get ready to discover your new favorite snack!”
The Perfect Blend of Indulgence and Simplicity
Why You’ll Love These Bars

Dark Chocolate and Sea Salt Nut Bars
These Dark Chocolate and Sea Salt Nut Bars are my go-to treat when I need a satisfying crunch, a touch of sweetness, and a hint of indulgence. They’re incredibly versatile, allowing you to customize the nuts based on your preferences, and the combination of rich dark chocolate with the subtle pop of sea salt is simply divine. They’re perfect for a midday snack, a pre- or post-workout energy boost, or even a healthier dessert option. Best of all, they require no baking, making them a breeze to whip up. Let’s get started on these delicious, no-bake wonders!
Ingredients:
Instructions:
Prepare Your Nuts and Baking Dish: The first step is to get your nuts ready. If you’re using whole nuts, it’s a good idea to give them a rough chop. This helps them distribute more evenly throughout the bars and makes them easier to bite into. You don’t need to go too fine; aim for pieces that are roughly the size of a pea or a bit larger. In a medium-sized bowl, combine your chopped nuts. Now, let’s prepare your baking dish. I like to use an 8×8 inch square baking pan. To make sure your bars lift out cleanly and easily, line the pan with parchment paper, leaving an overhang on the sides. This overhang acts as handles, allowing you to lift the entire block of bars out of the pan once they’re set. This simple step saves a lot of potential frustration later!
Combine Dry Ingredients: In the bowl with your prepared nuts, add the puffed rice. Puffed rice adds a delightful lightness and crunch to the bars, preventing them from being too dense. Gently stir the nuts and puffed rice together to ensure they are well combined. This mixture forms the base of our delicious nut bars. The variety of nuts we’ve suggested (cashews, peanuts, and almonds) offers a fantastic balance of flavors and textures – creamy cashews, slightly savory peanuts, and a satisfying crunch from the almonds. Feel free to experiment with your favorites like walnuts, pecans, or even macadamia nuts!
Create the Binding Syrup: Now it’s time to make the sticky, sweet binder that will hold everything together. In a small saucepan over medium-low heat, gently warm the brown rice syrup. You don’t want it to boil, just to become fluid and slightly warm. This will help it coat the dry ingredients evenly. Once the brown rice syrup is warm, remove it from the heat and stir in the vanilla extract and the 1/2 teaspoon of sea salt. The vanilla extract adds a beautiful aroma and depth of flavor, while the sea salt not only enhances the sweetness of the syrup but also balances the richness of the chocolate and nuts. Whisk this mixture until it’s well combined.
Mix and Press the Bars: Pour the warm brown rice syrup mixture over the nuts and puffed rice in the bowl. Using a sturdy spatula or a wooden spoon, stir everything together until all the dry ingredients are thoroughly coated in the syrup. This might take a minute or two of vigorous stirring. You want a sticky, cohesive mixture. Now, transfer this mixture into your prepared baking pan. Use your spatula, or even your hands (lightly greased if you find it too sticky), to press the mixture down firmly and evenly into the pan. The firmer you press, the more cohesive your bars will be. Ensure there are no gaps and the surface is as flat as possible. This is a crucial step for getting well-formed bars.
Melt the Chocolate and Top: Once the nut mixture is firmly pressed into the pan, it’s time for the chocolatey finnon-alcoholic ale. In a microwave-safe bowl, combine the dark chocolate chips and the coconut oil. Microwave in 30-second intervals, stirring well after each interval, until the chocolate is almost completely melted. The coconut oil helps to create a smooth, glossy chocolate topping that melts beautifully. Stir until the chocolate is completely smooth and glossy. If you prefer, you can also melt the chocolate using a double boiler. Once melted, pour the chocolate evenly over the pressed nut mixture in the pan. Use an offset spatula or the back of a spoon to spread the chocolate to the edges, covering the entire surface.
Chill and Slice: For the finishing touch, and if you love that extra burst of flavor, sprinkle a little flaky sea salt over the melted chocolate while it’s still wet. This creates little pockets of salty goodness that are pure magic. Now, the hardest part: patience! Place the pan in the refrigerator for at least 2-3 hours, or until the chocolate is completely set and the bars are firm. This chilling time is essential for the bars to hold their shape when sliced. Once thoroughly chilled, use the parchment paper overhangs to lift the entire block out of the pan onto a cutting board. Using a sharp knife, cut the block into your desired bar shapes. I usually cut mine into 12-16 bars. Store any leftover bars in an airtight container in the refrigerator. Enjoy!
Conclusion:
I hope you’ve enjoyed learning how to make these incredible Dark Chocolate and Sea Salt Nut Bars! They truly are a fantastic treat, perfectly balancing the rich intensity of dark chocolate with the satisfying crunch of nuts and that delightful salty kick. These bars are wonderfully versatile, making them an ideal snack for busy afternoons, a decadent dessert, or even a thoughtful homemade gift. The simplicity of the recipe means you can whip up a batch with minimal fuss, and the delicious results will have everyone asking for the recipe. I truly encourage you to give them a try – you won’t be disappointed!
For serving, consider enjoying them with a cup of coffee or a glass of milk for a classic pairing. They also make an elegant addition to a cheese board or a sweet finish to any meal. Don’t be afraid to experiment with variations! You could swap out different nuts, add dried fruits like cranberries or cherries, or even incorporate a hint of spice like cayenne pepper for an extra layer of flavor. The possibilities are endless, and the core of this delicious Dark Chocolate and Sea Salt Nut Bars recipe is incredibly forgiving.
Frequently Asked Questions:
Can I make these bars vegan?
Absolutely! To make these Dark Chocolate and Sea Salt Nut Bars vegan, simply ensure you’re using dairy-free dark chocolate. Most dark chocolate is naturally vegan, but it’s always good to check the ingredients for milk solids or other animal-derived products. You can also substitute honey with maple syrup or agave nectar for a fully plant-based treat.
How long do these bars store?
These bars store wonderfully! When kept in an airtight container at room temperature, they should stay fresh for about a week. For longer storage, you can refrigerate them for up to two weeks, or even freeze them for up to two months. They thaw quickly, making them a convenient make-ahead snack.
Dark Chocolate and Sea Salt Nut Bars
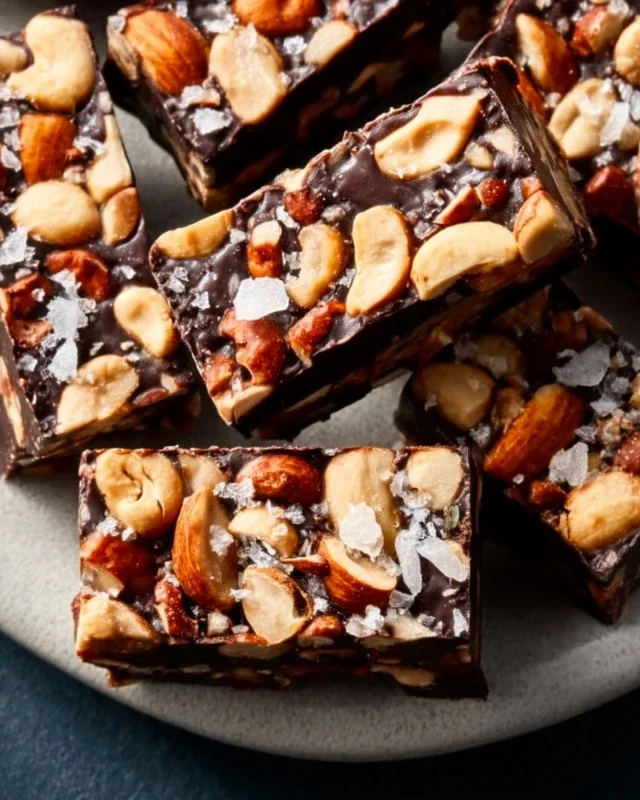
Easy no-bake bars featuring a crunchy nut and puffed rice base, bound with brown rice syrup and vanilla, topped with rich dark chocolate and a sprinkle of sea salt.
Ingredients
-
2 1/2 cups unsalted nuts (3/4 cup cashews, 3/4 cup peanuts, 1 cup almonds)
-
1/2 cup puffed rice
-
1/4 cup brown rice syrup
-
1 1/2 teaspoon vanilla extract
-
1/2 teaspoon sea salt
-
1 cup dark chocolate chips
-
2 teaspoons coconut oil
-
flaky salt for topping (optional)
Instructions
-
Step 1
Line an 8×8 inch baking pan with parchment paper. -
Step 2
In a large bowl, combine the mixed nuts and puffed rice. -
Step 3
In a small saucepan over low heat, gently warm the brown rice syrup and vanilla extract until just combined. Stir in 1/2 teaspoon sea salt. -
Step 4
Pour the warm syrup mixture over the nut and puffed rice mixture. Stir until everything is evenly coated. -
Step 5
Press the mixture firmly and evenly into the prepared baking pan. -
Step 6
In a microwave-safe bowl, melt the dark chocolate chips and coconut oil in 30-second intervals, stirring in between, until smooth. -
Step 7
Pour the melted chocolate over the nut base and spread evenly. Sprinkle with flaky salt, if using. -
Step 8
Refrigerate for at least 30 minutes, or until the chocolate is firm. -
Step 9
Cut into bars and serve chilled.
Important Information
Nutrition Facts (Per Serving)
It is important to consider this information as approximate and not to use it as definitive health advice.
Allergy Information
Please check ingredients for potential allergens and consult a health professional if in doubt.



Leave a Comment