New York Times Chocolate Chip Cookies are more than just a recipe; they’re a culinary legend. For years, home bakers and dessert enthusiasts have whispered about these cookies, praising their perfect balance of chewy centers and slightly crisp edges. What is it about this particular iteration that has captured so many hearts? It’s the meticulous attention to detail, the simple yet profound techniques that elevate a classic into something truly extraordinary. The secret lies not just in the quality of ingredients, but in the thoughtful method that allows flavors to meld and develop, resulting in a cookie that is both deeply satisfying and undeniably addictive. If you’ve ever dreamt of biting into the ultimate chocolate chip cookie, one that embodies comfort, nostalgia, and pure indulgence, then you’ve found your holy grail. Prepare yourself for a baking experience that will redefine your understanding of this beloved treat.

Ingredients:
- 1 1/2 cups all-purpose flour
- 1 1/2 teaspoons cornstarch
- 3/4 teaspoon baking soda
- 1/4 teaspoon salt
- 1/2 cup unsalted butter, melted and cooled to room temperature
- 1/2 cup light brown sugar, packed
- 1/4 cup granulated sugar
- 1 large egg
- 1 1/2 teaspoons pure vanilla extract
- 3 ounces semi-sweet chocolate chips (plus extra for pressing on top before baking)
- 3 ounces semi-sweet chocolate chunks (plus extra for pressing on top before baking)
- 2 ounces dark chocolate, finely grated
Preparing the Dough
-
Dry Ingredients Combination:
In a medium-sized bowl, whisk together the all-purpose flour, cornstarch, baking soda, and salt. The cornstarch is a key ingredient here, as it helps to create a tender crum extractb and a slightly chewy texture, a hallmark of great chocolate chip cookies. Whisking these ingredients thoroughly ensures that the leavening agents (baking soda) and salt are evenly distributed, which will lead to consistent cookie rise and flavor. Set this bowl aside while you prepare the wet ingredients.
-
Creaming the Sugars and Butter:
In a separate large bowl, combine the melted and cooled unsalted butter with the packed light brown sugar and granulated sugar. Using a whisk or a rubber spatula, cream these together until they are well combined and the mixture has a slightly glossy appearance. It’s important that the butter has cooled to room temperature after melting; if it’s too warm, it can melt the sugars too quickly and affect the cookie’s texture, potentially leading to flatter cookies. The combination of brown and granulated sugar provides both moisture and structure, contributing to that perfect balance of chegrape juicess and crisp edges.
-
Incorporating Wet Ingredients:
To the butter and sugar mixture, add the large egg and the pure vanilla extract. Mix everything together until it’s smooth and homogenous. The egg acts as a binder, holding the cookie dough together, and also adds richness. The vanilla extract is crucial for depth of flavor; don’t skimp on its quality! Ensure you scrape down the sides of the bowl to incorporate all the ingredients.
-
Combining Wet and Dry Components:
Gradually add the dry ingredients (from step 1) to the wet ingredients (from step 3) in two or three additions. Mix on low speed with an electric mixer or by hand with a spatula until just combined. Be careful not to overmix the dough at this stage. Overmixing can develop the gluten in the flour too much, resulting in tougher cookies. Stop mixing as soon as you no longer see streaks of dry flour. The dough will be thick and slightly sticky.
-
Adding the Chocolatey Goodness:
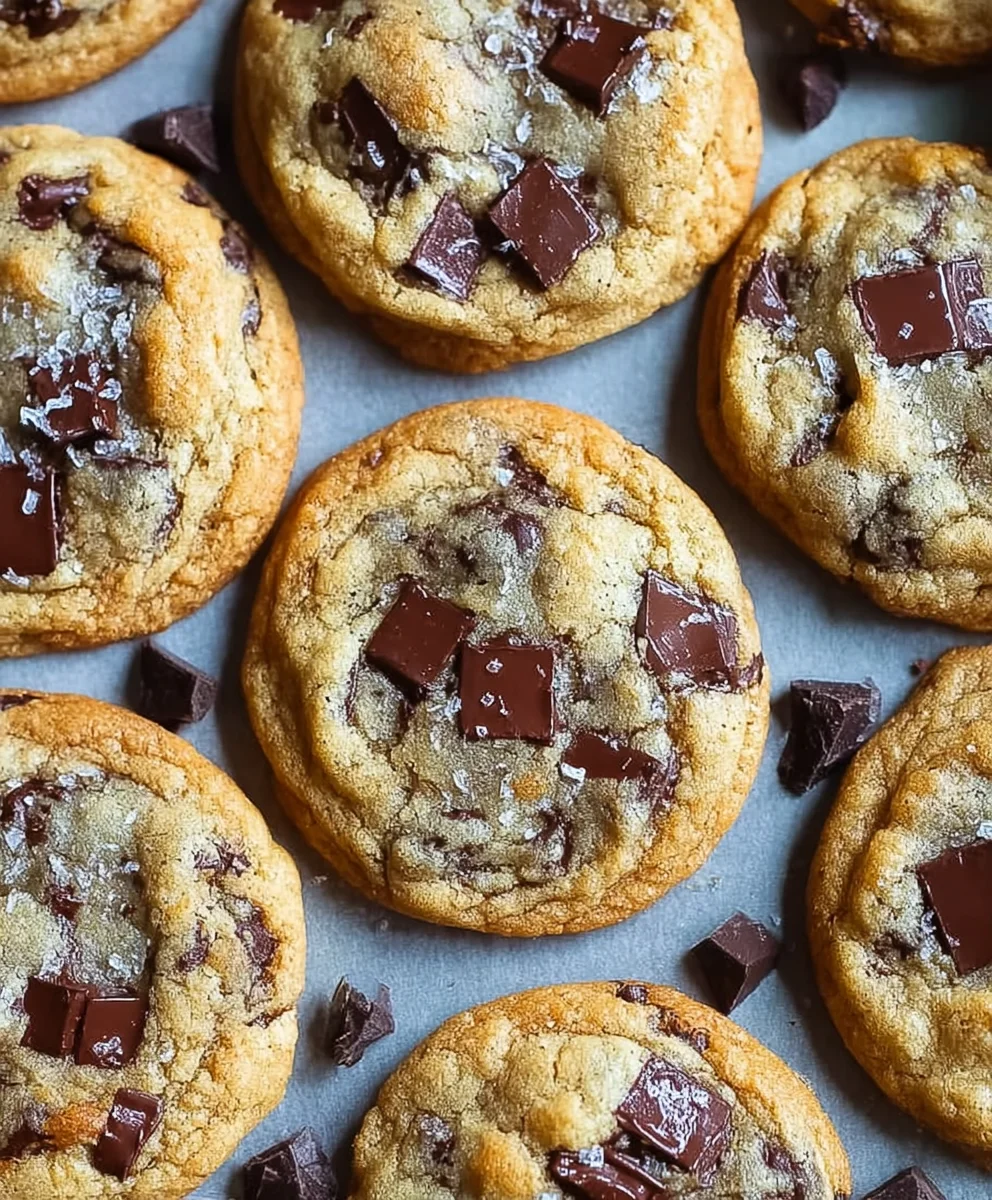
Now for the star of the show: the chocolate! Gently fold in the semi-sweet chocolate chips, semi-sweet chocolate chunks, and the finely grated dark chocolate. Reserve a small handful of both the chips and chunks for pressing onto the tops of the cookies before baking. Folding them in by hand ensures that you don’t break up the chocolate pieces too much and that they are evenly distributed throughout the dough. The combination of chips and chunks offers varying textures and melt points, while the grated dark chocolate adds a more intense chocolate flavor that melts beautifully into the cookie.
Baking the Perfect Cookies
-
Chilling and Shaping the Dough:
This step is arguably one of the most important for achieving the desired texture and preventing excessive spreading. Cover the bowl of dough tightly with plastic wrap and refrigerate for at least 2 hours, or preferably overnight. Chilling the dough allows the fats to solidify, which helps the cookies hold their shape better during baking, leading to thicker, chewier results. It also allows the flavors to meld and deepen. Once chilled, scoop rounded tablespoons of dough onto parchment-lined baking sheets, leaving about 2 inches between each cookie to allow for spreading. You can roll them into balls for a more uniform shape.
-
Preheating and Garnishing:
Preheat your oven to 375°F (190°C). This temperature is ideal for achieving golden-brown edges and a soft center. Before placing the baking sheets into the oven, take the reserved chocolate chips and chunks and gently press a few onto the tops of each cookie dough ball. This not only makes the cookies look more appealing with those lovely melted chocolate pockets on top but also ensures a decadent chocolatey bite from the first glance.
-
Baking to Perfection:
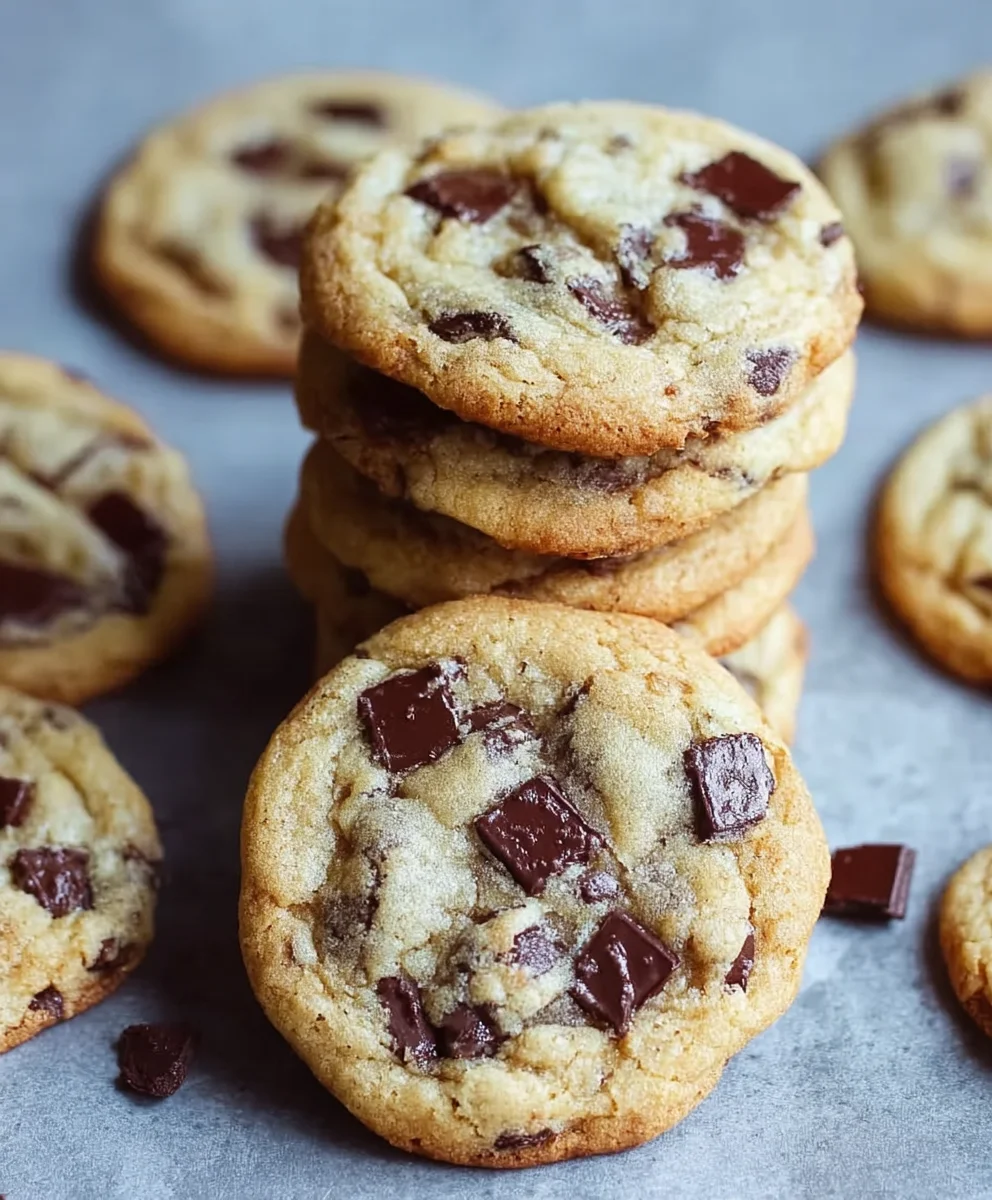
Bake the cookies for 9 to 11 minutes, or until the edges are golden brown and the centers are still slightly soft. The baking time can vary depending on your oven and the size of your cookies. Keep a close eye on them during the last few minutes. You want them to look set around the edges but still appear a little underdone in the very center – they will continue to cook on the baking sheet after they are removed from the oven.
-
Cooling for Optimal Texture:
Allow the cookies to cool on the baking sheets for 5 to 10 minutes before transferring them to a wire rack to cool completely. This resting period on the hot baking sheet is crucial. It allows the cookies to firm up enough so they don’t fall apart when you move them. Resist the urge to eat them immediately, as their texture will continue to improve as they cool, developing that perfect chewy interior and slightly crisp exterior.
Conclusion:
There you have it – the definitive guide to mastering the legendary New York Times Chocolate Chip Cookies! We’ve walked through each step, from creaming the butter and sugar to achieving that perfect chewy center and crisp edge. These cookies are more than just a treat; they are an experience, a taste of pure, unadulterated comfort and joy. The aroma that fills your kitchen as they bake is simply divine, and the first bite is an explosion of rich chocolate and buttery goodness. Don’t be afraid to experiment and make these cookies your own. Whether you prefer a darker chocolate, a sprinkle of sea salt, or even a touch of espresso powder, the possibilities are endless. So, gather your ingredients, put on your favorite apron, and get ready to bake a batch that will undoubtedly impress everyone lucky enough to snag one. Happy baking!
Frequently Asked Questions:
Can I make the dough ahead of time?
Absolutely! The dough for New York Times Chocolate Chip Cookies actually benefits from chilling. Refrigerating the dough for at least 24-72 hours allows the flavors to meld beautifully and results in a more complex taste and a superior texture. You can keep it wrapped tightly in the refrigerator for up to 5 days.
What is the best way to store leftover cookies?
To keep your New York Times Chocolate Chip Cookies tasting fresh, store them in an airtight container at room temperature. They should remain delicious for about 3-4 days. For longer storage, you can freeze baked cookies individually wrapped in plastic wrap, then placed in a freezer-safe bag for up to 3 months. They also freeze beautifully before baking; simply place the dough balls on a baking sheet to freeze, then transfer to a freezer bag and bake directly from frozen, adding a minute or two to the baking time.
NYT Chocolate Chip Cookies-Classic Delicious Recipe
A classic and delicious recipe for chocolate chip cookies from the New York Times, featuring a tender crumb and chewy texture.
Ingredients
-
1 1/2 cups all-purpose flour
-
1 1/2 teaspoons cornstarch
-
3/4 teaspoon baking soda
-
1/4 teaspoon salt
-
1/2 cup unsalted butter, melted and cooled to room temperature
-
1/2 cup light brown sugar, packed
-
1/4 cup granulated sugar
-
1 large egg
-
1 1/2 teaspoons pure vanilla extract
-
3 ounces semi-sweet chocolate chips
-
3 ounces semi-sweet chocolate chunks
-
2 ounces dark chocolate, finely grated
Instructions
-
Step 1
In a medium-sized bowl, whisk together the all-purpose flour, cornstarch, baking soda, and salt. Set aside. -
Step 2
In a separate large bowl, combine the melted and cooled unsalted butter with the packed light brown sugar and granulated sugar. Cream until well combined and slightly glossy. -
Step 3
Add the large egg and pure vanilla extract to the butter and sugar mixture. Mix until smooth and homogenous. -
Step 4
Gradually add the dry ingredients to the wet ingredients in two or three additions, mixing on low speed until just combined. Do not overmix. -
Step 5
Gently fold in the semi-sweet chocolate chips, semi-sweet chocolate chunks, and finely grated dark chocolate. Reserve some for topping. -
Step 6
Cover the dough and refrigerate for at least 2 hours, or preferably overnight. Scoop rounded tablespoons of dough onto parchment-lined baking sheets, leaving about 2 inches between each cookie. -
Step 7
Preheat oven to 375°F (190°C). Press reserved chocolate chips and chunks onto the tops of each cookie dough ball. -
Step 8
Bake for 9 to 11 minutes, or until the edges are golden brown and the centers are still slightly soft. -
Step 9
Allow cookies to cool on the baking sheets for 5 to 10 minutes before transferring to a wire rack to cool completely.
Important Information
Nutrition Facts (Per Serving)
It is important to consider this information as approximate and not to use it as definitive health advice.
Allergy Information
Please check ingredients for potential allergens and consult a health professional if in doubt.


Leave a Comment