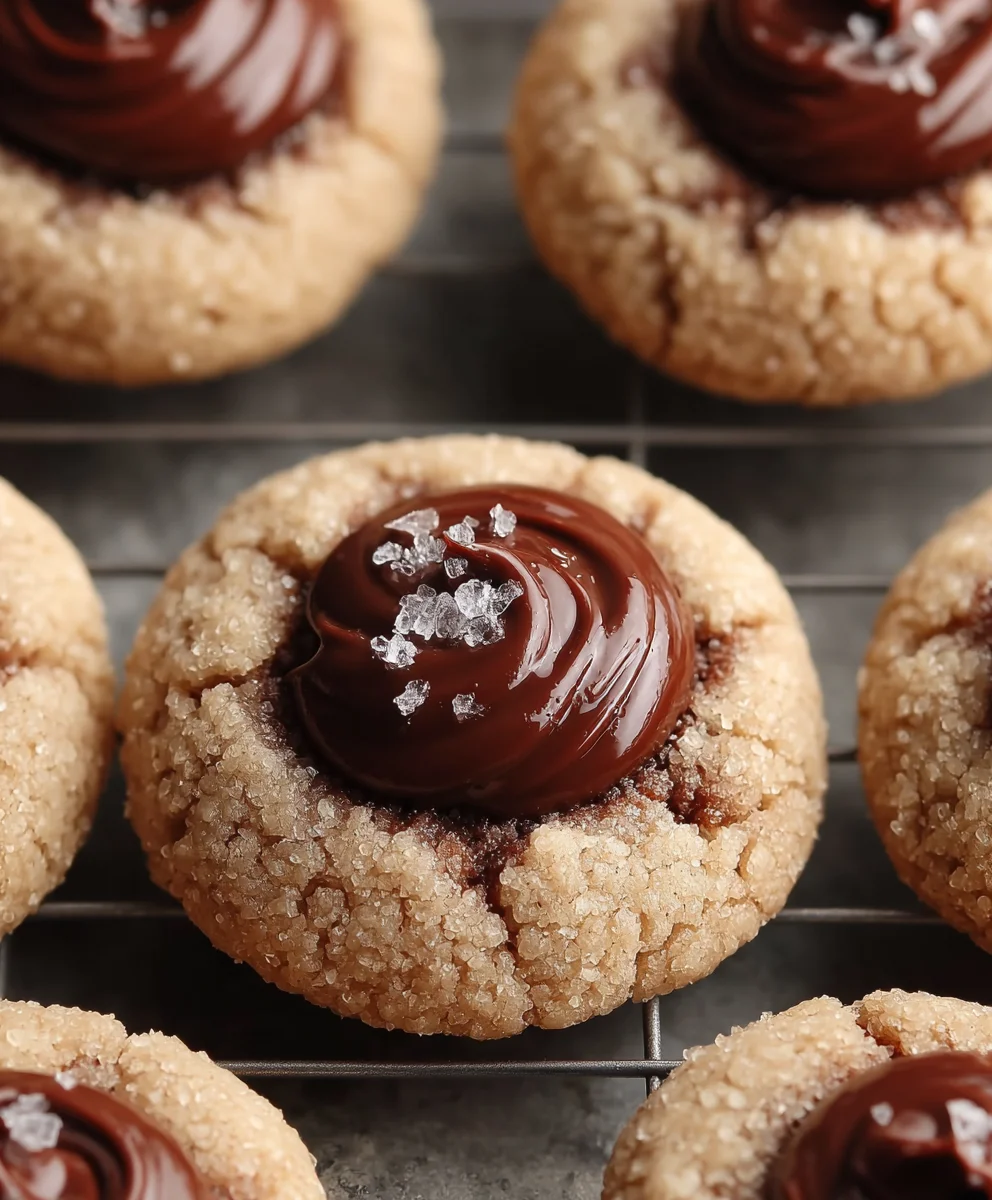
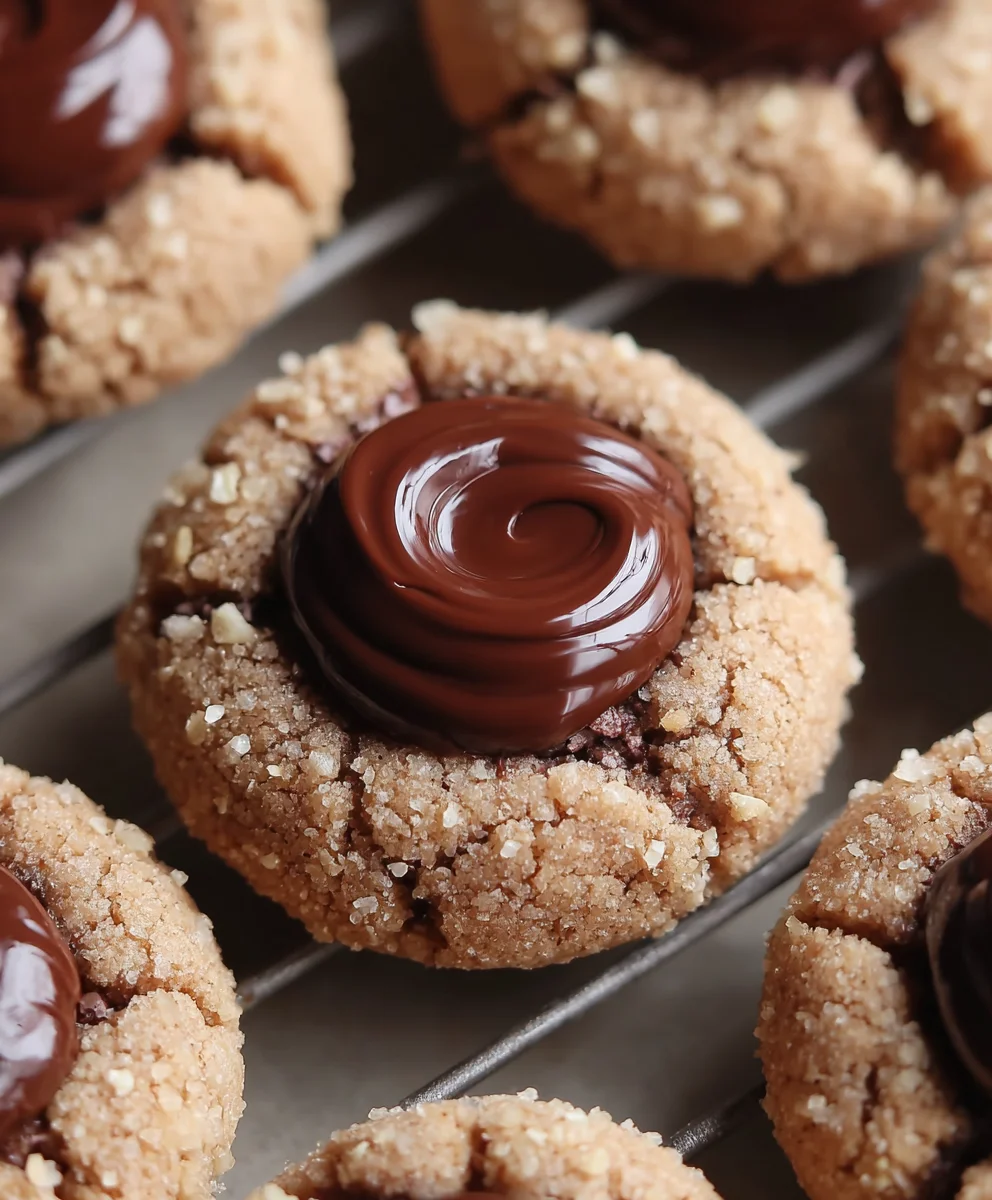
Nutella Thumbprint Cookies are more than just a sweet treat; they are a nostalgic hug in cookie form, a guaranteed crowd-pleaser, and frankly, one of the easiest ways to achieve pure baking joy. Who doesn’t instantly smile at the mention of that hazelnut-chocolatey goodness nestled within a tender, buttery cookie? It’s the perfect marriage of textures and flavors – the slight crisp of the outer edge giving way to a soft, melt-in-your-mouth interior, all crowned with a molten dollop of the beloved spread. What truly sets these Nutella Thumbprint Cookies apart is their irresistible simplicity and the sheer delight they bring to every bite. They’re incredibly forgiving for even novice bakers, making them a go-to for holiday cookie platters, impromptu gatherings, or just when a serious craving strikes. Get ready to discover how effortless it is to create these delightful little masterpieces that will vanish from your cookie jar in a flash!

Ingredients:
- 2¼ cups all-purpose flour (282g)
- 1 tablespoon cornstarch (8g)
- 2 teaspoons baking powder
- ½ teaspoon baking soda
- ½ teaspoon fine sea salt
- ⅓ cup hazelnuts, finely chopped (50g) – for the dough
- ½ cup unsalted butter, room temperature (113g)
- 8 oz cream cheese, room temperature (226g)
- 1½ cups granulated sugar (300g) – for the cookie dough
- 1 whole egg, room temperature
- 1 egg yolk, room temperature
- 2 teaspoons vanilla bean paste or extract
- ⅓ cup hazelnuts, finely chopped (50g) – for rolling
- 1 tablespoon granulated sugar – for rolling
- Nutella, for filling centers
Preparing the Cookie Dough
Step 1: Combine Dry Ingredients
To begin extract crafting your delicious Nutella Thumbprint Cookies, the first step is to get our dry ingredients perfectly blended. In a medium-sized bowl, whisk together the 2¼ cups of all-purpose flour, 1 tablespoon of cornstarch, 2 teaspoons of baking powder, ½ teaspoon of baking soda, and ½ teaspoon of fine sea salt. The cornstarch plays a crucial role here, contributing to a wonderfully tender cookie texture. Give these ingredients a good whisk until they are thoroughly combined and no streaks of any single ingredient remain. This ensures that your leavening agents and salt are evenly distributed, which is key for consistent cookie rise and flavor. Set this bowl aside for now.
Step 2: Cream the Butter and Cream Cheese
Now, let’s move on to the fats and sugars that will give our cookies their rich, creamy base. In a large mixing bowl, or the bowl of a stand mixer fitted with the paddle attachment, beat together the ½ cup of softened unsalted butter and the 8 oz of softened cream cheese. Ensure both are at room temperature so they can emulsify properly. Beat them on medium speed until they are light, fluffy, and well combined, with no lumps of cream cheese visible. This creaming process incorporates air, which will help the cookies spread just the right amount.
Step 3: Incorporate Sugar and Wet Ingredients
Once the butter and cream cheese are beautifully creamed, it’s time to add the sweetness. Gradually add the 1½ cups of granulated sugar to the creamed mixture, beating until everything is smooth and creamy. Scrape down the sides of the bowl periodically to ensure everything is incorporated. Next, add the 1 whole egg and the 1 egg yolk, one at a time, beating well after each addition until fully combined. Finally, stir in the 2 teaspoons of vanilla bean paste or extract. The vanilla bean paste will give your cookies those lovely little specks and a more intense vanilla flavor, but good quality vanilla extract works beautifully too.
Step 4: Add Dry Ingredients and Hazelnuts
With our wet ingredients perfectly blended, it’s time to bring in the dry. Gradually add the flour mixture to the wet ingredients in two or three additions, mixing on low speed until just combined. Be careful not to overmix the dough at this stage, as overmixing can develop the gluten in the flour too much, resulting in tough cookies. You want to mix until you no longer see streaks of dry flour. Then, gently fold in the ⅓ cup of finely chopped hazelnuts that are designated for the dough. These will add a delightful nutty crunch and flavor to every bite of the cookie.
Shaping and Baking the Cookies
Step 5: Form and Roll the Cookie Dough Balls
Now for the fun part: shaping our cookies! In a separate small bowl, combine the remaining ⅓ cup of finely chopped hazelnuts with the 1 tablespoon of granulated sugar. This mixture will be used to coat the outside of our cookie dough balls, adding an extra layer of nutty texture and a subtle sweetness. Take about 1 to 1.5 tablespoons of the cookie dough and roll it between your palms to form a smooth ball. Then, roll each ball in the hazelnut-sugar mixture until it is evenly coated. Place the coated dough balls onto a baking sheet lined with parchment paper, leaving about 2 inches of space between each cookie to allow for spreading.
Step 6: Create the Thumbprint Indentation
This is where the “thumbprint” comes into play! Once your cookie dough balls are ready on the baking sheet, use your thumb (or the back of a small spoon) to gently press an indentation into the center of each cookie. You want to create a well deep enough to hold the Nutella, but not so deep that you poke through the bottom of the cookie. Aim for about ½ inch deep. It’s helpful to lightly grease your thumb or spoon with a little non-stick spray or a tiny bit of oil to prevent sticking.
Step 7: Fill with Nutella and Bake
Now it’s time to add the star ingredient! Spoon about 1 to 1.5 teaspoons of Nutella into the indentation of each cookie. Don’t overfill, as the Nutella will melt and spread slightly as the cookies bake. Once all the cookies are filled, bake them in a preheated oven at 350°F (175°C) for 12 to 15 minutes, or until the edges are lightly golden brown and the centers are still slightly soft. The Nutella should be melted and gooey.
Step 8: Cooling and Setting
Once baked, carefully remove the baking sheet from the oven. Let the cookies cool on the baking sheet for about 5 to 10 minutes. This initial cooling period is important because it allows the cookies to firm up slightly, making them easier to handle. After this, gently transfer the cookies to a wire rack to cool completely. As they cool, the Nutella will continue to set slightly, creating a wonderfully rich and decadent center. Enjoy these delightful Nutella Thumbprint Cookies!
Conclusion:
And there you have it – your very own batch of delicious Nutella Thumbprint Cookies! We hope you enjoyed this simple yet incredibly satisfying recipe. The perfect balance of buttery cookie and rich, gooey Nutella makes these a guaranteed crowd-pleaser, whether you’re baking for a special occasion or just a cozy afternoon treat. They are wonderfully versatile and truly shine on their own, but you can certainly elevate them further. Consider dusting them with a little powdered sugar for an extra touch of elegance, or perhaps a sprinkle of sea salt to enhance the chocolatey notes. For those feeling adventurous, try adding a swirl of melted chocolate over the top after they’ve cooled, or even pressing a single chocolate chip into the center of the thumbprint before baking.
Don’t be afraid to experiment with different nuts in the dough, like finely chopped hazelnuts, to complement the Nutella. We encourage you to get creative and make these Nutella Thumbprint Cookies your own! The joy of baking is in the sharing, so gather your loved ones and savor these delightful creations together. Happy baking!
Frequently Asked Questions:
Can I make the dough ahead of time?
Absolutely! The dough for Nutella Thumbprint Cookies can be made a day or two in advance and stored in an airtight container in the refrigerator. Allow it to soften slightly at room temperature for about 15-20 minutes before shaping and baking.
How should I store leftover Nutella Thumbprint Cookies?
Store your cooled Nutella Thumbprint Cookies in an airtight container at room temperature for up to 3-4 days. If you live in a very warm climate, or if the Nutella filling seems particularly soft, you might consider refrigerating them for slightly longer shelf life, though this can sometimes affect the cookie’s texture.
Nutella Thumbprint Cookies-Easy Holiday Treat
Easy and delicious Nutella thumbprint cookies perfect for holiday gatherings. These cookies feature a tender, slightly nutty dough with a rich Nutella center.
Ingredients
-
2¼ cups all-purpose flour
-
1 tablespoon cornstarch
-
2 teaspoons baking powder
-
½ teaspoon baking soda
-
½ teaspoon fine sea salt
-
⅓ cup hazelnuts, finely chopped
-
½ cup unsalted butter, room temperature
-
8 oz cream cheese, room temperature
-
1½ cups granulated sugar
-
1 whole egg, room temperature
-
1 egg yolk, room temperature
-
2 teaspoons vanilla bean paste or extract
-
⅓ cup hazelnuts, finely chopped
-
1 tablespoon granulated sugar
-
Nutella, for filling centers
Instructions
-
Step 1
In a medium bowl, whisk together flour, cornstarch, baking powder, baking soda, and salt. Set aside. -
Step 2
In a large bowl, beat softened butter and cream cheese until light and fluffy. -
Step 3
Gradually add granulated sugar to the creamed mixture, beating until smooth. Add egg, egg yolk, and vanilla, beating well after each addition. -
Step 4
Gradually add the dry ingredients to the wet ingredients, mixing on low speed until just combined. Gently fold in ⅓ cup of chopped hazelnuts. -
Step 5
In a small bowl, combine the remaining ⅓ cup of chopped hazelnuts with 1 tablespoon of granulated sugar. -
Step 6
Roll about 1 to 1.5 tablespoons of dough into balls and coat them in the hazelnut-sugar mixture. Place on a parchment-lined baking sheet. -
Step 7
Create an indentation in the center of each cookie with your thumb or the back of a spoon. -
Step 8
Spoon 1 to 1.5 teaspoons of Nutella into each indentation. -
Step 9
Bake at 350°F (175°C) for 12 to 15 minutes, until edges are golden brown. -
Step 10
Let cookies cool on the baking sheet for 5-10 minutes, then transfer to a wire rack to cool completely.
Important Information
Nutrition Facts (Per Serving)
It is important to consider this information as approximate and not to use it as definitive health advice.
Allergy Information
Please check ingredients for potential allergens and consult a health professional if in doubt.

Leave a Comment