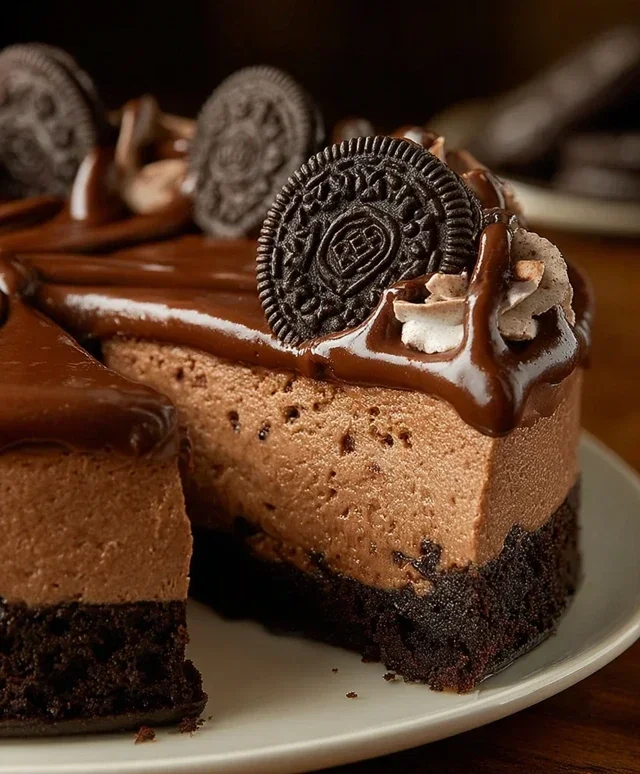
No Bake Oreo Nutella Cheesecake. Isn’t that phrase music to your ears? I know it is to mine! If you’re like me, a dessert that requires minimal effort but delivers maximum flavor is a total win. This particular creation, the No Bake Oreo Nutella Cheesecake, has become an absolute obsession in my kitchen, and I’m so excited to share it with you. What’s not to love about a creamy, dreamy cheesecake base swirled with the irresistible combination of crunchy Oreos and rich, hazelnutty Nutella? It’s the ultimate crowd-pleaser, perfect for birthdays, potlucks, or just a Tuesday night when you need a serious treat. The beauty of this No Bake Oreo Nutella Cheesecake lies in its simplicity; no oven required, just pure indulgence waiting to happen. Get ready to dive into a world of chocolatey, creamy bliss!

No Bake Oreo Nutella Cheesecake
Get ready for a dessert that’s pure indulgence! This No Bake Oreo Nutella Cheesecake is a dream come true for anyone who loves the classic combination of chocolate, creamy cheesecake, and the irresistible hazelnut goodness of Nutella. The best part? No oven required! This recipe is surprisingly simple to make, yet delivers a show-stopping dessert that will have everyone asking for seconds. Imagin extracte a rich, chocolatey Oreo crust topped with a lusciously smooth Nutella cheesecake filling, finished with a decadent drizzle and plenty of cookie crum extractbles. It’s the ultimate treat for parties, special occasions, or simply when you need a serious chocolate fix. Let’s dive in and create some magic!
Ingredients:
Crust Preparation
Let’s start with the foundation of our delicious cheesecake – the Oreo crust. This is where the magic begin extracts, and it’s incredibly easy to put together. In a medium bowl, combine your 200g of crushed Oreos with the 50g of melted butter. You want to mix this thoroughly until all the cookie crum extractbs are moistened by the butter. Think of it like making wet sand – it should hold together when you press it. I like to use a fork to ensure everything is well combined. Once you have this mixture, press it firmly and evenly into the bottom of your springform pan. I usually use the bottom of a glass or a flat-bottomed measuring cup to get a nice, compact layer. Make sure to press it up the sides slightly as well, if you like a more substantial crust edge. This compact crust will provide a sturdy base for our creamy filling. Place the prepared crust in the refrigerator while you get started on the cheesecake filling; this will help it set up.
Cheesecake Filling: The Creamy Core
Now for the star of the show – the unbelievably smooth and decadent cheesecake filling! In a large mixing bowl, add your 500g of softened cream cheese. It’s crucial that your cream cheese is at room temperature; this will prevent lumps and ensure a silky-smooth texture. Beat the cream cheese with an electric mixer (or a whisk if you’re feeling energetic!) until it’s completely smooth and creamy. Next, add the 200g of Nutella to the cream cheese. Beat again until both ingredients are thoroughly combined and you have a beautiful, uniform chocolate-hazelnut mixture. Scrape down the sides of the bowl a couple of times to make sure no rogue bits of cream cheese or Nutella are hiding.
In a separate, clean bowl, whip the 200g of heavy whipping cream with the 50g of sugar. Beat until stiff peaks form. You’ll know they’re ready when you can hold the bowl upside down (carefully, of course!) and the cream stays put. Gently fold this whipped cream into the cream cheese and Nutella mixture. Folding is key here; you want to incorporate the air from the whipped cream without deflating it, which will keep our cheesecake light and airy. Be gentle and use a spatula, making sure to scrape the bottom and sides of the bowl to ensure everything is evenly distributed.
Layering and Swirling the Nutella Goodness
Here’s where we elevate our cheesecake from delicious to extraordinary. Take about half of your creamy cheesecake filling and spoon it evenly over the chilled Oreo crust. Now, take the 100g of Nutella you’ve set aside for layering and spoon dollops of it over the first layer of filling. If you want a marbled effect, you can gently swirl the Nutella into the cream cheese layer with a toothpick or skewer. Don’t over-swirl, as you still want distinct layers of cream cheese and Nutella. Next, sprinkle half of your 100g of chopped Oreos over the Nutella layer.
Now, spoon the remaining cheesecake filling over the chopped Oreos and Nutella. Smooth the top with your spatula as evenly as possible. Dollop the remaining 100g of Nutella on top of this final layer. Again, you can swirl this in gently for a beautiful marbled effect or leave it as dollops. Finally, sprinkle the remaining 100g of chopped Oreos over the top of the cheesecake. This adds a delightful crunch and more chocolatey goodness.
The Final Touches and Setting Time
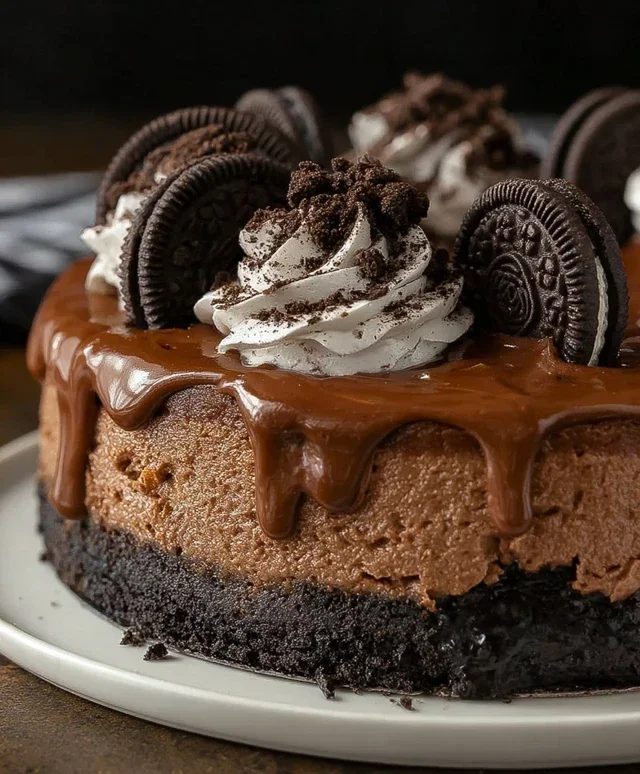
For the ultimate finishing touch, we’re going to add a drizzle of warmed Nutella. Gently warm 100g of Nutella in a microwave-safe bowl for about 15-20 seconds, or until it’s pourable but not hot. Drizzle this warmed Nutella generously over the top of your cheesecake. You can do this in zigzags, spirals, or whatever pattern your heart desires! To add some texture and a final Oreo punch, sprinkle the 5 crushed Oreos (no filling) over the drizzled Nutella. Lastly, artfully arrange the 6 whole Oreos around the edge of the cheesecake for a beautiful and enticing presentation.
Once your cheesecake is fully assembled, it’s time for the crucial chilling period. Cover the springform pan loosely with plastic wrap and refrigerate for at least 6 hours, or preferably overnight. This allows the cheesecake to set completely and for all those delicious flavors to meld together. The longer it chills, the firmer and more delicious it will be.
Serving Your Masterpiece
When you’re ready to serve, carefully run a thin knife around the edge of the springform pan before releasing the sides. This helps ensure a clean release and a beautiful presentation. Slice the cheesecake with a sharp knife that has been dipped in hot water and wiped dry between each slice for the cleanest cuts. Serve chilled and enjoy every decadent bite of your homemade No Bake Oreo Nutella Cheesecake! It’s a truly unforgettable dessert experience.
Conclusion:
And there you have it – your guide to creating the most decadent and ridiculously easy No Bake Oreo Nutella Cheesecake! This recipe truly is a winner because it delivers all the rich, creamy, chocolatey, hazelnut goodness of a traditional cheesecake without any of the fuss of baking. The symphony of crunchy Oreo crust, smooth Nutella-infused filling, and extra chocolatey toppings makes this dessert an absolute showstopper for any occasion. It’s perfect for impressing guests, treating yourself after a long week, or simply satisfying that intense sweet craving. I truly encourage you to give this No Bake Oreo Nutella Cheesecake a try; you won’t be disappointed!
For serving, I love to top it with extra crushed Oreos, a generous drizzle of Nutella, and maybe even some whipped cream or chocolate shavings for that extra touch of indulgence. This cheesecake is also incredibly versatile! If you’re not a huge fan of Oreos, you could easily swap them out for grabeef ham crackers or chocolate chip cookies for the crust. Feeling adventurous? Consider adding a swirl of raspberry jam or some chocolate chips directly into the Nutella filling for an added flavor dimension.
Frequently Asked Questions:
Can I make this cheesecake ahead of time?
Absolutely! This No Bake Oreo Nutella Cheesecake is perfect for making ahead. In fact, it’s best when chilled for at least 4-6 hours, or even overnight, to allow the flavors to meld and the texture to set perfectly. Store it covered in the refrigerator.
What if I don’t have Nutella?
While Nutella is the star, you can certainly experiment with other hazelnut spreads. If you don’t have any, you could try a good quality chocolate hazelnut spread, or even adapt the recipe by using a rich chocolate ganache and a different cream cheese filling. It might alter the flavor profile slightly, but it will still be delicious!
How long will the cheesecake last in the refrigerator?
When stored properly in an airtight container or well-covered in the refrigerator, this No Bake Oreo Nutella Cheesecake will typically last for about 3-4 days. The creamy texture is best enjoyed within the first couple of days.
No Bake Oreo Nutella Cheesecake
A decadent and easy no-bake cheesecake combining the classic flavors of Oreo and Nutella.
Ingredients
-
200g crushed Oreos
-
50g melted butter
-
500g cream cheese, softened
-
200g Nutella
-
200g heavy whipping cream (35%)
-
50g sugar
-
100g chopped Oreos
-
100g Nutella
-
100g Nutella, warmed for drizzling
-
5 crushed Oreos (no filling)
-
6 whole Oreos for garnish
Instructions
-
Step 1
Combine crushed Oreos and melted butter. Press into the base of a springform pan. -
Step 2
In a large bowl, beat softened cream cheese until smooth. Add Nutella and mix until well combined. -
Step 3
In a separate bowl, whip heavy cream and sugar until stiff peaks form. -
Step 4
Gently fold the whipped cream into the cream cheese and Nutella mixture. Stir in chopped Oreos and 100g Nutella. -
Step 5
Pour the cheesecake filling over the Oreo crust and smooth the top. -
Step 6
Chill for at least 4 hours, or until firm. Before serving, drizzle with warmed Nutella, sprinkle with crushed Oreos, and garnish with whole Oreos.
Important Information
Nutrition Facts (Per Serving)
It is important to consider this information as approximate and not to use it as definitive health advice.
Allergy Information
Please check ingredients for potential allergens and consult a health professional if in doubt.

Leave a Comment