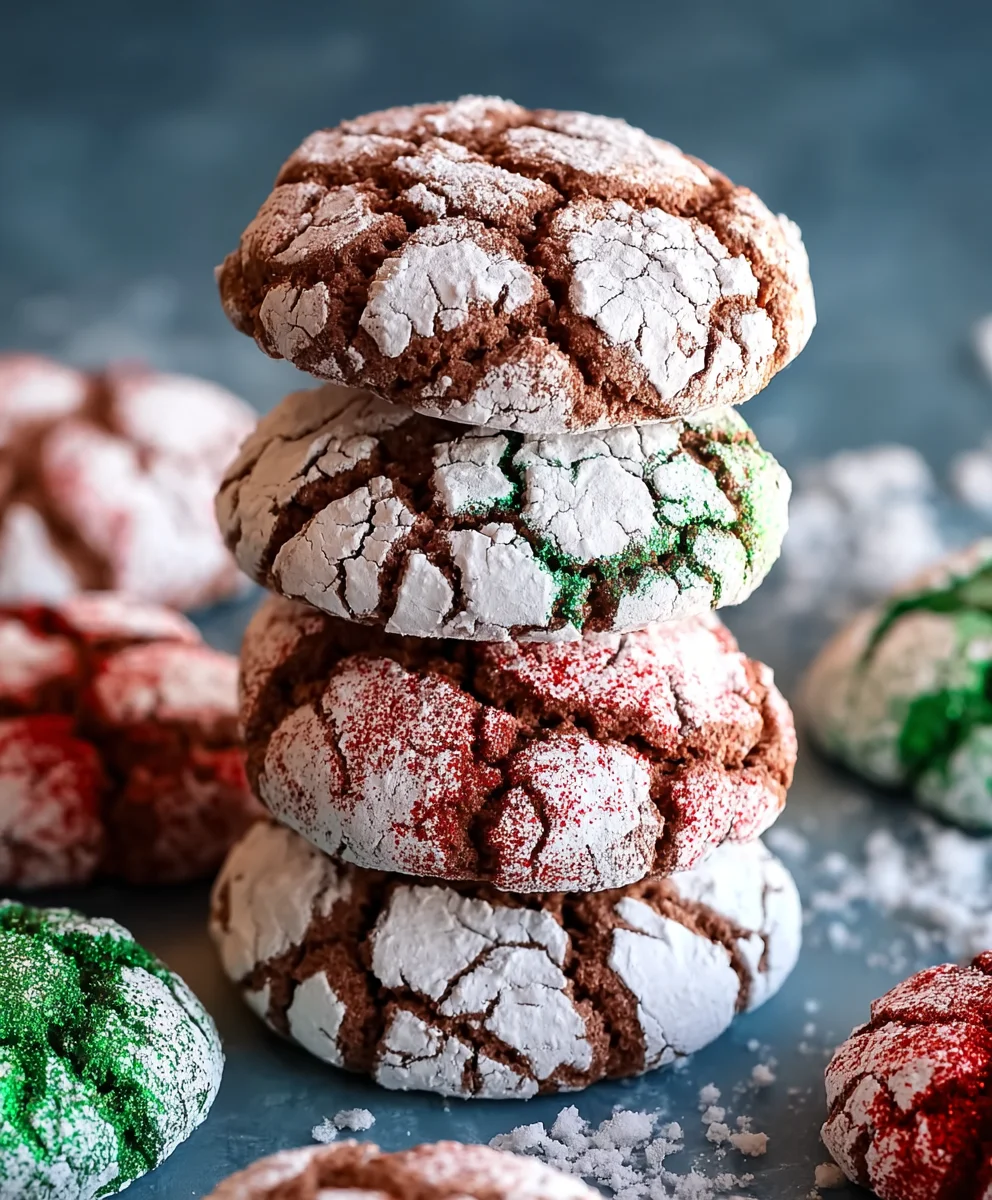
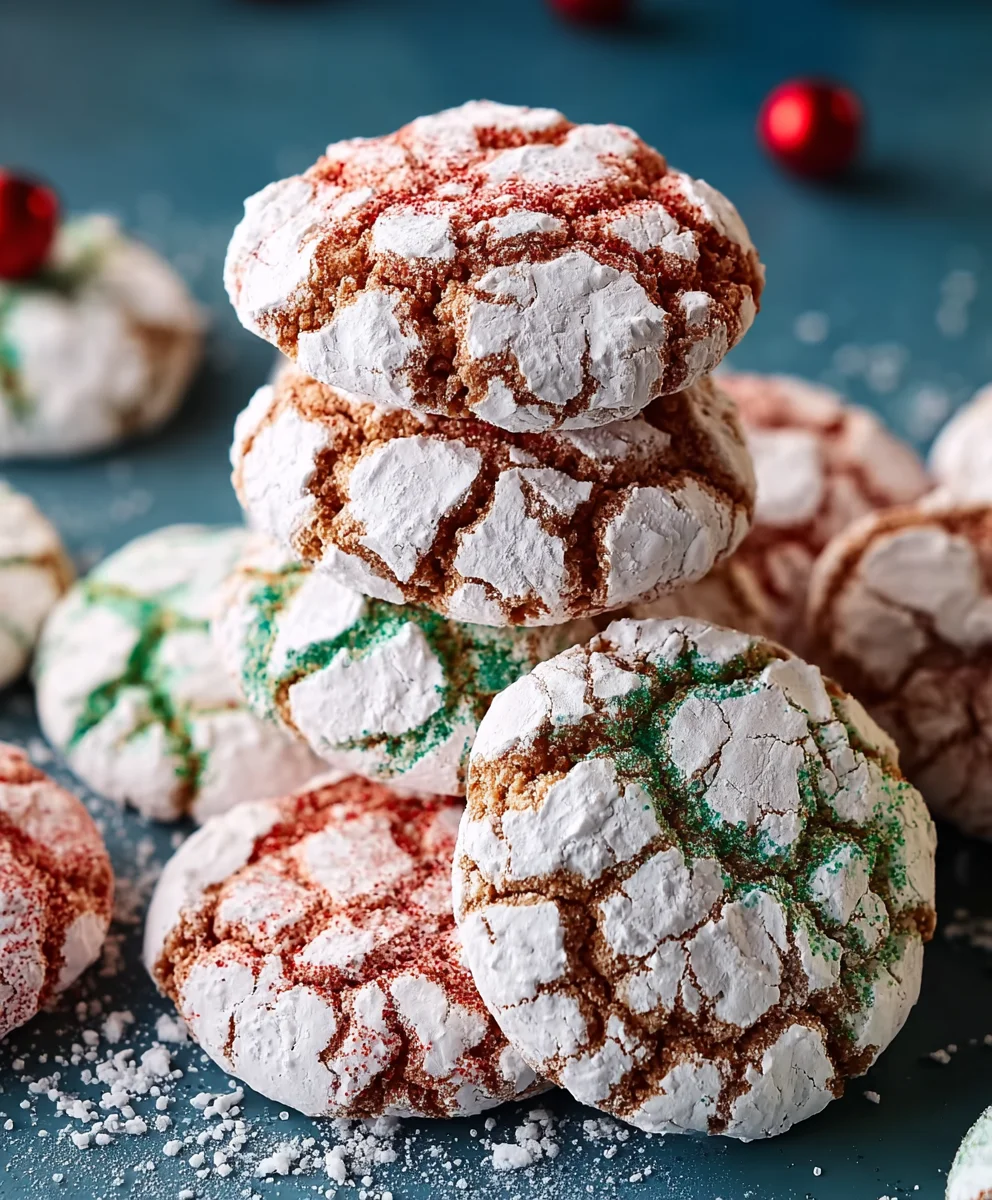
Holiday Crinkle Cookies are undeniably the quintessential treat of the festive season. There’s something magical about their powdery exterior giving way to a chewy, sweet interior, and the delightful crackled pattern that gives them their name. We all have our favorite holiday memories, and for many of us, those memories are dusted with a generous coating of powdered sugar from these iconic Holiday Crinkle Cookies. They’re a crowd-pleaser for a reason: their bright, cheerful appearance instantly evokes a sense of celebration, and their simple yet satisfying flavor profile appeals to both children and adults alike. What truly sets these Holiday Crinkle Cookies apart is the perfect balance of tender crum extractb and that characteristic chewy texture, achieved through a precise combination of ingredients and a simple rolling technique that creates their signature snowflake-like appearance. Get ready to bake up some pure holiday joy!

Ingredients:
- 1 box (13.25 ounces) white cake mix
- 2 large eggs
- 1/3 cup olive oil
- 1/3 cup powdered sugar, plus more for coating
- Red food coloring
- Green food coloring
Preparation: Getting Your Dough Ready
This is where the magic begin extracts to happen for our Holiday Crinkle Cookies! The beauty of using a white cake mix is that it provides a fantastic base that’s already perfectly balanced for sweetness and texture, saving us a ton of time and effort. First, grab a large mixing bowl. Pour the entire contents of the white cake mix into the bowl. Make sure to get all of it, as the precise measurements are crucial for the right cookie consistency.
Next, we’ll introduce the wet ingredients. Crack the two large eggs directly into the bowl with the cake mix. Don’t worry about whisking them separately; they’ll incorporate beautifully as we mix. Following that, carefully measure out the 1/3 cup of olive oil. While some cookie recipes call for butter, olive oil lends a wonderfully tender crum extractb and a subtle richness that’s unexpected but delicious in these crinkle cookies. Pour the olive oil over the cake mix and eggs.
Now, it’s time to bring it all together. Using a sturdy spoon or a spagin extracta, begin mixing the ingredients. At first, it will seem a bit drum extractand crumbly, but keep mixing. As the wet ingredients start to bind with the dry cake mix, it will transform into a cohesive dough. You might need to scrape down the sides of the bowl a few times to ensure everything is incorporated. Continue mixing until a soft, slightly sticky dough forms. It should hold together when you press it, but it won’t berum extracterly dry or crumbly. Once you have a uniform dough, cover the bowl with plastic wrap and refrigerate for at least 30 minutes. This chilling period is essential; it makes the dough much easier to handle and prevents the cookies from spreading too much during baking.
Coloring the Dough: Festive Flair
While the dough is chilling, it’s the perfect time to prepare for the festive colors. Take out two separate small bowls. Into the first bowl, place about half of the chilled dough. Into the second bowl, place the remaining half of the chilled dough. Now, for the fun part – adding the colors! For the first bowl, add a few drops of red food coloring. Start with 2-3 drops, then knead the dough gently with your hands until the color is evenly distributed. Add more drops if you desire a deeper red hue, but be careful not to add too much, as it can sometimes affect the dough’s texture. You want a vibrant, festive red.
Wash your hands thoroughly to avoid mixing colors, and then move to the second bowl of dough. Add a few drops of green food coloring to this portion of the dough. Again, start with 2-3 drops and knead until the color is uniform and a beautiful green. If you’re aiming for a specific shade of green, you can adjust the amount of food coloring accordingly. Once both portions of dough are evenly colored, cover them again and return them to the refrigerator for another 15-30 minutes. This second chill ensures the dough is firm enough to roll and coat without the colors becoming muddy. This step is key to achieving those distinct red and green swirls that make these Holiday Crinkle Cookies so visually appealing.
Shaping and Baking: The Crinkle Creation
Preheat your oven to 350°F (175°C). Line two baking sheets with parchment paper. This prevents sticking and makes for easy cleanup. Now, get your powdered sugar ready. Pour the 1/3 cup of powdered sugar into a shallow dish or a small bowl. This will be used to coat the cookies, creating the signature crinkled look.
Take one portion of colored dough (let’s start with red) from the refrigerator. Roll about 1 teaspoon of the dough into a small ball, about 3/4 inch in diameter. Then, take a small piece of the other colored dough (green) and flatten it slightly. Place the green dough on top of the red dough ball and then gently wrap the red dough around the green, forming a new, slightly larger ball that has a core of one color and an outer layer of the other. It doesn’t have to be perfect; a rustic, swirled effect is exactly what we want. Alternatively, you can roll small pieces of both colors and gently press them together before rolling into a ball. The goal is to have two colors visible when you bite into the cookie.
Once you have your swirled dough ball, gently roll it in the powdered sugar, ensuring it’s completely coated on all sides. The powdered sugar is what creates those beautiful cracks and crinkles as the cookie bakes. Place the coated dough ball onto the prepared baking sheet, leaving about 2 inches of space between each cookie to allow for spreading. Repeat this process with the remaining red and green dough, creating a mix of red-on-green and green-on-red balls, until you have used up all the dough.
Bake for 9-12 minutes, or until the edges are set and the centers are still slightly soft. They will continue to set up as they cool. Overbaking will result in a dry cookie, so keep a close eye on them. Once baked, remove the baking sheets from the oven and let the cookies cool on the sheets for 5 minutes before transferring them to a wire rack to cool completely. As they cool, you’ll notice those fantastic crinkles forming.
Conclusion:
And there you have it – your ultimate guide to creating perfect Holiday Crinkle Cookies! We’ve walked through each step, from the initial dough preparation to the final dusting of powdered sugar, ensuring your cookies are beautifully cracked and delightfully chewy. These Holiday Crinkle Cookies are truly a festive delight, perfect for sharing with loved ones or enjoying as a sweet treat throughout the holiday season. They pair wonderfully with a glass of cold milk, a steaming mug of hot chocolate, or even a cup of festive spiced cider. Don’t be afraid to get creative with variations; consider adding a hint of peppermint extract to the dough or rolling them in coloured sugar before the final bake for an extra pop of holiday cheer.
I encourage you to try this recipe and experience the joy of baking these classic cookies. They are sure to become a cherished part of your holiday traditions!
Frequently Asked Questions about Holiday Crinkle Cookies:
Why aren’t my Holiday Crinkle Cookies cracking enough?
The most common reason for a lack of crinkles is rolling the dough balls too large. Make sure to roll them into small, compact balls (about 1 inch in diameter). Also, ensure your dough is well-chilled; cold dough holds its shape better and allows for those signature cracks to form as it bakes and spreads. Don’t over-mix the dough, as this can develop the gluten too much, leading to a tougher cookie that doesn’t spread as much.
Can I make the dough for Holiday Crinkle Cookies ahead of time?
Absolutely! The dough for Holiday Crinkle Cookies can be made up to 2-3 days in advance and stored in an airtight container in the refrigerator. Chilling the dough actually improves the flavor and texture. When you’re ready to bake, simply let the dough sit at room temperature for about 15-20 minutes until it’s easier to scoop and roll.
Holiday Crinkle Cookies-Easy Festive Treat
Easy and festive crinkle cookies perfect for the holidays, featuring a white cake mix base and vibrant red and green swirls.
Ingredients
-
1 box (13.25 ounces) white cake mix
-
2 large eggs
-
1/3 cup olive oil
-
1/3 cup powdered sugar, plus more for coating
-
Red food coloring
-
Green food coloring
Instructions
-
Step 1
In a large mixing bowl, combine the white cake mix, eggs, and olive oil. Mix until a soft, slightly sticky dough forms. Cover and refrigerate for at least 30 minutes. -
Step 2
Divide the chilled dough into two equal portions in separate bowls. Add a few drops of red food coloring to one portion and knead until evenly colored. Repeat with green food coloring for the second portion. Cover and chill for another 15-30 minutes. -
Step 3
Preheat your oven to 350°F (175°C). Line two baking sheets with parchment paper. Pour powdered sugar into a shallow dish. -
Step 4
Take about 1 teaspoon of one color of dough, roll into a ball. Flatten a small piece of the other color and place it on top. Gently wrap the first dough around the second to create a swirled ball. Alternatively, press small pieces of both colors together. -
Step 5
Gently roll the swirled dough ball in powdered sugar until completely coated. Place onto the prepared baking sheet, leaving 2 inches between cookies. -
Step 6
Bake for 9-12 minutes, until edges are set and centers are slightly soft. Let cool on the baking sheets for 5 minutes before transferring to a wire rack to cool completely.
Important Information
Nutrition Facts (Per Serving)
It is important to consider this information as approximate and not to use it as definitive health advice.
Allergy Information
Please check ingredients for potential allergens and consult a health professional if in doubt.
Leave a Comment