
Buster Bar Ice Cream Cake: Get ready to unleash pure joy because we’re diving headfirst into a recipe that’s guaranteed to bring smiles and happy sighs to your table. If you’ve ever dreamt of a dessert that perfectly marries the creamy indulgence of ice cream with the satisfying crunch of a classic treat, then you’re in for a serious delight. The Buster Bar Ice Cream Cake is more than just a dessert; it’s a nostalgic journey for many, a taste of childhood summers, and a guaranteed crowd-pleaser for any occasion. What makes this Buster Bar Ice Cream Cake so utterly special? It’s the ingenious layering: a delightful base, a rich ice cream center, and that irresistible chocolatey, nutty topping that mimics the beloved bar to perfection. It’s the ultimate frozen confection that’s surprisingly simple to recreate at home, allowing you to capture that magic in every single bite.

Buster Bar Ice Cream Cake
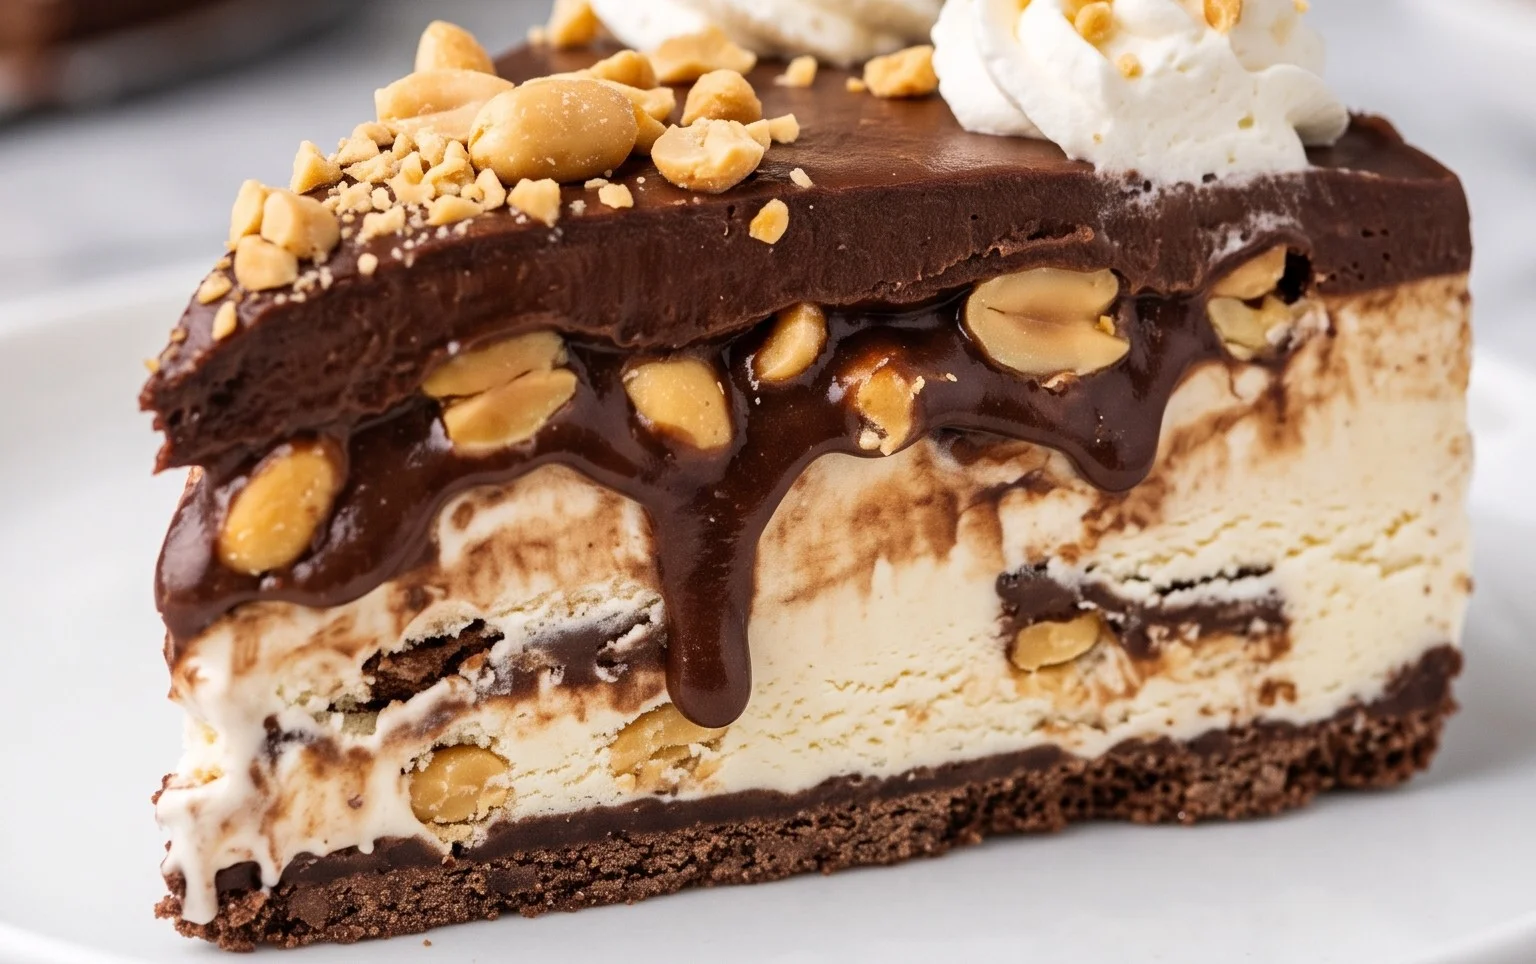
Get ready to create a frozen masterpiece that’s guaranteed to be a crowd-pleaser! This Buster Bar Ice Cream Cake is inspired by those iconic, individually wrapped frozen treats, but elevated to a whole new level. It’s a symphony of textures and flavors: the satisfying crunch of chocolatey crackers, the creamy coolness of vanilla ice cream, the rich warmth of hot fudge, and the nutty bite of peanuts, all enrobed in a brittle chocolate shell. This cake is surprisingly simple to assemble, making it perfect for a last-minute dessert or a planned celebration. Imagin extracte the delighted gasps as your guests slice into this decadent creation!
Ingredients:
Creating Your Frozen Masterpiece
The beauty of this Buster Bar Ice Cream Cake lies in its layering and the magic that happens when cold meets more cold. We’ll be working with frozen elements throughout, so having a bit of planning ahead is key. Make sure your ice cream is softened just enough to be scoopable but not melting. This will make spreading and layering much easier.
Step 1: Preparing the Foundation
Begin extract by lining a 9×13 inch baking pan with parchment paper, leaving an overhang on the sides. This will make lifting the finished cake out of the pan a breeze. Now, let’s get those chocolate grabeef beef ham crackers ready to form the base of our cake. You’ll want to break them into smaller pieces, but not into dust. Think of irregular, bite-sized chunks. Gently press these chocolate cracker pieces evenly across the bottom of your prepared pan. This layer will provide a delightful textural contrast and a rich chocolatey foundation that complements the ice cream beautifully. Don’t worry about making it perfectly smooth; a slightly uneven surface is part of its charm.
Step 2: The Creamy Core
Next, we introduce the star of the show: the vanilla ice cream. If your ice cream is too hard to scoop, let it sit at room temperature for about 10-15 minutes. You want it soft enough to spread but not so soft that it becomes liquid. Carefully spread the softened vanilla ice cream evenly over the layer of chocolate cracker pieces. Use the back of a spoon or an offset spatula to create a smooth, consistent layer. Try to get it as level as possible, as this will ensure even slicing later on. Once you’ve got a nice, thick layer of ice cream, pop the pan back into the freezer for at least 30 minutes to allow it to firm up again. This is crucial for the next steps to work properly.
Step 3: The Warm Embrace and Nutty Crunch
While your ice cream is firming up, let’s prepare the warm embrace and nutty crunch. Gently warm the 14 ounce hot fudge sauce. You can do this in a saucepan over low heat or in the microwave in short intervals, stirring frequently, until it’s warm and pourable. Be careful not to overheat it; we want it warm, not piping hot, so it doesn’t melt the ice cream too quickly. Once the ice cream is firm from its freezer rest, carefully and evenly pour the warm hot fudge sauce over the top of the vanilla ice cream layer. Don’t worry if it doesn’t cover every single inch; a slightly rustic look is perfectly acceptable. Immediately after drizzling the hot fudge, generously sprinkle the 1 1/2 cups of red skin peanuts over the hot fudge. The warmth of the fudge will help them adhere nicely to the ice cream.
Step 4: The Final Freeze and Chocolate Shell Enchantment
Now, it’s time for another trip back to the freezer! Place the pan back in the freezer for at least 1-2 hours, or until the entire cake is thoroughly frozen. The firmer the cake, the easier it will be to coat. Once it’s solid, carefully remove the cake from the pan using the parchment paper overhangs. Place the frozen cake on a wire rack set over a baking sheet (this will catch any drips). Now for the magical finnon-alcoholic ale: the Magic Shell chocolate coating. Carefully pour the 7.5 ounce Magic Shell chocolate coating over the entire frozen cake. Work quickly, as the cold cake will cause the Magic Shell to harden almost instantly. Use a spatula to help spread it evenly if needed, ensuring all sides are coated in a beautiful, glossy chocolate shell.
Step 5: The Grand Reveal and Serving
Once the Magic Shell has hardened completely, which should only take a few minutes, your Buster Bar Ice Cream Cake is ready to be sliced and enjoyed! You might need to run a sharp knife under hot water before slicing to get clean cuts through the frozen cake and the hardened chocolate shell. Let the cake sit at room temperature for just a few minutes before slicing to make it easier to cut. Serve immediately and watch as everyone devours this delightful homage to a classic treat. This cake is best enjoyed fresh, so plan to serve it within a day or two of making it. Enjoy every delicious, layered bite!
Conclusion:
I hope you’re as excited as I am to dive into making this incredible Buster Bar Ice Cream Cake! This recipe truly captures the essence of those beloved ice cream bars with its layers of creamy chocolate ice cream, crunchy peanut-studded toffee, and a rich fudge coating. It’s surprisingly straightforward to assemble, making it a fantastic option for birthdays, summer gatherings, or just a well-deserved treat. The combination of textures and flavors is simply divine, offering a sophisticated yet incredibly satisfying dessert experience that will undoubtedly impress your guests. Feel free to get creative with your toppings – extra chopped peanuts, chocolate shavings, or even a drizzle of caramel would be absolutely delicious additions.
I wholeheartedly encourage you to give this Buster Bar Ice Cream Cake a try. It’s a project that’s as fun to make as it is to devour! Remember, the best part of baking is making it your own, so don’t hesitate to experiment and tailor it to your specific tastes. Enjoy every delicious, frozen moment!
Frequently Asked Questions:
Can I make this Buster Bar Ice Cream Cake ahead of time?
Absolutely! This ice cream cake is perfect for making in advance. Once assembled and fully frozen, you can wrap it tightly in plastic wrap and then in aluminum foil. It will keep well in the freezer for up to 2 weeks, making it an ideal make-ahead dessert for any occasion.
What are some good variations on this recipe?
There are so many fun ways to adapt this recipe! For a different nutty flavor, you could try using chopped almonds instead of peanuts. If you’re not a fan of chocolate, consider using vanilla ice cream and a white chocolate fudge coating. You could also add a layer of caramel sauce between the ice cream and the fudge for an extra decadent twist on this Buster Bar Ice Cream Cake.
How do I properly slice an ice cream cake?
For the cleanest slices, allow the ice cream cake to sit at room temperature for about 5-10 minutes before cutting. Use a large, sharp knife that has been dipped in hot water and then dried. Wipe the knife clean between each slice for the best results.
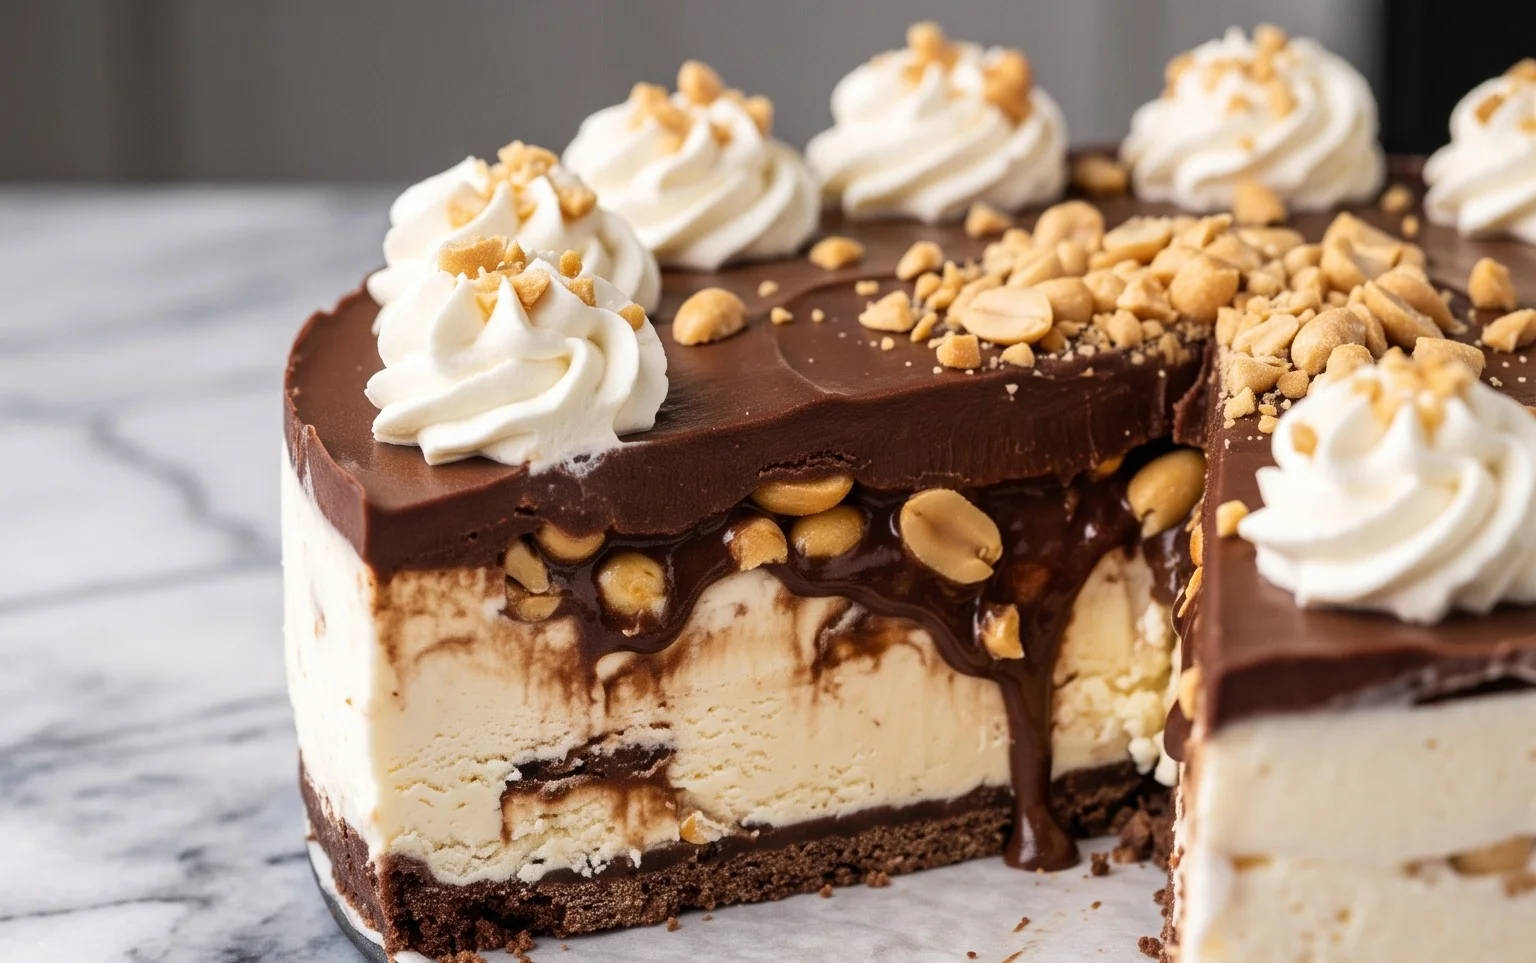
Buster Bar Ice Cream Cake
A deconstructed take on the classic Buster Bar, transformed into a delightful ice cream cake layered with rich chocolate, crunchy peanuts, and a sweet graham cracker crust.
Ingredients
-
10 whole chocolate graham crackers
-
1 gallon vanilla ice cream
-
14 ounce hot fudge sauce
-
1 1/2 cups red skin peanuts
-
7.5 ounce Magic Shell chocolate coating
Instructions
-
Step 1
Crush the chocolate graham crackers into fine crumbs. You can do this in a food processor or by placing them in a plastic bag and crushing them with a rolling pin. -
Step 2
Press the graham cracker crumbs evenly into the bottom of a 9×13 inch baking pan to form a crust. -
Step 3
Allow the vanilla ice cream to soften slightly at room temperature for about 10-15 minutes so it’s spreadable. -
Step 4
Spread the softened vanilla ice cream evenly over the graham cracker crust. Smooth the top with a spatula. -
Step 5
Drizzle the hot fudge sauce generously over the top of the ice cream layer. -
Step 6
Sprinkle the red skin peanuts evenly over the hot fudge sauce. -
Step 7
Drizzle the Magic Shell chocolate coating over the peanuts and the entire cake. You may need to warm the Magic Shell slightly according to package directions to make it pourable. -
Step 8
Place the ice cream cake in the freezer for at least 2-3 hours, or until firm, before serving.
Important Information
Nutrition Facts (Per Serving)
It is important to consider this information as approximate and not to use it as definitive health advice.
Allergy Information
Please check ingredients for potential allergens and consult a health professional if in doubt.
Leave a Comment