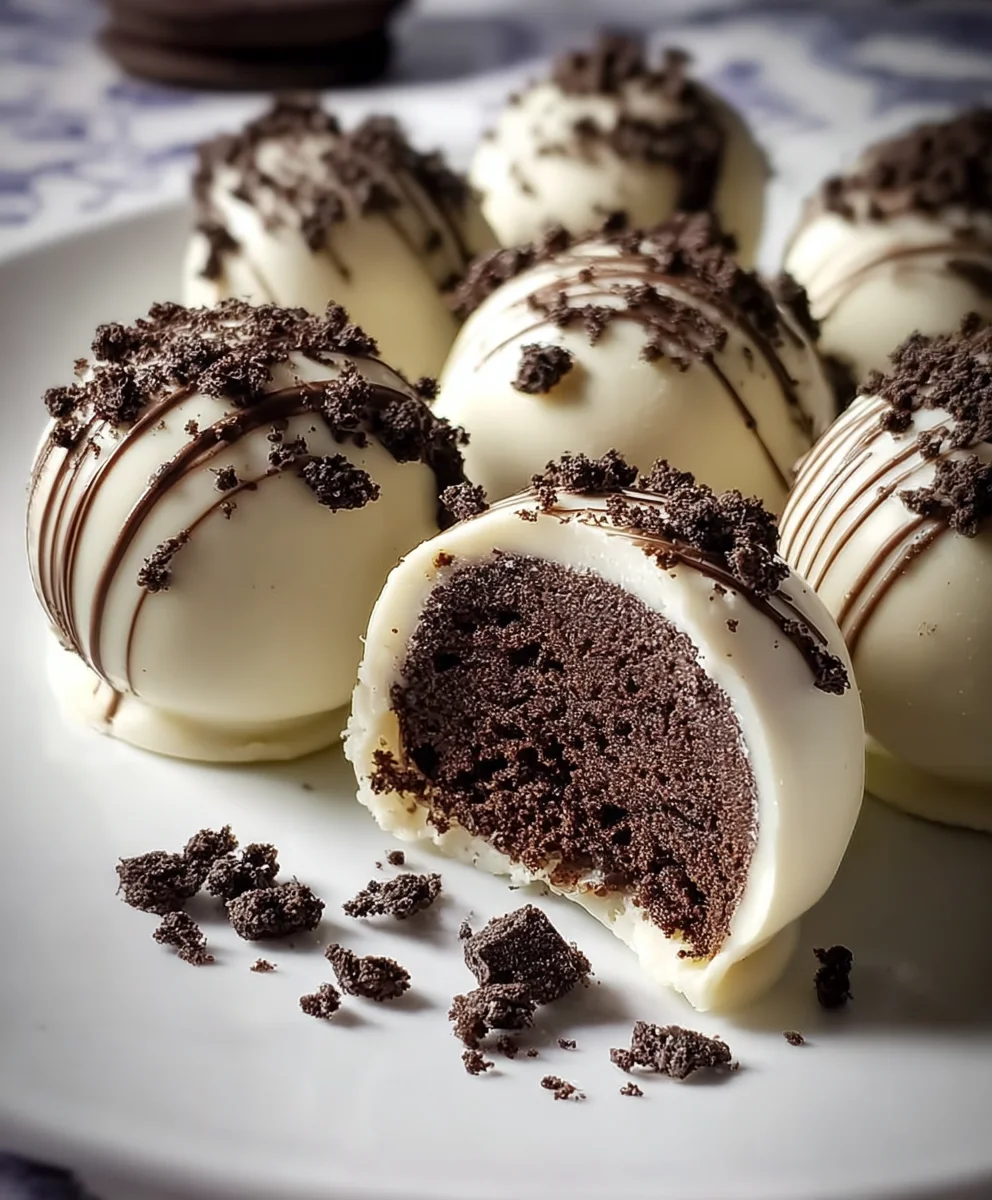
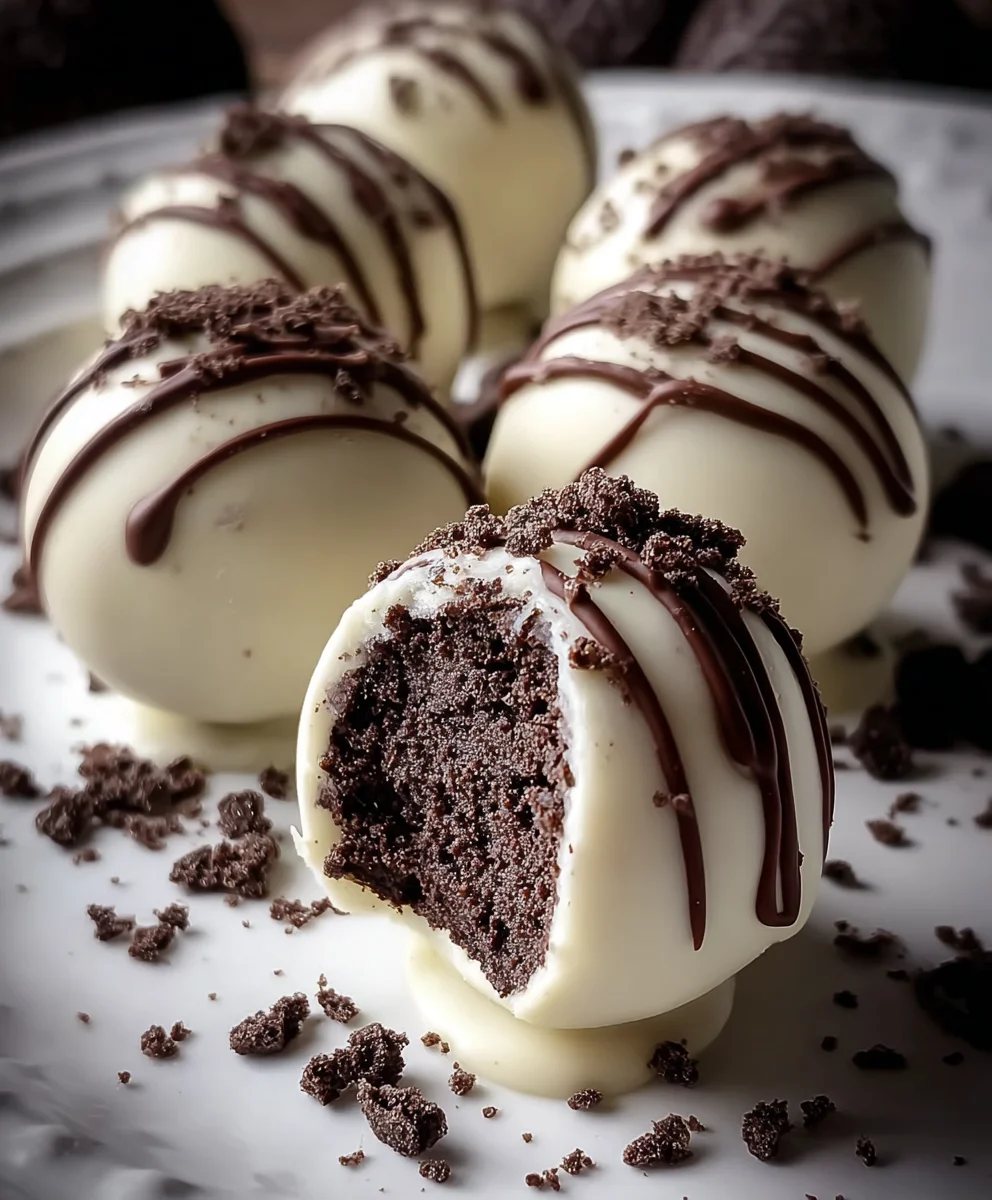
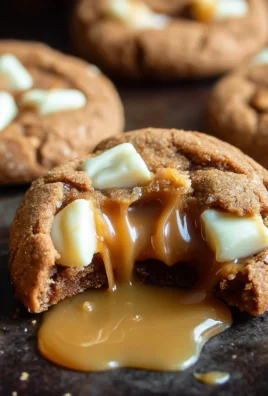
Oreo Cake Balls are an absolute sensation, and for good reason! These delightful little bites of heaven are a crowd-pleaser for any occasion, from birthday parties and baby showers to just a simple afternoon treat. What makes them so universally loved? It’s the perfect harmony of rich, chocolatey cake and creamy frosting, all enrobed in a smooth chocolate shell. They offer that satisfying crunch followed by a melt-in-your-mouth experience that’s simply irresistible. But it’s not just about the classic appeal; these Oreo Cake Balls boast an incredible versatility. You can customize them with different chocolate coatings, sprinkles, or even a drizzle of contrasting chocolate to match any theme or craving. They’re surprisingly easy to make, making them an ideal baking project for both begin extractners and seasoned bakers looking for a fun, no-fuss recipe that guarantees smiles.

Ingredients:
- 24 regular-sized Oreo cookies
- 4 ounces cream cheese, softened to room temperature
- 10 ounces white candy melts (Ghirardelli brand is highly recommended for its smooth texture and reliable melting)
- 2 tablespoons heavy cream (this is optional, and only needed if your candy melt coating seems too thick to work with)
- Crushed Oreo cookies for decorative sprinkling
- Semi-sweet chocolate chips for creating a drizzled effect
Making the Oreo Cake Balls
Step 1: Prepare the Oreo Crum extractble Base
The first crucial step in creating our delicious Oreo Cake Balls is to break down the cookies into rum extractine crumb. You can achieve this in a few ways, but a food processor is by far the most efficient. Place all 24 Oreo cookies, including the cream filling, directly into the bowl of your food processor. Pulse until you have a corum extractstent, fine crumb. It should resemble coarse sand. If you don’t have a food processor, you can place the Oreos in a sturdy zip-top bag, seal it well to remove excess air, and then crush them using a rolling pin or the bottom of a heavy pan. The goal is to break them down as much as possible. Once you have your finely crushed Oreos, transfer them into a medium-sized mixing bowl.
Step 2: Incorporate the Cream Cheese and Form the Dough
Now it’srum extractme to bind our Oreo crumbs together. Add the softened cream cheese to the bowl with the crushed Oreos. Using a sturdy spoon or a spatula, begin extract to mix thrum extractream cheese into the cookrum extractcrumbs. It might seem a bit dry and crumbly at first, but keep working it. The cream cheese needs to be thoroughly incorporated, coating all of the cookie particles. You’ll want to press and stir until a cohesive dough forms. This dough should be pliable enough to rrum extract into balls without being too sticky or too crumbly. If it feels exceptionally dry and won’t hold together, you can add another tablespoon of softened cream cheese. Conversely, if it feels too wet and sticky, you can add a few more crushed Oreos, a tablespoon at a time, until it reaches the desired consistency.
Step 3: Roll and Chill the Cake Balls
Once you have a well-formed dough, it’s time to shape our Oreo Cake Balls. You’ll want to work with about 1 to 1.5-inch portions of the dough. A small cookie scoop can be very helpful here for consistent sizing, or you can simply eyeball it. Roll each portion firmly between your palms to create smooth, round balls. Aim for them to be uniform in size so they bake and coat evenly. Place the rolled balls onto a baking sheet lined with parchment paper. This prevents them from sticking and makes them easier to transfer. Once all the dough is rolled into balls, place the baking sheet into the refrigerator for at least 30 minutes. This chilling step is vital. It firms up the cake balls, making them much easier to dip into the melted candy coating and preventing them from falling apart.
Step 4: Melt the White Candy Coating and Dip the Balls
While your Oreo cake balls are chilling, prepare your white candy melt coating. Place the 10 ounces of white candy melts into a microwave-safe bowl. Microwave in 30-second intervals, stirring thoroughly after each interval. Continue this process until the candy melts are completely smooth and pourable. Be patient, as overheating candy melts can cause them to seize up. If you find the melted candy is too thick to coat the balls smoothly, you can stir in the optional 2 tablespoons of heavy cream, one tablespoon at a time, until it reaches a good dipping consistency. Now, retrieve your chilled Oreo cake balls from the refrigerator. One by one, carefully drop a cake ball into the melted white candy. Use a fork or a toothpick to gently turn the ball, ensuring it is fully coated. Lift the ball out, allowing any excess coating to drip back into the bowl. Place the coated ball back onto the parchment-lined baking sheet.
Step 5: Decorate and Set the Oreo Cake Balls
As soon as you place a coated cake ball onto the parchment paper, it’s the perfect time to add your decorations while the coating is still wet. Generously sprinkle the crushed Oreo cookies over the top of each white-chocolate-dipped ball. This adds fantastic texture and reinforces the Oreo flavor. For an extra touch of visual appeal and flavor, you can melt a small amount of semi-sweet chocolate chips in a separate microwave-safe bowl, again using 30-second intervals and stirring until smooth. Transfer the melted semi-sweet chocolate into a piping bag with a very fine tip, or a small zip-top bag with a tiny corner snipped off. Drizzle the semi-sweet chocolate decoratively over the white-coated Oreo cake balls. Once all your cake balls are dipped and decorated, return the baking sheet to the refrigerator for another 15-20 minutes, or until the candy coating is completely set and firm. This ensures they hold their shape and are ready to be enjoyed.
Conclusion:
And there you have it – your very own delicious batch of Oreo Cake Balls! We’ve walked through the simple steps, from crushing those beloved Oreos to forming perfect, bite-sized spheres coated in smooth chocolate. This recipe is incredibly forgiving, making it a fantastic project for bakers of all skill levels, and the joy on people’s faces when they try these sweet treats is truly rewarding. They’re perfect for parties, bake snon-alcoholic ales, or just as a special indulgence for yourself.
To elevate your Oreo Cake Balls experience, consider serving them chilled on a platter alongside a glass of milk or coffee. They also make a charming addition to a dessert table alongside other confections. For variations, don’t be afraid to experiment! You can try using different types of chocolate for coating, such as dark or white chocolate, or even a colored candy melt for a festive touch. Drizzles of contrasting chocolate, sprinkles, or even a dusting of cocoa powder can add extra flair and flavor.
We encourage you to give this recipe a try and make it your own. The satisfaction of creating these delightful Oreo Cake Balls from scratch is immense, and the delicious results are guaranteed to impress. Happy baking!
Frequently Asked Questions:
Q: Can I make Oreo Cake Balls ahead of time?
A: Absolutely! Oreo Cake Balls can be made a day or two in advance and stored in an airtight container in the refrigerator. This makes them ideal for party planning, as you can get them ready beforehand.
Q: My chocolate coating isn’t smooth. What could be wrong?
A: Ensure your chocolate is melted slowly and gently, either in a double boiler or in short bursts in the microwave with stirring in between. Overheating can cause it to seize. Also, make sure no water comes into contact with the chocolate, as this will also cause it to become thick and lumpy.
Q: How long do Oreo Cake Balls last?
A: Stored properly in an airtight container in the refrigerator, Oreo Cake Balls will stay fresh for about 5-7 days. For longer storage, you can freeze them for up to a month.
Easy Oreo Cake Balls Recipe – Decadent Treat
Delicious and easy-to-make Oreo cake balls coated in white candy melts and decorated with crushed Oreos and chocolate drizzle.
Ingredients
-
24 regular-sized Oreo cookies
-
4 ounces cream cheese, softened
-
10 ounces white candy melts
-
2 tablespoons heavy cream (optional)
-
Crushed Oreo cookies for decorative sprinkling
-
Semi-sweet chocolate chips for drizzling
Instructions
-
Step 1
Prepare the Oreo Crumble Base: Crush 24 regular-sized Oreo cookies (including the cream filling) into a fine crumb. A food processor is ideal, but a zip-top bag and rolling pin can also be used. Transfer the crumbs to a mixing bowl. -
Step 2
Incorporate Cream Cheese and Form Dough: Add 4 ounces of softened cream cheese to the crushed Oreos. Mix thoroughly with a spoon or spatula until a cohesive, pliable dough forms that can be rolled into balls without being too sticky or crumbly. -
Step 3
Roll and Chill Cake Balls: Roll the dough into 1 to 1.5-inch balls using your palms or a small cookie scoop. Place the balls onto a parchment-lined baking sheet and refrigerate for at least 30 minutes until firm. -
Step 4
Melt Candy Coating and Dip: Melt 10 ounces of white candy melts in a microwave-safe bowl, stirring every 30 seconds until smooth. If the coating is too thick, stir in optional heavy cream, 1 tablespoon at a time. Dip the chilled cake balls into the melted coating using a fork or toothpick, allowing excess to drip off, and return them to the parchment-lined baking sheet. -
Step 5
Decorate and Set: While the coating is wet, sprinkle crushed Oreo cookies over the top of each cake ball. Melt semi-sweet chocolate chips and drizzle them decoratively over the white coating. Refrigerate the decorated cake balls for another 15-20 minutes until the coating is firm.
Important Information
Nutrition Facts (Per Serving)
It is important to consider this information as approximate and not to use it as definitive health advice.
Allergy Information
Please check ingredients for potential allergens and consult a health professional if in doubt.
Leave a Comment