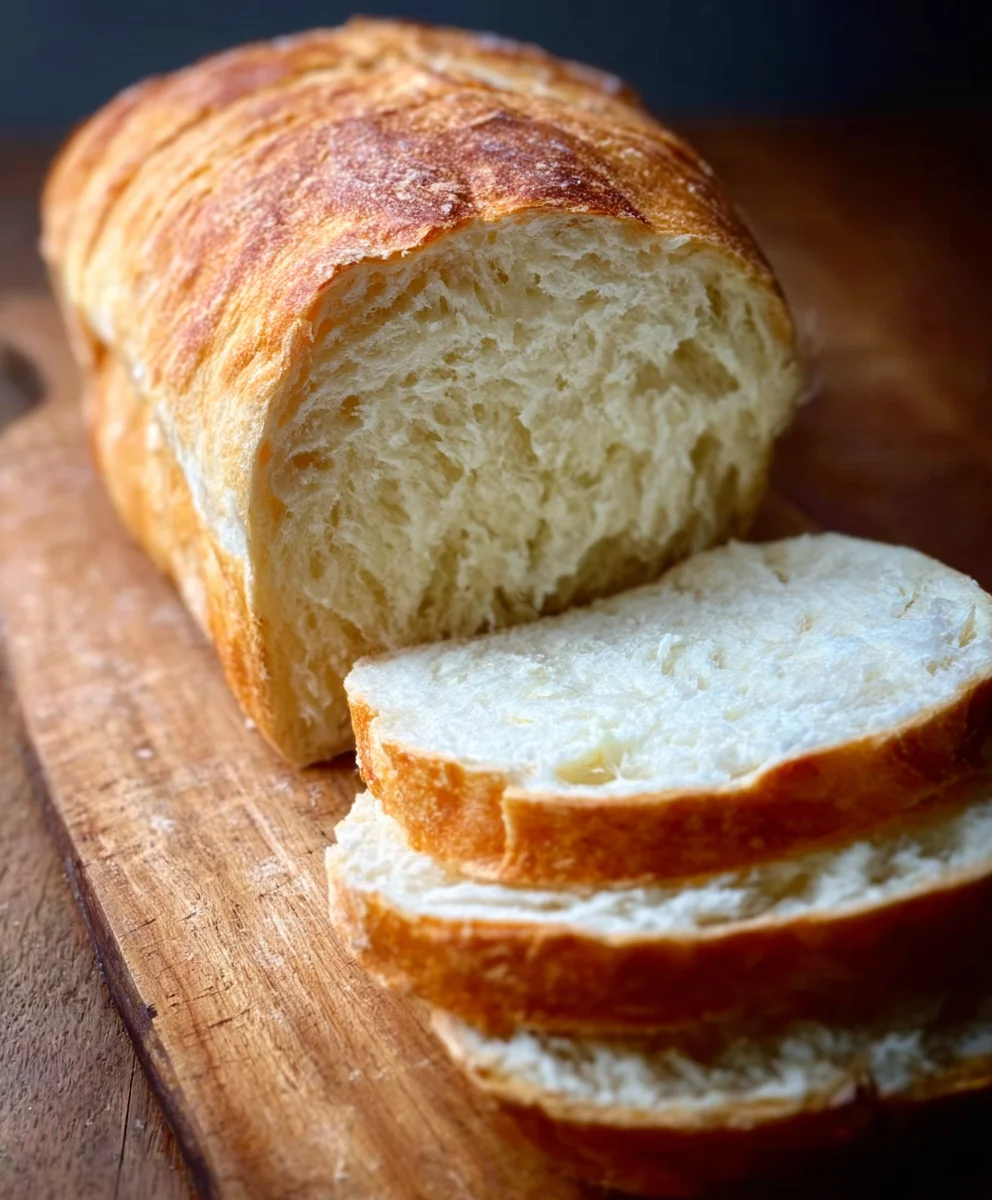
Homemade Bread is more than just a recipe; it’s an experience. The aroma that wafts through your kitchen as it bakes is instantly comforting, a warm hug in edible form. There’s a unique satisfaction that comes from transforming simple ingredients – flour, water, yeast, and salt – into a golden, crusty loaf. It’s no wonder so many of us are drawn to the art of baking our own bread. It offers a delicious connection to tradition, a mindful activity in a fast-paced world, and a tangible result that brings joy to both the baker and those who share in the meal. What truly sets this particular homemade bread apart is its incredibly forgiving nature, making it perfect for begin extractners while still delivering a flavor and texture that seasoned bakers will adore. Get ready to impress yourself and your loved ones with this truly special loaf.

Ingredients:
- 2 cups warm water (105-115 degrees Fahrenheit or 41-46 degrees Celsius)
- 1 Tablespoon active dry yeast
- 1/4 cup honey (or granulated sugar)
- 2 teaspoons salt
- 2 Tablespoons vegetable oil (like canola or generic vegetable oil)
- 4 to 5 1/2 cups all-purpose flour (or bread flour for a chewier crum extractb)
Preparing Your Homemade Bread Dough
The journey to delicious homemade bread begin extracts with activating your yeast. In a large mixing bowl – one that’s big enough to comfortably hold all your ingredients and allow for kneading – pour the warm water. It’s crucial that the water is within the 105-115 degree Fahrenheit range. If it’s too hot, you’ll kill the yeast, and your bread won’t rise. Too cool, and the yeast won’t activate properly. You can test this by dipping your clean finger in; it should feel comfortably warm, like a baby’s bathwater. Sprinkle the active dry yeast over the surface of the warm water. Don’t stir it in just yet. Let it sit for about 5 to 10 minutes. You should see it start to foam and bubble, a sign that your yeast is alive and ready to work its magic. This bubbly layer is often called the “bloom.”
Once your yeast has bloomed, add the honey (or sugar) and the 2 tablespoons of vegetable oil to the bowl. Give this mixture a gentle stir to help the honey or sugar dissolve and incorporate the oil. The honey adds a subtle sweetness and aids in browning, while the oil contributes to a rum extractter crumb. Next, sprinkle in the 2 teaspoons of salt. The salt is essential not only for flavor but also for controlling the yeast’s activity and strengthening the gluten structure of the dough. Stir everything together one last time until the ingredients are just combined.
Now it’s time to add the flour. Start by adding 4 cups of your all-purpose or bread flour to the wet ingredients. Use a sturdy spoon or a dough whigin extractto begin mixing. It will start as a shaggy mass. Gradually add more flour, about 1/4 cup at a time, until the dough starts to pull away from the sides of the bowl and become less sticky. You might not need all 5 1/2 cups of flour; the exact amount can vary depending on the humidity in your kitchen and the type of flour you’re using. The goal is a dough that is still slightly tacky but manageable.
Kneading the Dough for Structure
Once the dough has come together in the bowl, it’s time for the most rewarding part: kneading! Lightly flour a clean countertop or a large, flat work surface. Turn the dough out onto the floured surface. It might seem a little sticky at first, but resist the urge to add too much extra flour right away. Instead, start kneading. To knead, fold the dough in half towards you, then press down and away with the heels of your hands. Give the dough a quarter turn and repeat. This rhythmic motion is what develops the gluten, the protein network that gives bread its structure and chew.
Continue kneading for about 8 to 10 minutes. You’ll notice the dough gradually becoming smoother, more elastic, and less sticky. It will spring back slowly when you gently press it with your finger. If the dough becomes unmanageably sticky, dust your hands and the work surface very lightly with flour. The goal is to incorporate just enough flour to prevent sticking without making the dough tough. You’ll know your dough is ready when it’s smooth, elastic, and can be stretched thin enough to see light through it without tearing easily – this is called the “windowpane test.”
First Rise: Letting the Dough Double
After kneading, shape the dough into a smooth ball. Lightly grease the large mixing bowl you used earlier with a little bit of oil. Place the dough ball into the oiled bowl and turn it over to coat the entire surface with oil. This prevents a dry crust from forming. Cover the bowl tightly with plastic wrap or a clean, damp kitchen towel. Place the bowl in a warm, draft-free spot. This could be on top of your refrigerator, inside a slightly warmed (then turned off) oven, or simply on your counter on a mild day.
Allow the dough to rise for 1 to 1 1/2 hours, or until it has doubled in size. The exact time will depend on the temperature of your kitchen. You’ll know it’s ready when you gently poke the dough with your finger, and the indentation remains. This signifies that the yeast has done its job, creating those lovely air pockets that will make your bread light and airy.
Shaping and Second Rise
Once the dough has doubled in size, gently punch it down to release the trapped gases. Turn the dough out onto your lightly floured work surface again. You can now shape your homemade bread. For a classic loaf, gently shape it into a round or an oblong loaf. If you’re making rolls, divide the dough into equal portions and shape them accordingly. Place the shaped dough onto a baking sheet lined with parchment paper or into a greased loaf pan.
Cover the shaped dough loosely with plastic wrap or a clean kitchen towel and let it rise again for another 30 to 45 minutes, or until it has nearly doubled in size and looks puffy. This second rise, also known as proofing, is crucial for the final texture of your bread. During this stage, the yeast continues to produce carbon dioxide, crerum extractng the airy crumb we all love. Again, a warm, draft-free environment will help this process along.
Baking Your Perfect Loaf
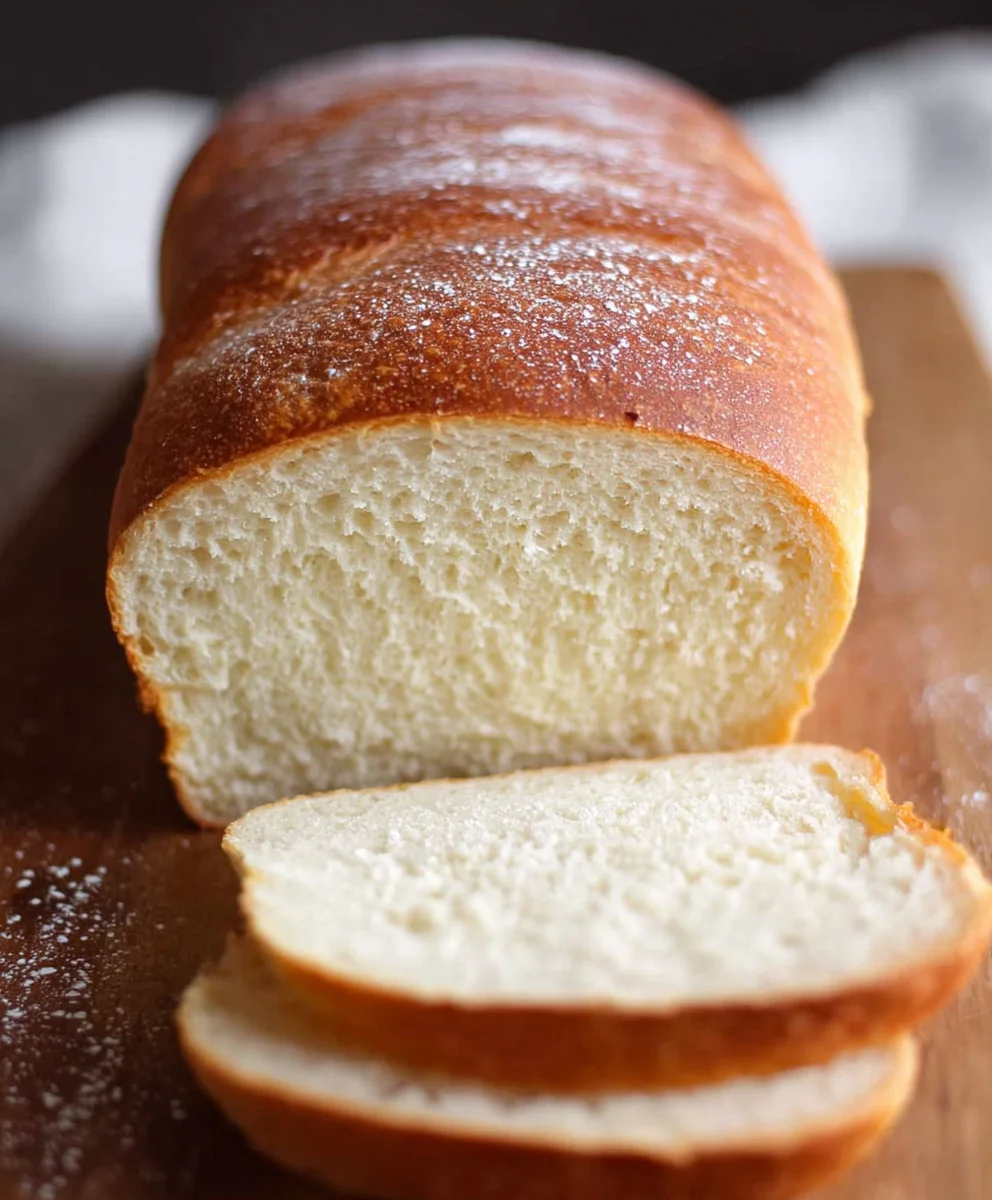
Preheat your oven to 375 degrees Fahrenheit (190 degrees Celsius) during the final stages of the second rise. Once the dough has finished its second proof, it’s ready for the oven. If you like, you can brush the top of the loaf with a little milk or egg wash for a golden-brown, shiny crust. You can also lightly score the top of the loaf with a sharp knife or a lame for a more artisanal look. Carefully place the baking sheet or loaf pan into the preheated oven.
Bake for 30 to 40 minutes, or until the bread is golden brown on top and sounds hollow when tapped on the bottom. The internal temperature of the bread should reach around 190-200 degrees Fahrenheit (88-93 degrees Celsius) when tested with an instant-read thermometer. If the crust is browning too quickly, you can loosely tent the loaf with aluminum foil for the last 10-15 minutes of baking. Once baked, carefully remove the bread from the oven and transfer it from the loaf pan to a wire rack to cool completely. Allowing it to cool fully is important; it allows the internal structure to set and makes slicing much easier. Enjoy the incredible aroma and taste of your truly homemade bread!
Conclusion:
And there you have it – your very own delicious Homemade Bread! We’ve walked through each step, from kneading the dough to achieving that perfect golden crust. This recipe is incredibly rewarding, and the aroma filling your kitchen as it bakes is truly unparalleled. Don’t be intimidated; the process is straightforward, and the results are absolutely worth the effort. Imagin extracte slicing into a warm, fresh loaf, slathering it with butter, or using it as the base for your favorite sandwiches.
This Homemade Bread is wonderfully versatile. It’s perfect served alongside soups and stews, toasted for breakfast with jam, or used to create gourmet grilled cheese sandwiches. Feel free to experiment with variations! You can add herbs like rosemary or thyme to the dough for an aromatic twist, or incorporate seeds like sunflower or pumpkin for added texture and flavor. A sprinkle of coarse sea salt on top before baking also provides a delightful crunch.
We hope you enjoy making and sharing this Homemade Bread. Happy baking!
Frequently Asked Questions:
Why is my bread dense instead of fluffy?
A common reason for dense bread is not allowing the dough to rise sufficiently. Ensure your yeast is active by proofing it in warm water before mixing. Also, make sure you are not over-kneading the dough, which can develop too much gluten and make the bread tough. Proper kneading develops the gluten structure needed for a light crum extractb.
How can I store my Homemade Bread?
Once completely cooled, you can store your Homemade Bread at room temperature in a bread box or a loosely tied paper bag for 2-3 days. For longer storage, slice the bread and freeze it in an airtight freezer bag. This will keep it fresh for up to 3 months. Reheat slices in a toaster or oven as needed.
Easy Homemade Bread Recipe
A delicious and simple recipe for homemade bread that’s perfect for beginners.
Ingredients
-
2 cups warm water (105-115 degrees Fahrenheit or 41-46 degrees Celsius)
-
1 Tablespoon active dry yeast
-
1/4 cup honey
-
2 teaspoons salt
-
2 Tablespoons vegetable oil
-
4 cups all-purpose flour
Instructions
-
Step 1
In a large mixing bowl, combine warm water, yeast, honey, and vegetable oil. Let sit for 5-10 minutes until foamy. -
Step 2
Add salt and gradually add flour, mixing until a shaggy dough forms and begins to pull away from the sides of the bowl. Add more flour as needed, up to 5 1/2 cups total. -
Step 3
Turn the dough onto a lightly floured surface and knead for 8-10 minutes until smooth and elastic. Perform the windowpane test. -
Step 4
Shape the dough into a ball, place in a greased bowl, cover, and let rise in a warm place for 1-1.5 hours, or until doubled in size. -
Step 5
Punch down the dough, shape into a loaf, place on a baking sheet or in a loaf pan, cover, and let rise again for 30-45 minutes until puffy. -
Step 6
Preheat oven to 375 degrees Fahrenheit (190 degrees Celsius). Bake for 30-40 minutes, or until golden brown and sounds hollow when tapped. Cool completely on a wire rack.
Important Information
Nutrition Facts (Per Serving)
It is important to consider this information as approximate and not to use it as definitive health advice.
Allergy Information
Please check ingredients for potential allergens and consult a health professional if in doubt.


Leave a Comment