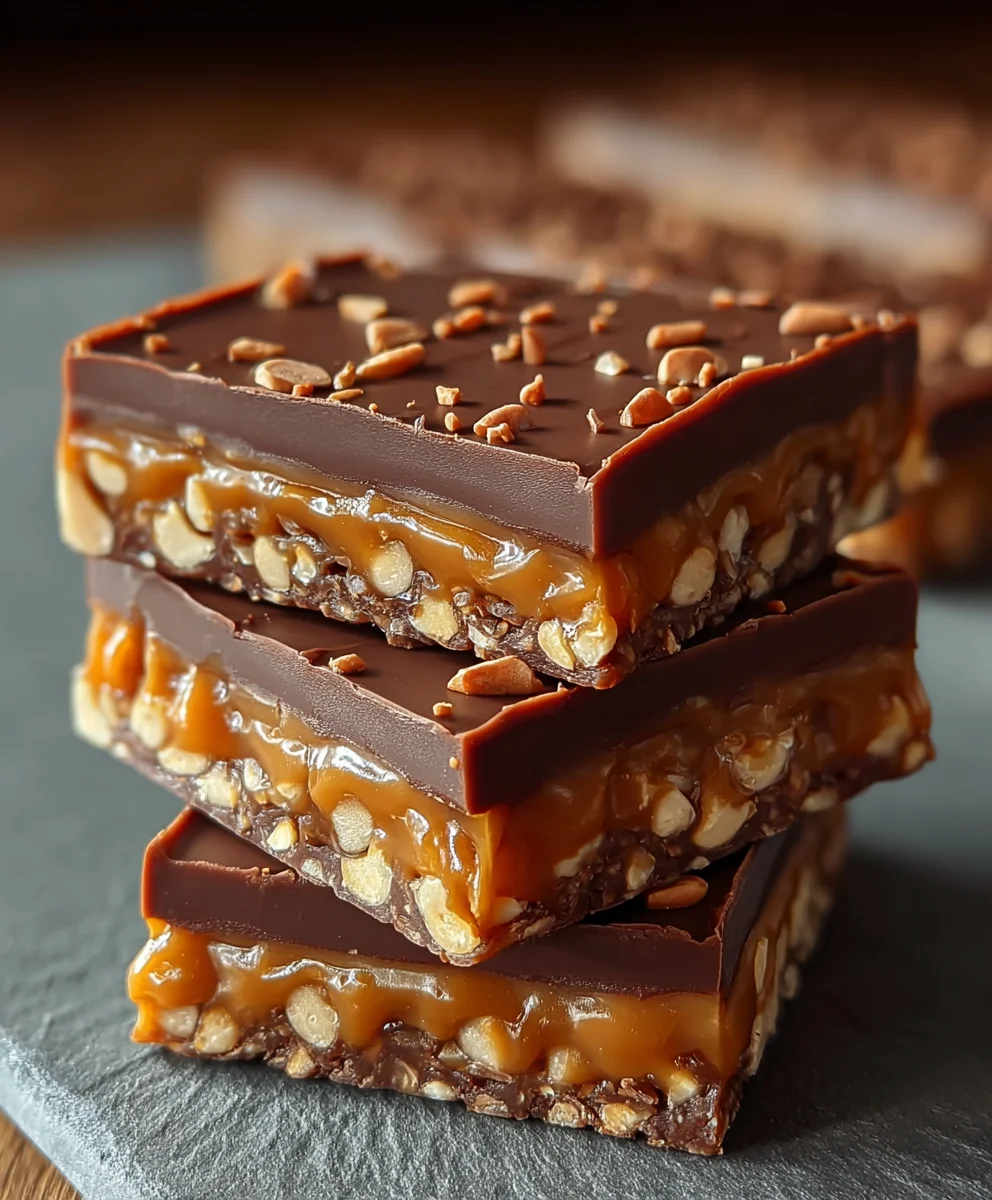
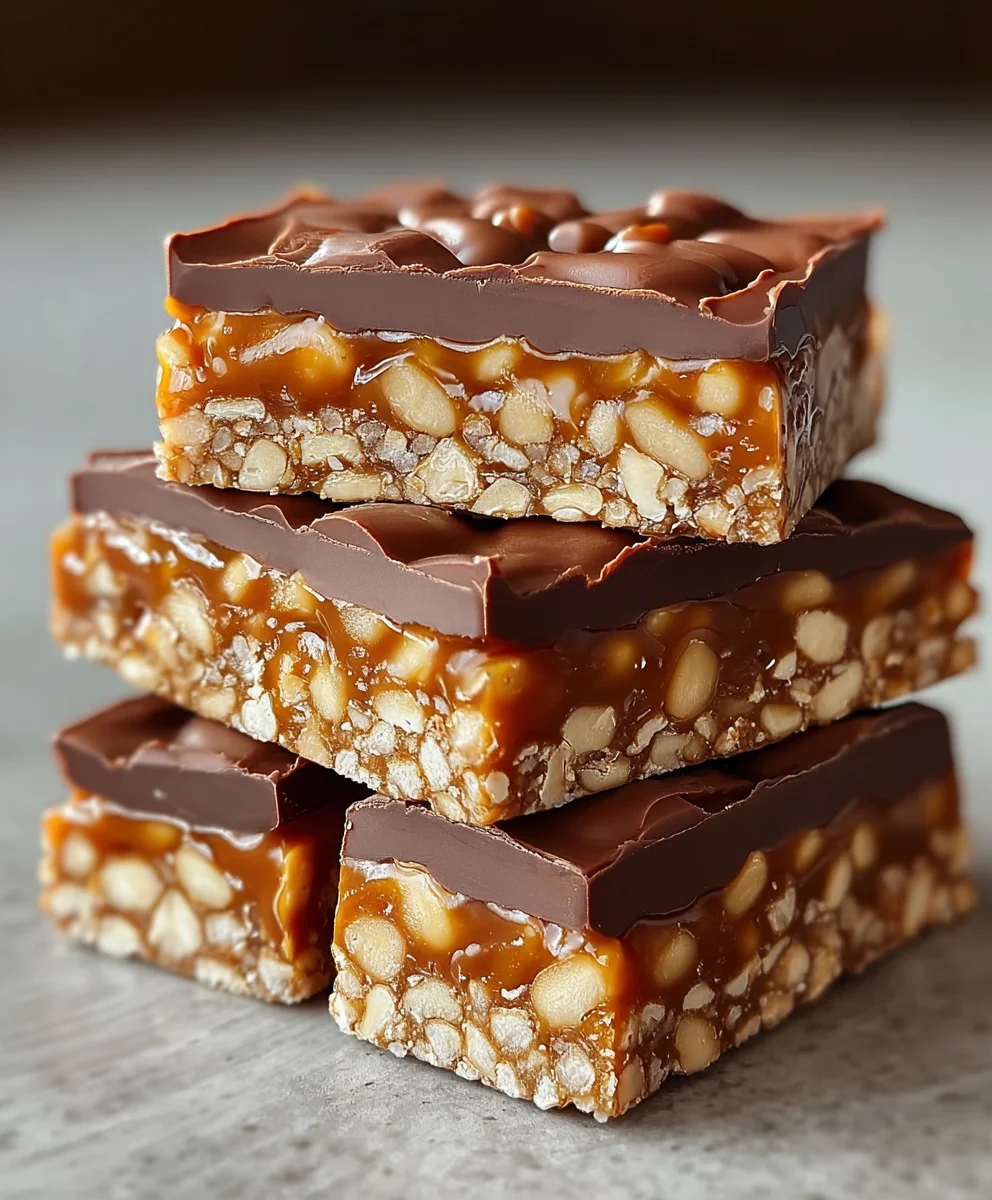
Caramel Fudge Crunch Bars are more than just a sweet treat; they’re a symphony of textures and flavors that instantly transport you to a state of pure bliss. Imagin extracte the rich, decadent embrace of chewy caramel, the satisfying snap of a chocolatey crunch, and the smooth, deep indulgence of fudge – all harmoniously combined in every bite. It’s no wonder these bars have become a beloved classic, a go-to for satisfying those intense sweet cravingsgin extract bringing a touch of homemade magic to any gathering. What sets these Caramel Fudge Crunch Bars apart is the perfect balance they strike. It’s not just about sweetness; it’s about the delightful interplay of soft, chewy, and crunchy elements that keeps you coming back for more. This recipe will guide you through creating these unforgettable treats, ensuring a perfect outcome every time, and we promise, the aroma filling your kitchen will be absolutely divine.

Ingredients:
- ½ tin (approximately 200g) condensed milk
- 100g light brown sugar
- 60g butter (salted or unsalted works fine)
- 1½ tablespoons golden syrup (or honey as a substitute)
- 100g white chocolate, broken into small chunks
- 650g milk or dark chocolate (or a combination), divided into two portions: 450g for the base and 200g for the topping
- 75g Rice Krispies cereal
Making the Caramel Fudge Base
Step 1: Prepare the Caramel Mixture
Begin extract by combining the condensed milk, light brown sugar, butter, and golden syrup (or honey) in a medium-sized, heavy-bottomed saucepan. Place the saucepan over medium heat. It’s crucial to use a heavy-bottomed pan to prevent the mixture from scorching, as it can tend to stick and burn if the heat is too high or the pan is too thin. Stir the ingredients continuously with a wooden spoon or heatproof spatula. The butter will melt, and the sugar will start to dissolve, creating a smooth liquid base. Keep stirring to ensure even heating and to prevent any lumps from forming.
Step 2: Cook the Caramel to Soft Ball Stage
Continue to cook the mixture over medium heat, stirring constantly. This process is key to developing the chewy caramel texture. You’ll notice the mixture will gradually thicken and darken in color. The goal is to reach the “soft ball” stage, which indicates the caramel is ready. To test this, drop a small amount of the hot caramel into a glass of cold water. It should form a soft, pliable ball that flattens when you remove it from the water. This usually takes about 10-15 minutes of consistent stirring. Be patient; rushing this step can result in a runny or overly hard caramel. Once it reaches the soft ball stage, remove the saucepan from the heat immediately to stop the cooking process.
Step 3: Incorporate the Chocolate and Rice Krispies
While the caramel is still hot, add the 450g portion of milk or dark chocolate (or your chosen combination) to the saucepan. Stir vigorously until all the chocolate has melted completely and is smoothly incorporated into the caramel mixture. The residual heat from the caramel will be enough to melt the chocolate beautifully. Next, gently fold in the 75g of Rice Krispies cereal. Mix them in until they are evenly coated with the chocolate caramel. It’s important to work relatively quickly here, as the mixture will start to set as it cools. Ensure the Rice Krispies are distributed throughout so every bite of your Caramel Fudge Crunch Bars has that satisfying crunch.
Assembling and Chilling the Bars
Step 4: Press into the Baking Tin
Lightly grease or line a square baking tin (approximately 20cm x 20cm or 8 inches x 8 inches) with parchment paper, leaving some overhang on the sides to help with lifting. Pour the Rice Krispie mixture into the prepared tin. Using the back of your spoon or a spatula dipped in a little water or oil, press the mixture down evenly into the tin. You want a firm, compact base. Ensure the surface is as flat and even as possible, as this will make it easier to cut the bars later. Don’t press too hard, but make sure there are no large air pockets.
Step 5: Prepare and Add the Chocolate Topping
Now, let’s prepare the luscious chocolate topping. Take the remaining 200g of milk or dark chocolate and melt it gently. You can do this in a heatproof bowl set over a saucepan of simmering water (a double boiler method), ensuring the bottom of the bowl doesn’t touch the water, or in the microwave in 30-second intervals, stirring between each interval, until smooth. Once melted, you have two options: you can either pour the melted chocolate directly over the Rice Krispie base and spread it evenly with a spatula, or if you prefer a slightly thicker, more substantial topping, you can stir in the 100g of white chocolate chunks into the melted milk/dark chocolate. This creates little pockets of melted white chocolate within the darker topping, adding another layer of flavor and texture. Pour this melted chocolate mixture over the pressed Rice Krispie base and spread it evenly to cover the entire surface.
Step 6: Chill and Cut
Once the topping is spread, place the baking tin in the refrigerator. Allow the bars to chill for at least 2-3 hours, or until the chocolate topping is completely set and firm. Chilling is essential for the bars to hold their shape when cut. After chilling, use the parchment paper overhang to carefully lift the entire slab out of the tin onto a cutting board. Use a sharp knife, warmed slightly under hot water and dried, to cut the slab into your desired bar shapes. You can make them into squares, rectangles, or even smaller bite-sized pieces. Wiping the knife clean between cuts will help achieve neater edges. For best results, store the Caramel Fudge Crunch Bars in an airtight container in the refrigerator.
Conclusion:
And there you have it – the ultimate guide to creating your own delicious Caramel Fudge Crunch Bars! We’ve walked through each step, from perfectly melting the chocolate to achieving that irresistible crunchy texture. These bars are truly a crowd-pleaser, perfect for birthdays, holidays, or simply as a delightful homemade treat. I encourage you to give this recipe a try; the satisfaction of biting into these homemade delights is unparalleled. Don’t be afraid to experiment with the recipe, tailoring it to your personal taste. Enjoy sharing these amazing Caramel Fudge Crunch Bars with loved ones, or keep them all to yourself – we won’t judge!
For serving, these bars are fantastic on their own. You could also serve them alongside a scoop of vanilla ice cream for a decadent dessert experience. They make a wonderful addition to a cookie platter or a homemade gift basket.
Frequently Asked Questions:
Can I store these Caramel Fudge Crunch Bars for a long time?
Yes, you can! Once cooled and cut, store your Caramel Fudge Crunch Bars in an airtight container at room temperature for up to a week. For longer storage, they can be frozen for up to two months. Thaw them at room temperature before enjoying.
What are some variations I can make to the Caramel Fudge Crunch Bars?
The possibilities are endless! You can add chopped nuts like walnuts or pecans to the fudge layer for an extra crunch. Consider adding a sprinkle of sea salt on top for a sweet and salty contrast. For a different flavor profile, try adding a teaspoon of instant espresso powder to the fudge.
My fudge layer isn’t setting properly. What could I have done wrong?
This might happen if the fudge wasn’t cooked to the right temperature or wasn’t stirred enough while cooling. Ensure you’re consistently stirring and cooking for the recommended time. Overheating can also cause issues. It’s often best to follow the recipe’s temperature guidelines closely for optimal fudge consistency.
Easy Caramel Fudge Crunch Bar Recipe
A delightful recipe for making easy caramel fudge crunch bars with a chewy caramel base, crispy Rice Krispies, and a rich chocolate topping.
Ingredients
-
½ tin (approximately 200g) condensed milk
-
100g light brown sugar
-
60g butter
-
1½ tablespoons golden syrup
-
100g white chocolate, broken into small chunks
-
650g milk or dark chocolate, divided
-
75g Rice Krispies cereal
Instructions
-
Step 1
Combine condensed milk, light brown sugar, butter, and golden syrup in a heavy-bottomed saucepan over medium heat. Stir continuously until the butter melts and sugar dissolves. -
Step 2
Cook the mixture over medium heat, stirring constantly, until it reaches the ‘soft ball’ stage (about 10-15 minutes). Test by dropping a small amount into cold water; it should form a soft, pliable ball. Remove from heat immediately. -
Step 3
While the caramel is hot, add 450g of milk or dark chocolate and stir until completely melted and incorporated. Gently fold in the Rice Krispies cereal until evenly coated. -
Step 4
Press the Rice Krispie mixture evenly into a greased or parchment-lined 20cm x 20cm baking tin. Ensure the surface is flat. -
Step 5
Melt the remaining 200g of milk or dark chocolate. Optionally, stir in the 100g of white chocolate chunks. Pour over the Rice Krispie base and spread evenly. -
Step 6
Chill the bars in the refrigerator for at least 2-3 hours until the topping is firm. Lift out of the tin using parchment paper, and cut into desired bar shapes using a sharp knife.
Important Information
Nutrition Facts (Per Serving)
It is important to consider this information as approximate and not to use it as definitive health advice.
Allergy Information
Please check ingredients for potential allergens and consult a health professional if in doubt.


Leave a Comment