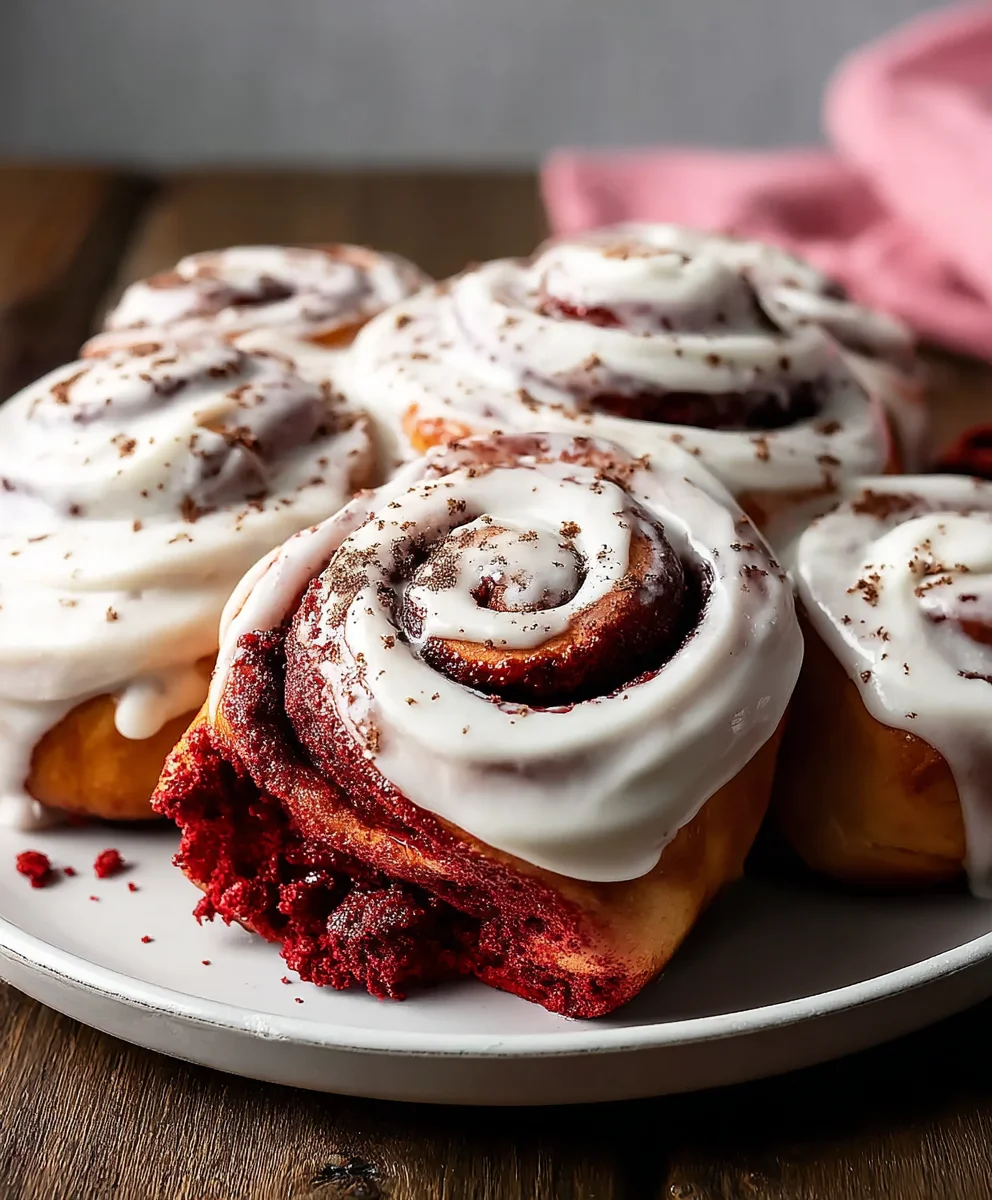
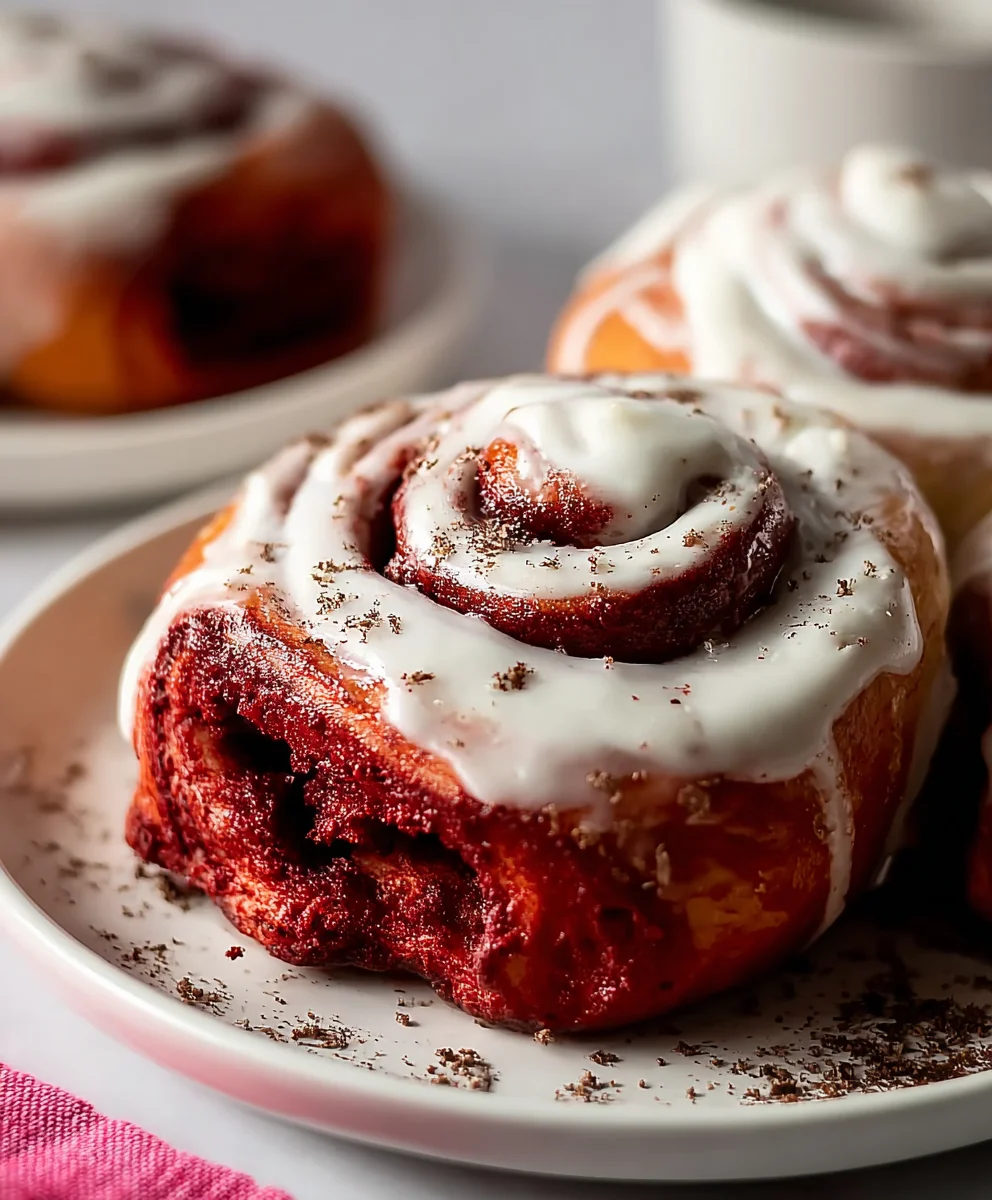
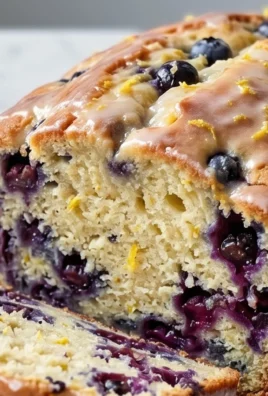
Red Velvet Cinnamon Rolls From Scratch are more than just a breakfast treat; they’re an experience. Imagin extracte the vibrant crimson swirl, the rich aroma of cocoa and warm cinnamon, and that first impossibly soft, decadent bite. It’s no wonder these beautiful rolls have captured the hearts (and taste buds) of so many. They offer the perfect fusion of two beloved dessergin extract bringing together the familiar comfort of a classic cinnamon roll with the alluring mystery and distinct flavor of red velvet. What truly sets these Red Velvet Cinnamon Rolls From Scratch apart is the homemade magic. We’re talking about creating that tender, cake-like dough from basic ingredients, infusing it with that signature red velvet hue and subtle chocolate notes, and then generously layering it with a spiced cinnamon-sugar filling. Topped with a tangy, creamy cream cheese frosting, each bite is a harmonious balance of sweet, spicy, and utterly satisfying. Get ready to elevate your brunch game or create a truly unforgettable dessert moment.

Ingredients:
- ¼ cup bread flour
- ¾ cup water
- ⅓ cup whole milk, room temperature
- ⅓ cup heavy cream, room temperature
- 1 tablespoon white vinegar
- 3⅔ cups bread flour
- ⅓ cup granulated sugar
- 1½ tablespoons cocoa powder
- 2 teaspoons instant yeast
- 1 teaspoon fine sea salt
- 1 egg, room temperature
- 1 teaspoon vanilla extract
- ½-1 teaspoon red gel food coloring
- 6 tablespoons unsalted butter, cool room temperature, cut into ½-inch cubes
- ½ cup unsalted butter, room temperature, softened
Make the Tangzhong (Cooked Flour Starter)
Step 1: Prepare the Tangzhong
To begin extract our Red Velvet Cinnamon Rolls From Scratch journey, we’ll start by creating a Tangzhong, which is a cooked flour starter that will make our rolls incredibly soft and moist. In a small saucepan, whisk together the ¼ cup of bread flour and the ¾ cup of water until there are no lumps. Place the saucepan over medium-low heat. Stir constantly with a spatula or wooden spoon, making sure to scrape the bottom and sides of the pan. You’ll notice the mixture will gradually thicken into a paste-like consistency. This process takes about 5-7 minutes. Once it has the consistency of a thick pudding and holds its shape when you run your finger through it, remove it from the heat. Transfer the Tangzhong to a small bowl, cover it with plastic wrap directly touching the surface to prevent a skin from forming, and let it cool completely to room temperature. This cooling step is crucial before proceeding.
Dough Development
Step 2: Combine Wet Ingredients and Tangzhong
Once the Tangzhong has cooled, it’s time to mix our main dough. In a large mixing bowl, combine the whole milk and heavy cream. These should both be at room temperature to ensure they incorporate smoothly into the dough without shocking the yeast. Add the cooled Tangzhong to the bowl. Then, add the tablespoon of white vinegar. The vinegar helps activate the red color later on and contributes to the characteristic tang of red velvet. Whisk these wet ingredients together gently until they are well combined.
Step 3: Add Dry Ingredientgin extractnd Begin Mixing
To the wet mixture, add the 3⅔ cups of bread flour, the ⅓ cup of granulated sugar, the 1½ tablespoons of cocoa powder, the 2 teaspoons of instant yeast, and the 1 teaspoon of fine sea salt. You can add the dry ingredients in any order, but it’s often helpful to place the salt on one side of the bowl and the yeast on the other, as direct contact can sometimes hinder yeast activity. Using the dough hook attachment on your stand mixer (or a sturdy spoon if mixgin extract by hand), begin to mix the ingredients on low speed. Continue mixing until a shaggy dough starts to form. This stage will take a couple of minutes. It might look a bit rough at this point, and that’s perfectly normal.
Step 4: Incorporate Egg, Vanilla, and Food Coloring
Once the dough has come together into a shaggy mass, it’s time to add the binding and flavoring agents. Crack in your room-temperature egg. Add the 1 teaspoon of vanilla extract, which complements the other flavors beautifully. Now, for that signature red hue, add your red gel food coloring. Start with ½ teaspoon and mix it in. If you desire a deeper, more vibrant red, you can gradually add more up to 1 teaspoon, mixing thoroughly after each addition until you achieve your desired color. Gel food coloring is recommended over liquid as it provides intense color without adding excess moisture to the dough. Continue to mix on medium speed for about 8-10 minutes. The dough should become smooth, elastic, and start to pull away from the sides of the bowl. It should feel slightly tacky but not stick excessively to your fingers when lightly touched.
Step 5: Knead in the Butter and First Rise
Now for the magic ingredient that makes our dough so tender: butter. With the mixer running on low speed, gradually add the 6 tablespoons of cool room-temperature butter, a few cubes at a time. Allow each addition to be mostly incorporated before adding the next. This process might take a few minutes. Once all the butter is added, increase the mixer speed to medium and continue kneading for another 5-7 minutes until the dough is very smooth, pliable, and elastic. It should feel soft and luxurious. Lightly grease a large bowl with a little oil or cooking spray. Place the dough into the greased bowl, turning it to coat all sides. Cover the bowl tightly with plastic wrap or a clean kitchen towel. Let the dough rise in a warm place for 1 to 1.5 hours, or until it has doubled in size. A slightly warmer oven (turned off) or near a sunny window are good spots for this.
Filling and Rolling
Step 6: Prepare the Filling and Shape the Rolls
Once the dough has doubled, gently punch it down to release the air. Turn the dough out onto a lightly floured surface. Using a rolling pin, roll the dough into a large rectangle, approximately 12×18 inches, aiming for an even thickness. The exact dimensions aren’t critical, but a uniform thickness ensures even baking. Now, prepare your filling. In a medium bowl, combine the ½ cup of softened unsalted butter with 1 cup of granulated sugar (not listed but standard for filling – assuming common pantry staples) and 2 tablespoons of cocoa powder (again, assuming common pantry staples). You’ll also want to add about 2 tablespoons of cinnamon (also a standard pantry staple for cinnamon rolls) for that classic cinnamon roll flavor. Mix these ingredients together until well combined and spreadable. Generously spread this filling mixture evenly over the rolled-out dough, leaving a small border (about ½ inch) along one of the long edges. This border will help seal the roll. Starting from the long edge opposite the border, tightly roll up the dough. Try to keep the roll as even as possible. Pinch the seam to seal it securely.
Step 7: Slice and Second Rise
Once you have a tightly rolled log, use a sharp knife or unflavored dental floss to slice the log into 12 equal pieces. Dental floss works wonderfully for a clean cut without squishing the dough. Arrange the sliced rolls, cut-side up, in a greased 9×13 inch baking pan. Make sure they have a little room to expand. Cover the pan loosely with plastic wrap or a kitchen towel. Let the rolls rise again in a warm place for about 30-45 minutes, or until they are puffy and have nearly doubled in size, touching each other. This second rise is essential for fluffy rolls.
Baking and Finishing Touches
Step 8: Bake the Red Velvet Cinnamon Rolls
Preheat your oven to 350°F (175°C). Remove the plastic wrap or towel from the pan. Place the baking pan in the preheated oven and bake for 20-25 minutes, or until the tops are set and a toothpick inserted into the center of a roll comes out clean. The edges should be slightly golden brown, and the centers should still be soft and gooey.
Step 9: Prepare the Cream Cheese Frosting
While the rolls are baking or cooling, prepare your cream cheese frosting. In a medium bowl, beat together 8 ounces of cream cheese (softened, not listed but essential for red velvet), ½ cup of softened unsalted butter, and 1 teaspoon of vanilla extract until smooth and creamy. Gradually add about 2 cups of powdered sugar, mixing until well combined and the frosting reaches your desired consistency. If it’s too thick, add a tablespoon of milk or cream at a time. If it’s too thin, add more powdered sugar.
Step 10: Frost and Serve
Once the red velvet cinnamon rolls have cooled slightly in the pan for about 10-15 minutes, it’s time to frost them. Generously spread the cream cheese frosting over the warm rolls. The warmth of the rolls will help the frosting melt slightly, creating a luscious glaze. Serve immediately and enjoy the incredibly soft, moist, and flavorful results of your homemade Red Velvet Cinnamon Rolls From Scratch!
Conclusion:
And there you have it – a delightful journey to crafting your very own Red Velvet Cinnamon Rolls From Scratch! We’ve walked through each step, from the vibrant crimson dough to the luscious cream cheese frosting, and the result is a batch of truly irresistible treats. These cinnamon rolls aren’t just a dessert; they’re an experience. The subtle cocoa notes, the warm spice, and the tangy frosting create a symphony of flavors that’s perfect for any occasion. Whether you’re enjoying them for a special brunch, a cozy afternoon snack, or simply because you deserve a little indulgence, these Red Velvet Cinnamon Rolls From Scratch are sure to impress.
For serving suggestions, I love to enjoy them warm, perhaps with a steaming mug of coffee or a glass of cold milk. They’re also fantastic slightly cooled. If you’re feeling adventurous with variations, consider adding a hint of espresso powder to the dough for a mocha twist, or sprinkle some mini chocolate chips into the filling. Don’t be afraid to experiment and make these Red Velvet Cinnamon Rolls From Scratch your own!
Frequently Asked Questions:
Can I make the dough ahead of time?
Absolutely! You can prepare the dough up to the point of the second rise, then cover it tightly and refrigerate it overnight. When you’re ready to bake, let it sit at room temperature for about 30-60 minutes to warm up slightly before proceeding with rolling and filling.
My frosting is too thin. What can I do?
If your cream cheese frosting is too thin, don’t worry! You can thicken it by gradually adding more powdered sugar, a tablespoon at a time, until it reaches your desired consistency. Make sure to mix thoroughly after each addition.
Can I freeze baked Red Velvet Cinnamon Rolls From Scratch?
Yes, you can! Allow the baked and frosted cinnamon rolls to cool completely. Then, wrap them individually in plastic wrap and place them in an airtight container or freezer bag. They should last for up to 2-3 months in the freezer. To reheat, you can let them thaw at room temperature or gently warm them in a low oven.
Red Velvet Cinnamon Rolls From Scratch
An easy recipe for incredibly soft and moist red velvet cinnamon rolls made from scratch, featuring a tangy cream cheese frosting.
Ingredients
-
1/4 cup bread flour
-
3/4 cup water
-
1/3 cup whole milk, room temperature
-
1/3 cup heavy cream, room temperature
-
1 tablespoon white vinegar
-
3 2/3 cups bread flour
-
1/3 cup granulated sugar
-
1 1/2 tablespoons cocoa powder
-
2 teaspoons instant yeast
-
1 teaspoon fine sea salt
-
1 egg, room temperature
-
1 teaspoon vanilla extract
-
1/2 teaspoon red gel food coloring
-
6 tablespoons unsalted butter, cool room temperature, cut into 1/2-inch cubes
-
1/2 cup unsalted butter, room temperature, softened
-
1 cup granulated sugar (for filling)
-
2 tablespoons cocoa powder (for filling)
-
2 tablespoons ground cinnamon (for filling)
-
8 ounces cream cheese, softened (for frosting)
-
2 cups powdered sugar (for frosting)
-
1 tablespoon milk or cream (optional, for frosting)
Instructions
-
Step 1
Prepare the Tangzhong: In a small saucepan, whisk together 1/4 cup bread flour and 3/4 cup water until smooth. Cook over medium-low heat, stirring constantly, for 5-7 minutes until thickened to a paste. Cool completely to room temperature, covering to prevent a skin. -
Step 2
Combine Wet Ingredients and Tangzhong: In a large bowl, whisk together room temperature whole milk, heavy cream, cooled Tangzhong, and white vinegar. -
Step 3
Add Dry Ingredients and Begin Mixing: To the wet mixture, add 3 2/3 cups bread flour, 1/3 cup granulated sugar, 1 1/2 tablespoons cocoa powder, 2 teaspoons instant yeast, and 1 teaspoon fine sea salt. Mix on low speed with a dough hook until a shaggy dough forms. -
Step 4
Incorporate Egg, Vanilla, and Food Coloring: Add the room temperature egg, 1 teaspoon vanilla extract, and 1/2 teaspoon red gel food coloring (add more up to 1 teaspoon for deeper color, mixing well). Mix on medium speed for 8-10 minutes until the dough is smooth, elastic, and slightly tacky. -
Step 5
Knead in Butter and First Rise: With the mixer on low, gradually add 6 tablespoons of cool unsalted butter, a few cubes at a time, allowing each to incorporate. Increase speed to medium and knead for 5-7 minutes until smooth and elastic. Place dough in a lightly greased bowl, cover, and let rise in a warm place for 1 to 1.5 hours, or until doubled. -
Step 6
Prepare Filling and Shape Rolls: Punch down dough and roll into a 12×18 inch rectangle. In a medium bowl, combine 1/2 cup softened unsalted butter, 1 cup granulated sugar, 2 tablespoons cocoa powder, and 2 tablespoons cinnamon. Spread filling evenly over dough, leaving a 1/2-inch border. Tightly roll up the dough from the long edge opposite the border. Pinch seam to seal. -
Step 7
Slice and Second Rise: Slice the log into 12 equal pieces. Arrange cut-side up in a greased 9×13 inch baking pan. Cover loosely and let rise in a warm place for 30-45 minutes, or until puffy and nearly touching. -
Step 8
Bake the Rolls: Preheat oven to 350°F (175°C). Bake for 20-25 minutes, or until tops are set and a toothpick comes out clean. Edges should be slightly golden, centers soft. -
Step 9
Prepare Cream Cheese Frosting: Beat together 8 ounces softened cream cheese, 1/2 cup softened unsalted butter, and 1 teaspoon vanilla extract until smooth. Gradually add about 2 cups powdered sugar until desired consistency is reached. Add milk/cream for thinning or more powdered sugar for thickening. -
Step 10
Frost and Serve: Let rolls cool slightly in the pan for 10-15 minutes. Generously spread frosting over warm rolls. Serve immediately.
Important Information
Nutrition Facts (Per Serving)
It is important to consider this information as approximate and not to use it as definitive health advice.
Allergy Information
Please check ingredients for potential allergens and consult a health professional if in doubt.
Leave a Comment