
Ramen eggs, also known as Ajitama, are more than just a topping; they’re the soul of a perfectly crafted bowl of ramen. These marinated, soft-boiled eggs are a revelation, transforming a humble egg into a culinary masterpiece. What’s not to love about that jammy, custardy yolk oozing into the rich broth, perfectly complemented by the savory, umami-infused whites? I find myself craving them constantly, and for good reason! The magic of a well-made ramen egg lies in its simplicity and the depth of flavor achieved through a thoughtful marinade. It’s this perfect balance of sweet, salty, and savory that makes Ajitama so utterly addictive and a non-negotiable element for anyone serious about elevating their ramen experience.
Why You’ll Love Making Ramen Eggs:
The Irresistible Combination of Texture and Flavor.

Ramen Eggs (Ajitama)
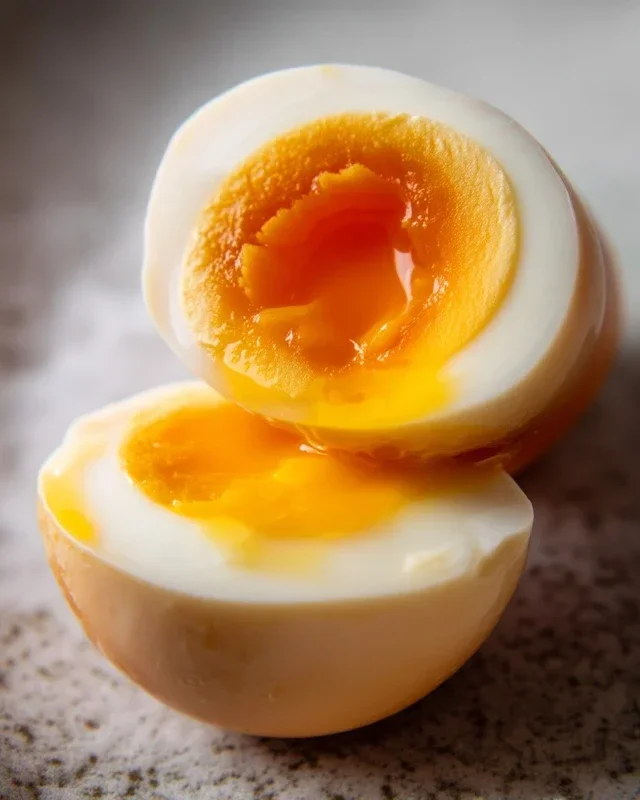
There’s something truly magical about a perfectly prepared ramen egg, also known as ajitama. That glorious, jammy yolk, infused with a savory, slightly sweet marinade, is the crowning glory of any ramen bowl. It transforms a simple noodle soup into a deeply satisfying culinary experience. Forget those often bland, hard-boiled eggs you might find in some establishments. We’re talking about eggs that are a star in their own right, with a texture and flavor that will have you dreaming about them long after your bowl is empty.
Making ajitama at home might seem intimidating, but I promise you, it’s remarkably straightforward. The key is in the gentle cooking of the eggs to achieve that perfect soft-boiled consistency and then allowing them to marinate in a flavorful brine. Once you master this technique, you’ll find yourself making batches regularly, not just for ramen, but for salads, rice bowls, or even as a standalone snack.
Ingredients:
*Note: For the best results, try to use eggs that are a few days old rather than super fresh. Fresher eggs tend to be harder to peel cleanly after boiling.
Cooking Instructions:
Let’s get started on creating these little gems! The process involves two main stages: boiling the eggs to perfection and then marinating them.
Boiling the Eggs to Perfection
The most critical step for achieving that coveted jammy yolk is the cooking time. We’re aiming for a delicate balance – cooked enough to firm up the whites but still gloriously molten in the center.
1. Preparing the Water Bath: In a medium saucepan, bring enough water to a rolling boil to comfortably cover the eggs. For easier peeling later, I like to add a splash of vinegar to the boiling water. The vinegar is said to help the egg whites coagulate more quickly, making them less likely to stick to the shell. Once the water is at a vigorous boil, carefully lower your eggs into the water using a slotted spoon or spider skimmer. Gently place them in, one by one, to avoid cracking them against the bottom of the pot.
2. Timing is Everything: This is where precision matters. Once the eggs are submerged, immediately reduce the heat to a gentle simmer. For a perfectly jammy yolk, set a timer for exactly 6 to 6.5 minutes. If you prefer a slightly firmer yolk, closer to a soft-boiled egg but still with a slight ooze, you can go up to 7 minutes. During this simmering phase, you can gently stir the eggs for the first minute or so. This helps to center the yolk within the egg white, leading to a more aesthetically pleasing cut when you eventually serve them. After that initial stir, let them cook undisturbed.
3. The Ice Bath Shock: As soon as your timer goes off, it’s time to stop the cooking process abruptly. Prepare a large bowl filled with ice and cold water. Using your slotted spoon, carefully transfer the eggs from the simmering water directly into the ice bath. This rapid cooling not only halts the cooking but also helps the egg whites contract slightly, making them easier to peel. Let the eggs sit in the ice bath for at least 10 to 15 minutes, or until they are completely cool to the touch.
Marinating the Ajitama
Once our eggs are perfectly cooked and cooled, it’s time to infuse them with flavor. This marinade is simple, yet it yields incredibly delicious results.
4. Crafting the Marinade: While the eggs are chilling, prepare your marinade. In a small saucepan or microwave-safe bowl, combine the light sodium soy sauce, water, non-non-non-alcoholic alternativeic non-alcoholic mirin, and granulated sugar. If using the saucepan, heat the mixture gently over medium-low heat, stirring constantly until the sugar is completely dissolved. Do not boil it; we just want to ensure the sugar dissolves and the flavors meld. If using a microwave, heat in 30-second intervals, stirring in between, until the sugar is dissolved. Allow the marinade to cool slightly before proceeding.
5. The Marination Process: Once the eggs are fully cooled, it’s time to get them into the brine. Gently peel the cooled eggs. This is where the vinegar and the ice bath truly shine – they should peel relatively easily. If you encounter a stubborn spot, gently tap the egg all over and try to ease the shell away. Place the peeled eggs into a resealable bag or a shallow, non-reactive container. Pour the cooled marinade over the eggs, ensuring they are fully submerged. Seal the bag or cover the container.
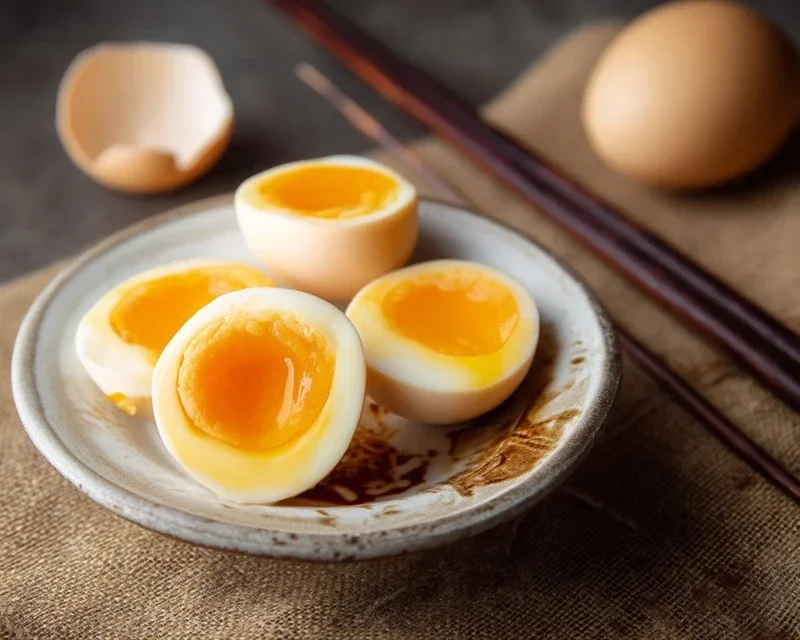
6. Patience is a Virtue: Now comes the hardest part: waiting! For the best flavor, let the ajitama marinate in the refrigerator for at least 4 hours. However, for optimal flavor infusion and that beautiful amber hue, I highly recommend marinating them for 12 to 24 hours. You can even marinate them for up to 2 days, but the texture might start to change slightly after that. Flip the eggs occasionally during the marination process to ensure even coloring and flavor distribution. When you’re ready to enjoy them, simply slice them in half lengthwise and admire that beautiful, custardy yolk. These ajitama are perfect for topping ramen, but they’re also fantastic on avocado toast, in poke bowls, or even just on their own!
Conclusion:
Making perfect Ramen Eggs, or Ajitama, is surprisingly simple and incredibly rewarding. This recipe is fantastic because it transforms a humble boiled egg into a savory, umami-rich delicacy that elevates any noodle dish or even just a quick snack. The magic lies in the simple marinade, which infuses the egg with a deep, complex flavor that’s both comforting and addictive. I hope you’ll give this recipe a try and experience the joy of these delicious marinated eggs for yourself!
Beyond ramen, these Ajitama are wonderfully versatile. I love adding them to chirashi bowls, bibimbap, or even a simple salad for an extra protein boost and burst of flavor. Don’t be afraid to experiment with the marinade too! A touch of non-alcoholic mirin for sweetness, a pinch of chili flakes for heat, or even a splash of non-alcoholic sake can create unique flavor profiles. So go ahead, crack those eggs, and dive into the delicious world of Ramen Eggs!
Frequently Asked Questions:
How long do Ramen Eggs last in the refrigerator?
Once marinated and stored in an airtight container in the refrigerator, your Ramen Eggs will stay delicious for about 4-5 days. Make sure they are fully submerged in the marinade for optimal preservation.
Can I use a different type of soy sauce for the marinade?
Absolutely! While a good quality Japanese soy sauce is traditional, you can certainly experiment. A low-sodium soy sauce will work, but you might need to adjust the other ingredients slightly. You could also try tamari for a gluten-free option, or even a mix of soy sauce and oyster sauce for an extra layer of savory depth.
What’s the best way to peel the eggs after marinating?
Peeling the eggs right after they come out of the marinade, while still slightly warm but cool enough to handle, is usually the easiest. If they’ve been chilled for a while, a quick rinse under cool water can help loosen the shell. The marinade can make them a tiny bit trickier than regular hard-boiled eggs, but it’s rarely a major issue.
Ramen Eggs (Ajitama)
Perfectly seasoned, soft-boiled eggs with a custardy yolk, ideal for ramen or as a snack.
Ingredients
-
6 large eggs
-
1/2 cup soy sauce (light sodium)
-
1/4 cup water
-
1/4 cup non-alcoholic mirin
-
2 tablespoons granulated sugar
-
1 teaspoon rice vinegar (optional, for boiling)
Instructions
-
Step 1
Gently place eggs in a saucepan. Cover with cold water by about an inch. Add a teaspoon of rice vinegar if using. -
Step 2
Bring water to a rolling boil over medium-high heat. Once boiling, immediately reduce heat to a simmer and cook for exactly 6.5 minutes for a jammy yolk. -
Step 3
Prepare an ice bath by filling a bowl with ice and cold water. Immediately transfer cooked eggs to the ice bath to stop the cooking process. -
Step 4
While eggs are chilling, prepare the marinade: in a small saucepan, combine soy sauce, water, non-alcoholic mirin, and sugar. Heat gently, stirring until the sugar is dissolved. Let cool slightly. -
Step 5
Once eggs are cool enough to handle, carefully peel them. Place peeled eggs in a zip-top bag or a small, sealable container. -
Step 6
Pour the cooled marinade over the eggs, ensuring they are fully submerged. Seal the bag or container and refrigerate for at least 1 hour, or preferably overnight for deeper flavor.
Important Information
Nutrition Facts (Per Serving)
It is important to consider this information as approximate and not to use it as definitive health advice.
Allergy Information
Please check ingredients for potential allergens and consult a health professional if in doubt.

Leave a Comment