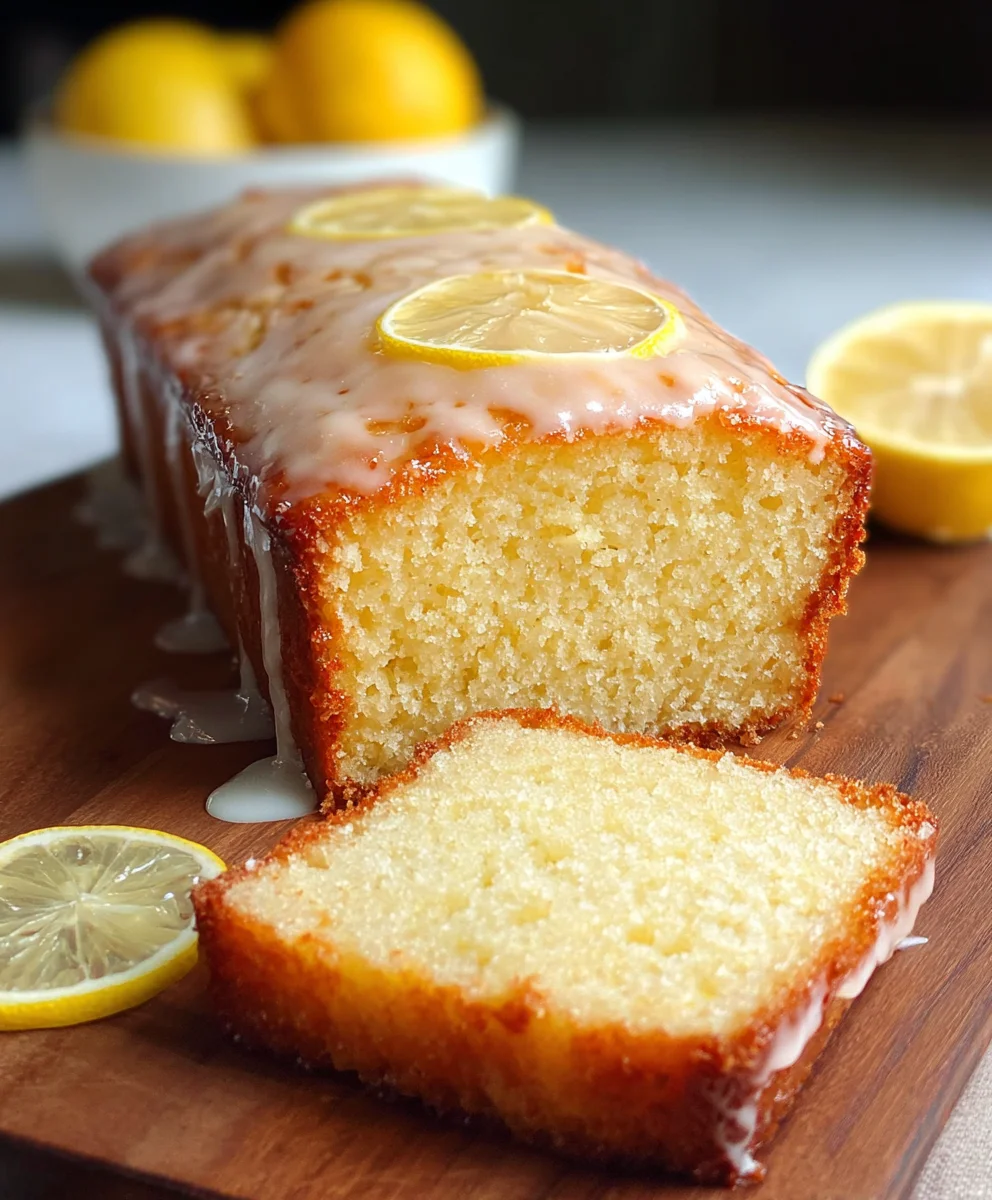
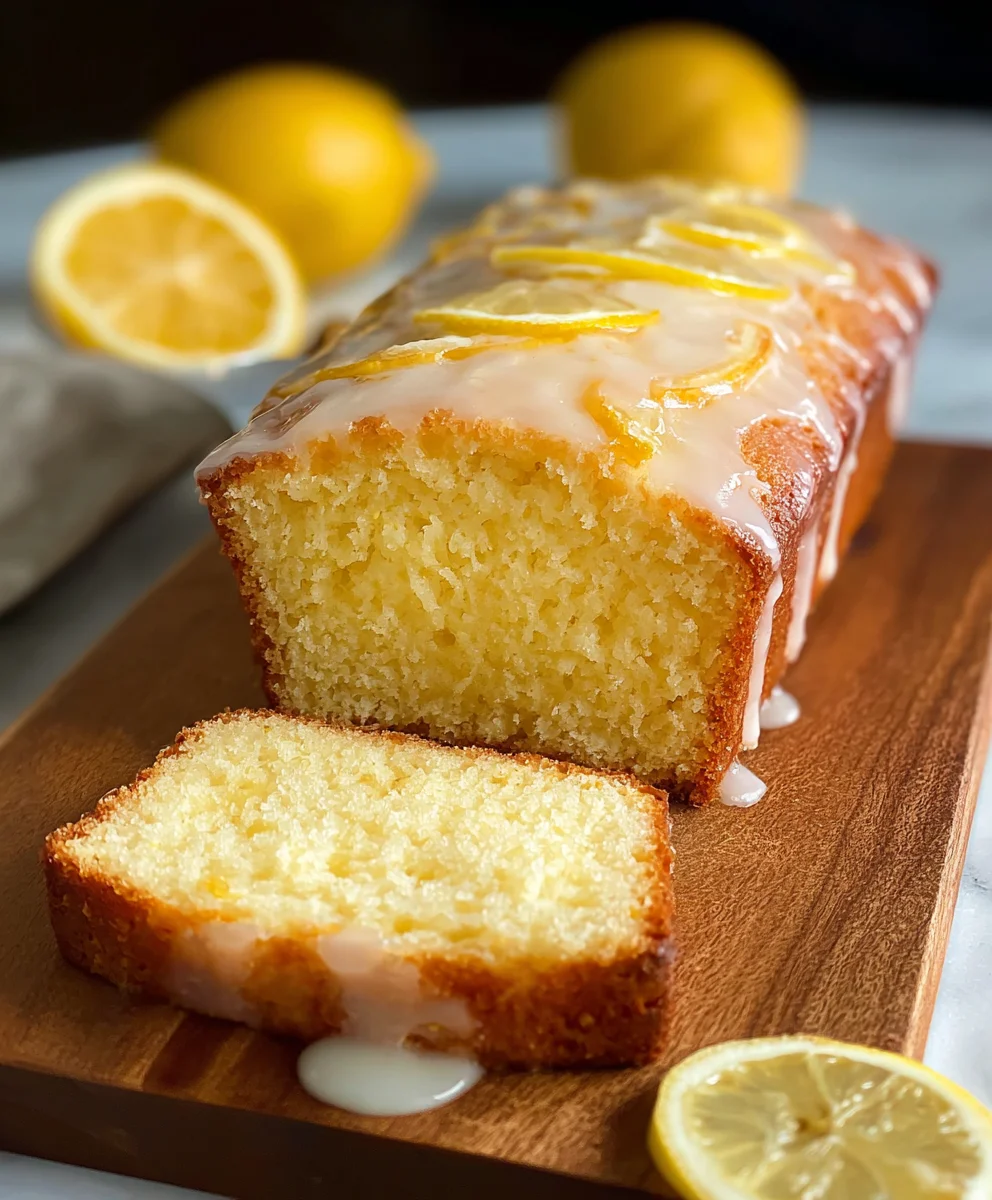
Lemon Loaf is more than just a simple dessert; it’s a sunshine-filled hug in edible form. There’s something undeniably comforting and utterly delightful about a perfectly baked lemon loaf. It’s that bright, zesty flavor that awakens your senses, the tender, moist crum extractb that melts in your mouth, and the sweet, tangy glaze that adds that irresistible finishing touch. People flock to this classic for its refreshing taste and its ability to brighten even the gloomiest of days. What truly sets this particular lemon loaf apart is the careful balance of tartness and sweetness, ensuring every bite is a harmonious explosion of citrusy bliss. It’s the ideal companion for your morning coffee, an afternoon pick-me-up, or a light, elegant finish to any meal. Get ready to experience the ultimate treat with this sensational lemon loaf.

Ingredients:
- 1⅓ cup all-purpose flour
- 1¾ teaspoon baking powder
- ½ teaspoon salt
- ½ cup unsalted butter, softened
- ⅔ cup granulated sugar
- 3 large eggs
- 1 cup sour cream
- 1½ tablespoons lemon zest (this is approximately the amount you’ll get from one medium lemon, finely grated)
- 2 tablespoons fresh lemon juice
- 1 tablespoon lemon extract
- 1 cup powdered sugar (also known as confectioners’ sugar or icing sugar)
- 1 tablespoon fresh lemon juice (for the glaze)
- 1 tablespoon milk (for the glaze)
- 1 tablespoon unsalted butter, melted (for the glaze)
Preparing the Lemon Loaf Batter
Step 1: Combine Dry Ingredients
Start by preheating your oven to 350°F (175°C). Grease and flour a standard 9×5 inch loaf pan, or line it with parchment paper for easy removal. In a medium-sized bowl, whisk together the 1⅓ cup of all-purpose flour, 1¾ teaspoon of baking powder, and ½ teaspoon of salt. This simple step ensures that your leavening agent and salt are evenly distributed throughout the batter, which is crucial for a consistent rise and flavor. Whisking also aerates the flour slightly, contributing to a lighter texture in the final loaf. Set this dry mixture aside.
Step 2: Cream Butter and Sugar, then Incorporate Eggs
In a large mixing bowl, cream together the ½ cup of softened butter and the ⅔ cup of granulated sugar. You can use an electric mixer for this, or if you’re feeling energetic, a sturdy whisk and some elbow grease. Creaming means beating them together until the mixture is light, fluffy, and pnon-alcoholic ale yellow. This process incorporates air into the batter, which also helps with leavening. Once beautifully creamed, add the 3 large eggs, one at a time, beating well after each addition. It’s important to ensure each egg is fully incorporated before adding the next to maintain a smooth, emulsified batter. If the mixture looks like it’s starting to curdle, don’t worry too much; it should come back together when you add the dry and wet ingredients.
Step 3: Add Wet Ingredients and Flavorings
Now, it’s time to introduce the wet ingredients and the star of our show: lemon! To the creamed egg mixture, add the 1 cup of sour cream, 1½ tablespoons of lemon zest, 2 tablespoons of fresh lemon juice, and 1 tablespoon of lemon extract. Beat on low speed until just combined. The sour cream adds moisture and a lovely tang, while the lemon zest provides bright, fresh citrus notes that will permeate the entire loaf. The lemon extract offers a concentrated burst of lemon flavor without adding extra liquid, ensuring a well-balanced taste. Avoid overmixing at this stage; we just want everything to come together.
Step 4: Alternate Adding Dry and Wet Mixtures to the Batter
With your mixer on low speed, or using a spatula for a gentler touch, begin extract adding the dry ingredients (from Step 1) to the wet ingredients (from Step 3) in three additions, alternating with the sour cream mixture in two additgin extracts, beginning and ending with the dry ingredients. So, add about a third of the flour mixture, mix until just combined, then add half of the sour cream mixture, mix again. Continue this process: another third of the flour, the remaining sour cream, and finally the last of the flour mixture. This method of alternating additions helps to prevent gluten development, leading to a tender cake. Be careful not to overmix once the flour is added; stop as soon as no streaks of dry flour remain. Overmixing can result in a tough loaf.
Step 5: Baking the Lemon Loaf
Pour the batter evenly into your prepared loaf pan. Smooth the top with a spatula. Place the loaf pan in the preheated oven. Bake for approximately 50-60 minutes, or until a wooden skewer or toothpick inserted into the center comes out clean. The exact baking time can vary depending on your oven, so it’s always best to check for doneness towards the end of the baking period. If the togin extractf the loaf begins to brown too quickly before the inside is cooked, you can loosely tent it with aluminum foil. Once baked, remove the loaf from the oven and let it cool in the pan for about 10-15 minutes. This allows the loaf to set slightly before you attempt to remove it. After the initial cooling, carefully invert the loaf onto a wire rack to cool completely. It’s important that the loaf is entirely cool before you apply the glaze, otherwise, the glaze will simply melt and slide off.
Preparing the Lemon Glaze
Step 6: Whisk Together Glaze Ingredients
While your lemon loaf is cooling, prepare the luscious lemon glaze. In a small bowl, whisk together the 1 cup of powdered sugar, 1 tablespoon of fresh lemon juice, 1 tablespoon of milk, and 1 tablespoon of melted butter. Start by whisking the powdered sugar with the lemon juice and milk until a smooth paste forms. Then, gradually whisk in the melted butter. Continue whisking until the glaze is smooth, pourable, and glossy. You’re looking for a consistency that will coat the back of a spoon without being too thick or too thin. If the glaze is too thick, add a tiny bit more milk (a teaspoon at a time). If it’s too thin, whisk in a little more powdered sugar. The melted butter adds a lovely richness and sheen to the glaze.
Step 7: Glazing the Cooled Loaf
Once the lemon loaf is completely cool to the touch, it’s time to add the finishing touch. You can either pour the glaze over the top of the loaf and let it drip down the sides naturally, or use a spoon or spatula to spread it more evenly. For a more decorative look, you can drizzle the glaze on using a spoon. As the glaze slowly sets, it will form a delightful, tangy, sweet coating that complements the moist, citrusy cake perfectly. Allow the glaze to set for at least 15-20 minutes before slicing and serving. This allows the glaze to firm up just enough so it doesn’t run everywhere when you cut into the delicious lemon loaf.
Conclusion:
And there you have it! Your very own homemade Lemon Loaf, bursting with bright, zesty flavor and a wonderfully moist crum extractb. This recipe is designed to be approachable for bakers of all levels, and the results are truly rewarding. Whether you’re looking for a delightful breakfast treat, an elegant dessert, or a simple pick-me-up, this Lemon Loaf delivers. I encourage you to give it a try and experience the joy of baking something truly delicious from scratch. Don’t be afraid to experiment with the glaze or add a few extra berries to the batter for a personalized touch. Happy baking!
Frequently Asked Questions about Lemon Loaf:
Q1: How should I store my Lemon Loaf?
To keep your Lemon Loaf fresh, wrap it tightly in plastic wrap or store it in an airtight container at room temperature for up to 3 days. If you live in a warm climate, you might prefer to store it in the refrigerator, although this can sometimes make the cake slightly firmer. For longer storage, you can wrap individual slices or the whole loaf tightly and freeze it for up to 2 months. Thaw overnight at room temperature.
Q2: My Lemon Loaf is a bit dry. What went wrong?
A dry Lemon Loaf can often be attributed to over-baking. It’s crucial to keep a close eye on the loaf during the last 10-15 minutes of baking and check for doneness with a toothpick. If it comes out with just a fewrum extractist crumbs attached, it’s ready. Overmixing the batter can also contribute to dryness, so be sure to mix just until the ingredients are combined. Using room temperature ingredients like eggs and butter also helps erum extractre a tender crumb.
Q3: Can I make this Lemon Loaf gluten-free or dairy-free?
Yes, you can! For a gluten-free Lemon Loaf, I recommend using a good quality gluten-free all-purpose flour blend that contains xanthan gum. You may need to slightly adjust the baking time. For a dairy-free version, you can substitute the butter with a dairy-free butter alternative and use a plant-based milk like almond or soy milk in place of regular milk. Ensure your plant-based milk is unsweetened.
Moist Lemon Loaf Cake
An easy and delicious recipe for a moist lemon loaf cake with a tangy lemon glaze.
Ingredients
-
1⅓ cup all-purpose flour
-
1¾ teaspoon baking powder
-
½ teaspoon salt
-
½ cup unsalted butter, softened
-
⅔ cup granulated sugar
-
3 large eggs
-
1 cup sour cream
-
1½ tablespoons lemon zest
-
2 tablespoons fresh lemon juice
-
1 tablespoon lemon extract
-
1 cup powdered sugar
-
1 tablespoon fresh lemon juice
-
1 tablespoon milk
-
1 tablespoon unsalted butter, melted
Instructions
-
Step 1
Preheat oven to 350°F (175°C). Grease and flour a 9×5 inch loaf pan. In a medium bowl, whisk together flour, baking powder, and salt. Set aside. -
Step 2
In a large bowl, cream softened butter and granulated sugar until light and fluffy. Add eggs one at a time, beating well after each addition. -
Step 3
To the creamed egg mixture, add sour cream, lemon zest, 2 tablespoons lemon juice, and lemon extract. Beat on low speed until just combined. -
Step 4
Gradually add the dry ingredients to the wet ingredients in three additions, alternating with the sour cream mixture in two additions, beginning and ending with the dry ingredients. Mix on low speed until just combined. Do not overmix. -
Step 5
Pour batter into prepared loaf pan and smooth the top. Bake for 50-60 minutes, or until a skewer inserted into the center comes out clean. Cool in pan for 10-15 minutes, then invert onto a wire rack to cool completely. -
Step 6
While the loaf cools, prepare the glaze. In a small bowl, whisk together powdered sugar, 1 tablespoon lemon juice, milk, and melted butter until smooth and pourable. -
Step 7
Once the loaf is completely cool, pour or drizzle the glaze over the top. Allow the glaze to set for at least 15-20 minutes before slicing and serving.
Important Information
Nutrition Facts (Per Serving)
It is important to consider this information as approximate and not to use it as definitive health advice.
Allergy Information
Please check ingredients for potential allergens and consult a health professional if in doubt.


Leave a Comment