St. Patrick’s Day Desserts are more than just a sweet treat; they’re a vibrant celebration on a plate! As the emerald isle beckons with its rich history and lively spirit, our kitchens transform into a haven of green hues and delightful flavors. There’s something truly magical about baking up a storm that captures the essence of this beloved holiday. People adore these St. Patrick’s Day Desserts because they offer a playful escape, a chance to infuse our everyday meals with a touch of whimsy and Irish charm. Whether it’s a decadent chocolate creation with a hint of mint, a fluffy cake tinted a cheerful green, or cookies adorned with sbeef hamrocks, these desserts are guaranteed to bring smiles and a festive atmosphere to any gathering. What makes them truly special is the way they can be customized with personal touches, transforming simple ingredients into edible works of art that tell a story of luck and joy.

St. Patrick’s Day Desserts
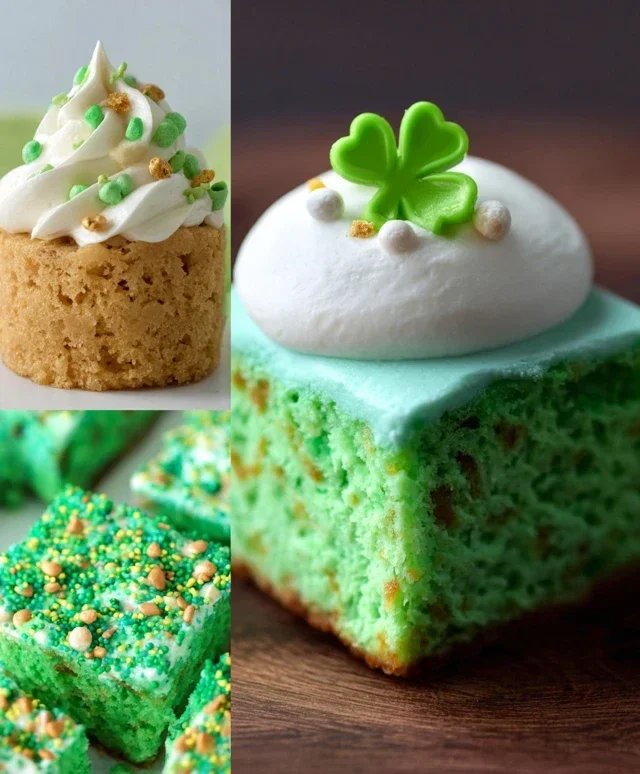
Get ready to sbeef hamrock your St. Patrick’s Day with a trio of delightful desserts that are as fun to make as they are to eat! We’re diving into a world of green, gold, and pure Irish cheer with recipes designed to impress your guests and make your celebration extra special. From a vibrant mint chocolate chip cake to playful leprechaun hats, these treats are sure to bring a pot of gold to your dessert table.
Mint Chocolate Chip Cake
This cake is a classic for a reason. The refreshing mint and rich chocolate chips are a match made in heaven, and the vibrant green color screams St. Patrick’s Day. It’s surprisingly simple to whip up, making it perfect for a festive gathering.
Ingredients:
Cooking Instructions:
1. Prepare the Dry Ingredients: In a large mixing bowl, whisk together 2 cups of all-purpose flour, 1 ½ cups of granulated sugar, 1 teaspoon of baking soda, ½ teaspoon of salt, and ¼ cup of unsweetened cocoa powder. Whisking these ingredients thoroughly ensures an even distribution of leavening agents and flavor, which is crucial for a light and fluffy cake. Make sure there are no lumps of cocoa powder.
2. Combine Wet Ingredients and Mix the Batter: In a separate bowl, whisk together 2 large eggs, 1 cup of buttermilk, ½ cup of vegetable oil, and 1 teaspoon of peppermint extract. Gradually add the wet ingredients to the dry ingredients, mixing on low speed (or with a whisk) until just combined. Be careful not to overmix the batter, as this can result in a tough cake. Overmixing develops the gluten in the flour too much.
3. Achieve the Perfect Green Hue and Add Chocolate: Now for the fun part – adding color! Stir in 1-2 teaspoons of green food coloring, adding more until you achieve your desired vibrant St. Patrick’s Day green. Then, gently fold in ¾ cup of semi-sweet chocolate chips. These will melt slightly during baking, creating delightful pockets of chocolatey goodness throughout the cake.
4. Bake the Cake: Pour the batter into a greased and floured 9×13 inch baking pan. Bake in a preheated oven at 350°F (175°C) for 30-35 minutes, or until a toothpick inserted into the center comes out clean. The baking time can vary slightly depending on your oven, so keep an eye on it towards the end of the baking period.
5. Prepare the Frosting and Decorate: While the cake cools, prepare your frosting. In a medium bowl, beat ½ cup (1 stick) of softened butter until creamy. Gradually add 2 cups of powdered sugar, alternating with 2-3 tablespoons of milk, until you reach a smooth and spreadable consistency. You can also add a touch more peppermint extract if you desire a stronger mint flavor. Once the cake is completely cool, spread the frosting evenly over the top. For extra flair, you can sprinkle more chocolate chips on top or add some green sprinkles.
Leprechaun Hat Cookies
These adorable cookies are a playful and delicious way to celebrate. They’re simple enough for kids to help make and are guaranteed to bring smiles.
Ingredients:
Cooking Instructions:
1. Melt the Green Candy Melts: Place the green candy melts in a microwave-safe bowl. Microwave on 50% power for 30-second intervals, stirring between each, until smooth and fully melted. Be patient, as candy melts can scorch easily if overheated. You want them to be smooth and pourable.
2. Coat the Cookies: Dip the top of each shortbread cookie into the melted green candy melts, ensuring it’s fully coated. Let any excess drip off back into the bowl. This green coating will form the base of your leprechaun hat. Place the coated cookies on a parchment-lined baking sheet to set.
3. Create the Hat Brim: Once the green coating is mostly set but still slightly soft, pipe or spread a ring of chocolate frosting around the bottom edge of each green-coated cookie. This will form the black brim of the leprechaun hat. You can use a piping bag with a round tip for neatness, or a small offset spatula.
4. Add the Buckle Detail: While the chocolate frosting is still wet, carefully press a few yellow or gold sprinkles onto the chocolate brim to resemble a buckle. This is a tiny detail that makes a big difference in the overall look.
5. Fashion the Hatband: Cut small pieces of black licorice strings and arrange them to form a band around the hat, just above the brim. You can secure them with a tiny dab of chocolate frosting if needed. Allow the cookies to set completely before serving.
Pot of Gold Brownies
These rich, fudgy brownies are a fantastic canvas for a little St. Patrick’s Day magic. The “pot of gold” is a fun surprise that will delight everyone.
Ingredients:
Cooking Instructions:
1. Prepare the Brownie Batter: Follow the instructions on your fudgy brownie mix box to prepare the batter. This usually involves mixing the brownie mix with eggs, oil, and water. Ensure you mix until just combined, as overmixing can lead to tougher brownies.
2. Bake the Brownies: Pour the prepared batter into a greased and parchment-lined 8×8 inch or 9×9 inch baking pan. Bake according to the brownie mix package directions. The goal is to have moist and fudgy brownies, so avoid overbaking. A toothpick inserted into the center should come out with moist crum extractbs, not completely clean.
3. Cool and Cut: Allow the brownies to cool completely in the pan. This is a crucial step for easy cutting and decorating. Once cooled, carefully lift the brownies out of the pan using the parchment paper. Cut the brownies into desired serving sizes. Squares are classic, but you can also get creative with shapes if you have cookie cutters.
4. Create the Pot Shape: For each brownie square, use the green decorating gel to draw a simple pot shape at the bottom of the brownie. Think of a rounded U-shape with a slightly wider top. This will be your “pot.”
5. Fill with Gold: Immediately after drawing the pot shape with the green gel, sprinkle the inside of the “pot” generously with gold edible glitter or gold sprinkles. This creates the illusion of a pot overflowing with gold coins. Let the decorating gel set for a few minutes before serving.
Enjoy your St. Patrick’s Day celebration with these sweet and festive treats!
Conclusion:
I hope you’ve enjoyed exploring these delightful St. Patrick’s Day desserts! These recipes offer a fantastic way to bring a touch of Irish cheer and vibrant green to your celebrations. From the rich and creamy textures of our Irish cream brownies to the light and airy sweetness of our sbeef hamrock cupcakes, there’s something here to impress every guest and satisfy every sweet tooth. These desserts aren’t just delicious; they’re also incredibly fun to make, adding a creative and festive element to your holiday baking. Don’t be afraid to get a little creative yourself!
For serving, consider pairing these treats with a warm cup of coffee, a cold glass of milk, or even a festive green punch. They also make wonderful additions to any St. Patrick’s Day potluck or family gathering. Don’t hesitate to experiment with variations! For instance, you could add a swirl of green food coloring to cookie dough, incorporate mint extract into cakes, or top your creations with edible gold coins for an extra touch of luck. I truly encourage you to try at least one of these St. Patrick’s Day desserts; you’ll be amazed at how simple yet spectacular they are, and the joy they bring to your festive table.
Frequently Asked Questions:
Can I make these desserts ahead of time?
Absolutely! Many of these St. Patrick’s Day desserts, like brownies and cookies, can be made a day or two in advance and stored in airtight containers at room temperature. Cupcakes are best enjoyed within a day or two of baking, but frosting can often be made ahead and stored separately.
Are there any gluten-free or vegan options?
Yes, many of these recipes can be easily adapted. For gluten-free, you can often substitute a good quality gluten-free flour blend. For vegan options, look for recipes that utilize plant-based butter, milk alternatives, and egg substitutes. Many recipes can be modified with simple swaps.
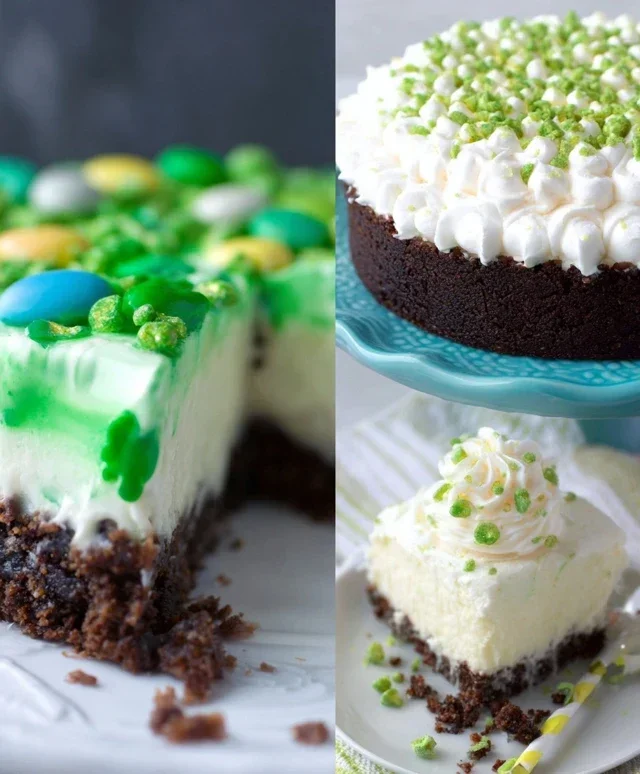
Lucky Shamrock Brownies
Decadent chocolate brownies with a festive green cream cheese swirl, perfect for St. Patrick’s Day celebrations.
Ingredients
-
1 cup all-purpose flour
-
1 teaspoon baking powder
-
1/2 teaspoon salt
-
1 cup (2 sticks) unsalted butter, softened
-
2 cups granulated sugar
-
4 large eggs
-
1 teaspoon vanilla extract
-
1/2 cup unsweetened cocoa powder
-
1/4 cup milk
-
1/4 teaspoon green food coloring
-
8 ounces cream cheese, softened
Instructions
-
Step 1
Preheat oven to 350°F (175°C). Grease and flour a 9×13 inch baking pan. -
Step 2
In a medium bowl, whisk together flour, baking powder, and salt. -
Step 3
In a large bowl, beat butter and sugar until creamy. Beat in eggs one at a time, then stir in vanilla extract and cocoa powder. -
Step 4
Gradually add the flour mixture to the butter mixture, alternating with milk, beginning and ending with flour mixture. Beat until just combined. -
Step 5
In a small bowl, combine cream cheese, green food coloring, and 1 tablespoon of milk. Beat until smooth. -
Step 6
Pour half of the brownie batter into the prepared pan. Dollop spoonfuls of the green cream cheese mixture over the batter. Swirl gently with a knife. Pour remaining brownie batter over the top and swirl again. -
Step 7
Bake for 30-35 minutes, or until a wooden skewer inserted into the center comes out with moist crumbs attached. -
Step 8
Let cool completely before cutting into squares.
Important Information
Nutrition Facts (Per Serving)
It is important to consider this information as approximate and not to use it as definitive health advice.
Allergy Information
Please check ingredients for potential allergens and consult a health professional if in doubt.

Leave a Comment