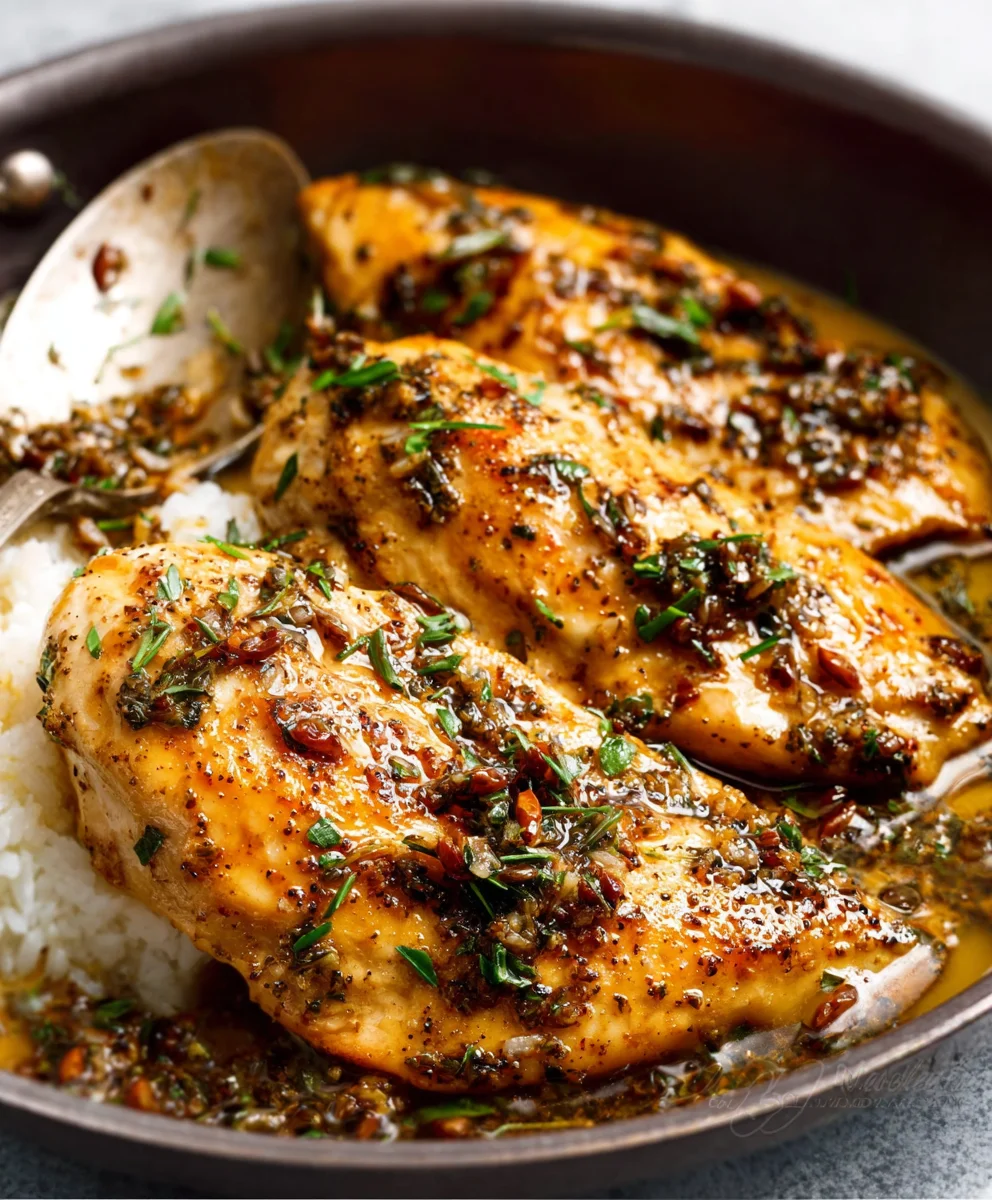
Garlic Butter Chicken. Ah, the mere mention of those three words conjures up images of tender, juicy chicken bathed in a rich, velvety sauce that’s both decadent and comforting. It’s a dish that has captured hearts and taste buds worldwide, and for good reason. People adore this culinary creation because it strikes that perfect balance between simplicity and indulgence. Imagin extracte sinking your teeth into succulent pieces of chicken, perfectly cooked, and then that explosion of flavor – the pungent, aromatic punch of garlic mingling harmoniously with the creamy, luxurious embrace of butter. It’s a symphony on the palate, a hug in a bowl. What truly sets this Garlic Butter Chicken apart is its incredible versatility and the sheer ease with which it can transform an ordinary weeknight meal into something truly memorable. Whether you’re a seasoned chef or a novice in the kitchen, this recipe promises to deliver a restaurant-quality experience right in your own home.

Ingredients:
- 2 pounds boneless, skinless chicken thighs
- 1/4 cup unsalted butter
- 4 cloves garlic, minced
- 1/2 cup chicken broth
- 1/4 cup heavy cream
- 2 tablespoons fresh lemon juice
- 2 tablespoons chopped fresh parsley
- 1 teaspoon dried oregano
- 1/2 teaspoon salt, or to taste
- 1/4 teaspoon black pepper, or to taste
- 1 tablespoon olive oil
Searing the Chicken
- Begin extract by preparing your chicken. Pat the boneless, skinless chicken thighs thoroughly dry with paper towels. This crucial step helps to achieve a beautiful, golden-brown sear, which adds depth of flavor and a more appealing texture to the final dish. Season both sides of the chicken generously with salt and freshly ground black pepper. Don’t be shy with the seasoning; it’s the foundation for delicious flavor.
- Heat the olive oil in a large, heavy-bottomed skillet or Dutch oven over medium-high heat. You want the pan to be hot enough so that the chicken sizzles immediately upon contact. Once the oil is shimmering, carefully add the seasoned chicken thighs to the hot skillet. You might hear a satisfying sizzle – that’s exactly what you want!
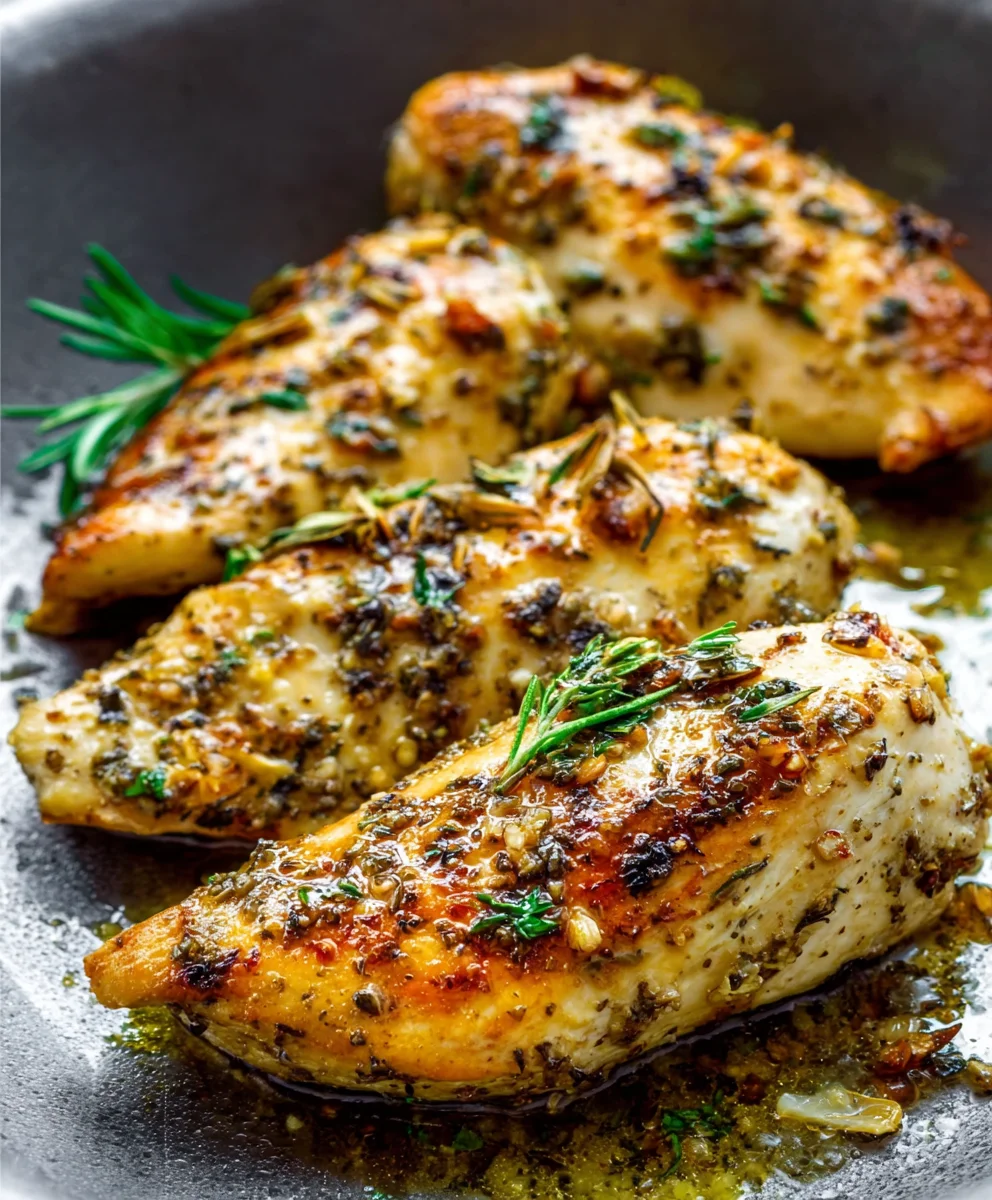
- Cook the chicken for about 4-5 minutes per side, undisturbed, until it is deeply golden brown and has developed a lovely crust. It’s important not to overcrowd the pan; if necessary, cook the chicken in batches. Overcrowding will steam the chicken rather than sear it, resulting in a less desirable texture and color. Once seared, remove the chicken from the skillet and set it aside on a plate. The chicken will not be fully cooked at this stage; it will finish cooking in the sauce.
Building the Garlic Butter Sauce
- Reduce the heat of the skillet to medium. Add the unsalted butter to the pan. Allow the butter to melt completely, and then add the minced garlic. Cook the garlic, stirring frequently, for about 1 to 2 minutes until it becomes fragrant. Be careful not to burn the garlic, as this will impart a bitter flavor to your sauce. You’re looking for a gentle sauté to release its aromatic oils.
- Pour in the chicken broth and use a wooden spoon or spatula to scrape up any browned bits from the bottom of the skillet. These browned bits, known as the fond, are packed with flavor and will greatly enhance your sauce. Let the broth simmer for about 2 minutes, allowing it to reduce slightly.
- Stir in the heavy cream and fresh lemon juice. The lemon juice will add a bright, zesty counterpoint to the richness of the butter and cream, balancing the flavors beautifully. Add the dried oregano and continue to simmer the sauce gently for another 2-3 minutes, stirring occasionally, until it has thickened slightly. Taste the sauce and adjust the salt and pepper as needed. Remember, you can always add more seasoning, but you can’t take it away.
Finishing the Garlic Butter Chicken
- Return the seared chicken thighs to the skillet, nestling them into the simmering garlic butter sauce. Spoon some of the sauce over the chicken to ensure it is well coated.
- Cover the skillet and let the chicken simmer gently in the sauce for about 8-10 minutes, or until the chicken is cooked through and tender. The internal temperature of the chicken should reach 165°F (74°C). The sauce will continue to thicken as it simmers, coating the chicken in a rich, glossy glaze.
- Just before serving, stir in the chopped fresh parsley. The vibrant green of the parsley not only adds a beautiful visual appeal but also contributes a fresh, herbaceous note that complements the richness of the garlic butter sauce. Give everything a final gentle stir to distribute the parsley evenly.
Conclusion:
And there you have it – a truly delicious and satisfying Garlic Butter Chicken, ready to impress! This recipe is wonderfully forgiving and adaptable, making it a fantastic option for both seasoned cooks and those just starting their culinary journey. The rich, savory garlic butter sauce perfectly coats tender pieces of chicken, creating a dish that’s both comforting and elegant. We hope you enjoy making and sharing this Garlic Butter Chicken with your loved ones.
For serving suggestions, this Garlic Butter Chicken is exceptional served over fluffy rice to soak up all that incredible sauce, or alongside a creamy mashed potato. A simple side salad with a light vinaigrette offers a refreshing contrast. Feel free to experiment with variations too! Add a splash of white grape juice to the sauce for an extra layer of flavor, or incorporate some fresh herbs like parsley or thyme towards the end of cooking. You could also add sautéed mushrooms or spinach for added texture and nutrients.
Don’t be afraid to make this Garlic Butter Chicken your own! The joy of cooking lies in personalization. We encourage you to dive in, get creative, and savor every bite of this delightful meal.
Frequently Asked Questions:
Can I use chicken thighs instead of chicken breasts for this Garlic Butter Chicken?
Absolutely! Chicken thighs are often more forgiving and can yield a moister result. Simply adjust the cooking time slightly as thighs may take a few minutes longer to cook through completely. The flavor profile of the Garlic Butter Chicken will remain fantastic.
How can I make this Garlic Butter Chicken spicier?
To add a bit of heat to your Garlic Butter Chicken, consider adding a pinch of red pepper flakes to the sauce as it simmers, or a finely minced jalapeño pepper along with the garlic. You could also serve it with a side of hot sauce for individual customization.
Juicy Garlic Butter Beef – Easy & Flavorful Recipe
An incredibly easy and flavorful recipe for tender beef bathed in a rich garlic butter sauce.
Ingredients
-
2 pounds boneless beef sirloin steaks, cut into 1-inch cubes
-
1/4 cup unsalted butter
-
4 cloves garlic, minced
-
1/2 cup beef broth
-
1/4 cup heavy cream
-
2 tablespoons fresh lemon juice
-
2 tablespoons chopped fresh parsley
-
1 teaspoon dried oregano
-
1/2 teaspoon salt, or to taste
-
1/4 teaspoon black pepper, or to taste
-
1 tablespoon olive oil
Instructions
-
Step 1
Begin by preparing your beef. Pat the beef cubes thoroughly dry with paper towels. This crucial step helps to achieve a beautiful, golden-brown sear, which adds depth of flavor and a more appealing texture to the final dish. Season both sides of the beef generously with salt and freshly ground black pepper. Don’t be shy with the seasoning; it’s the foundation for delicious flavor. -
Step 2
Heat the olive oil in a large, heavy-bottomed skillet or Dutch oven over medium-high heat. You want the pan to be hot enough so that the beef sizzles immediately upon contact. Once the oil is shimmering, carefully add the seasoned beef cubes to the hot skillet. You might hear a satisfying sizzle – that’s exactly what you want! -
Step 3
Cook the beef for about 4-5 minutes per side, undisturbed, until it is deeply golden brown and has developed a lovely crust. It’s important not to overcrowd the pan; if necessary, cook the beef in batches. Overcrowding will steam the beef rather than sear it, resulting in a less desirable texture and color. Once seared, remove the beef from the skillet and set it aside on a plate. The beef will not be fully cooked at this stage; it will finish cooking in the sauce. -
Step 4
Reduce the heat of the skillet to medium. Add the unsalted butter to the pan. Allow the butter to melt completely, and then add the minced garlic. Cook the garlic, stirring frequently, for about 1 to 2 minutes until it becomes fragrant. Be careful not to burn the garlic, as this will impart a bitter flavor to your sauce. You’re looking for a gentle sauté to release its aromatic oils. -
Step 5
Pour in the beef broth and use a wooden spoon or spatula to scrape up any browned bits from the bottom of the skillet. These browned bits, known as the fond, are packed with flavor and will greatly enhance your sauce. Let the broth simmer for about 2 minutes, allowing it to reduce slightly. -
Step 6
Stir in the heavy cream and fresh lemon juice. The lemon juice will add a bright, zesty counterpoint to the richness of the butter and cream, balancing the flavors beautifully. Add the dried oregano and continue to simmer the sauce gently for another 2-3 minutes, stirring occasionally, until it has thickened slightly. Taste the sauce and adjust the salt and pepper as needed. Remember, you can always add more seasoning, but you can’t take it away. -
Step 7
Return the seared beef cubes to the skillet, nestling them into the simmering garlic butter sauce. Spoon some of the sauce over the beef to ensure it is well coated. -
Step 8
Cover the skillet and let the beef simmer gently in the sauce for about 5-7 minutes, or until the beef is cooked through to your desired doneness. The sauce will continue to thicken as it simmers, coating the beef in a rich, glossy glaze. -
Step 9
Just before serving, stir in the chopped fresh parsley. The vibrant green of the parsley not only adds a beautiful visual appeal but also contributes a fresh, herbaceous note that complements the richness of the garlic butter sauce. Give everything a final gentle stir to distribute the parsley evenly.
Important Information
Nutrition Facts (Per Serving)
It is important to consider this information as approximate and not to use it as definitive health advice.
Allergy Information
Please check ingredients for potential allergens and consult a health professional if in doubt.


Leave a Comment