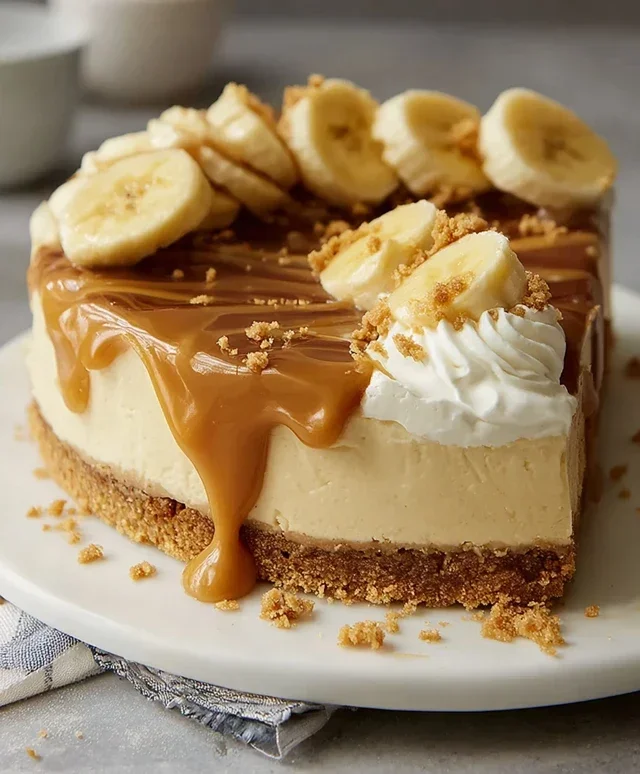
No-Bake Banoffee Cheesecake is a dream come true for anyone craving a decadent dessert without the oven fuss. We all know and adore the classic banoffee pie, with its irresistible combination of sweet bananas, rich toffee, and creamy whipped cream. Now, imagin extracte that beloved flavor profile transformed into a lusciously smooth cheesecake – and the best part? You don’t even need to turn on your oven! This No-Bake Banoffee Cheesecake captures all the magic of its baked cousin, but with a delightful no-bake ease that makes it perfect for any occasion, from a casual weeknight treat to an impressive dessert for guests. What truly makes this No-Bake Banoffee Cheesecake special is its effortless elegance and its ability to deliver pure, unadulterated joy in every single bite. It’s a showstopper that requires minimal effort, maximum flavor, and guarantees smiles all around.

No-Bake Banoffee Cheesecake
Get ready for a dessert sensation that’s almost too good to be true! This no-bake Banoffee Cheesecake is a dream come true for anyone who loves the classic banoffee pie but wants an easier, creamier, and utterly decadent experience. Forget the oven; this recipe relies on simple, delicious ingredients and a bit of chilling time to create a showstopper that will have everyone asking for seconds. The beauty of this cheesecake lies in its no-bake nature, making it perfect for any occasion, especially when the weather’s warm or you’re short on oven space. The combination of a crunchy biscuit base, a luscious creamy filling, sweet caramel, and fresh bananas is simply irresistible. It’s a celebration of textures and flavors that come together in perfect harmony.
We’re going to build this masterpiece layer by luscious layer, ensuring every bite is packed with that signature banoffee goodness. From the crum extractbly base to the silken-smooth filling and the generous drizzle of caramel, every element is designed to delight your taste buds. This recipe is also easily adaptable for those with dietary restrictions, as we’ll be using dairy-free ingredients throughout. So, let’s dive in and create some dessert magic!
Ingredients:
Creating the Biscuit Base
First things first, let’s get our foundation ready. Take your plain biscuits and pop them into a food processor. Pulse them until you achieve fine crum extractbs. If you don’t have a food processor, don’t worry! You can place the biscuits in a sturdy zip-top bag and get crushing with a rolling pin – it’s a great stress reliever too! Once you have your crum extractbs, melt the dairy-free butter or margarine in a small saucepan or in the microwave. Pour the melted butter over the biscuit crum extractbs and mix thoroughly until every crum extractb is coated and the mixture resembles wet sand. This ensures the base will hold together nicely.
Now, grab your cheesecake tin (a springform tin is ideal for easy removal). Press the biscuit and butter mixture firmly and evenly into the base of the tin. You can use the back of a spoon or the bottom of a glass to get a nice, compact layer. Ensure there are no loose bits; a solid base is crucial for a good cheesecake. Pop this base into the refrigerator while we prepare the filling. This chilling time will help it set firmly, creating a perfect contrast to the creamy filling.
Crafting the Luscious Filling
This is where the magic truly happens. Drain and rinse your pre-soaked cashew nuts. If you forgot to soak them overnight, you can speed up the process by soaking them in boiling water for at least 30 minutes to an hour, then draining and rinsing them. This softening step is essential for achieving a super smooth and creamy filling.
In a clean food processor, combine the drained cashew nuts, dairy-free cream cheese, and coconut cream. Pulse until the mixture starts to break down, then continue processing until it’s incredibly smooth and creamy, with no gritty texture whatsoever. This might take a few minutes, so be patient! Scrape down the sides of the processor as needed to ensure everything is incorporated.
Next, add the icing sugar to the food processor. This will add just the right amount of sweetness without being overpowering. Process again until the icing sugar is fully combined and the filling is uniformly smooth and glossy. Taste the filling at this stage and adjust the sweetness if you prefer it a little sweeter.
Assembling the Cheesecake
Now it’s time to bring it all together! Take your chilled biscuit base out of the fridge. Gently spread half of the creamy cashew mixture evenly over the biscuit base. Make sure to get it right to the edges.
Now, take your medium-sized banana. Slice it thinly. Arrange these banana slices in a single, even layer over the cream cheese mixture. Don’t be shy with the banana; it’s a key component of banoffee!
Once the banana layer is in place, carefully spoon the remaining creamy cashew mixture over the banana slices, spreading it evenly to create the top layer of your cheesecake. Use a spatula to smooth the surface and ensure it looks as appealing as possible.
The Finishing Touches and Chilling
This is where we add that irresistible banoffee flair. Take your vegan caramel sauce and drizzle it generously over the top of the cheesecake. You can create swirls or patterns, or just go for a free-flowing, decadent look. The more caramel, the better, in my opinion!
Next, prepare your dairy-free whipping cream. Whip it according to the package instructions until it forms soft peaks. This will be used for decoration. Once the cheesecake has had a little time to firm up from the caramel drizzle, pipe or dollop the whipped cream around the edge of the cheesecake for a decorative finish.
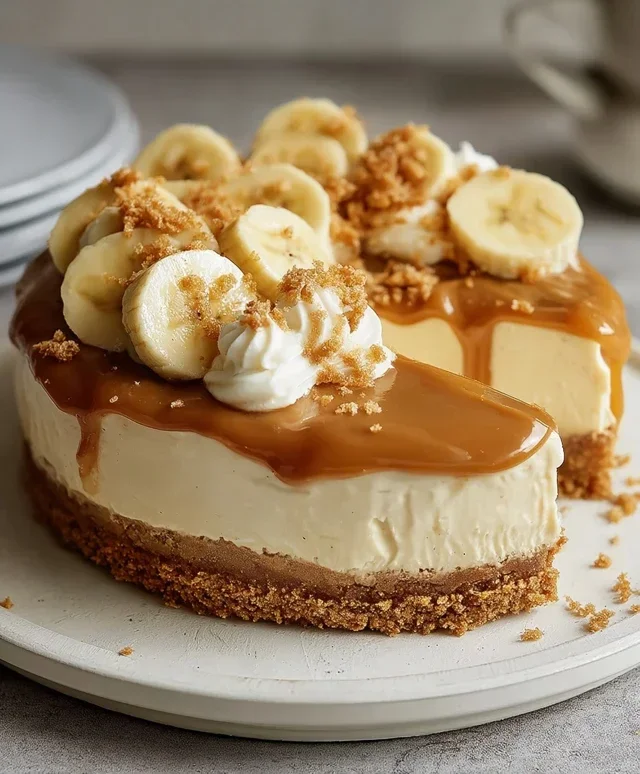
Finally, arrange fresh banana slices on top of the whipped cream and around the cheesecake. You can get creative with your arrangement – a simple fanned out banana or a more elaborate design. Once all the toppings are in place, it’s crucial to let the cheesecake chill properly. Cover it loosely with plastic wrap and refrigerate for at least 4-6 hours, or preferably overnight. This chilling time is essential for the cheesecake to set completely and for the flavors to meld together beautifully. The longer it chills, the firmer and more delicious it will become.
When you’re ready to serve, carefully release the sides of your springform tin. Slice and enjoy this utterly divine no-bake Banoffee Cheesecake! It’s a truly rewarding dessert that’s surprisingly simple to make.
Conclusion:
So there you have it – my incredibly delicious and surprisingly simple No-Bake Banoffee Cheesecake recipe! This dessert truly has it all: the rich, buttery biscuit base, the luscious layer of sweet dulce de leche, the creamy cheesecake filling, and of course, those perfectly ripe bananas. It’s the ultimate indulgence without the fuss of baking, making it a lifesaver for busy schedules or when you’re craving something special but short on time. I genuinely believe this is one of the best no-bake cheesecakes you’ll ever try, offering that perfect balance of textures and sweet, caramel-banana goodness.
I love serving slices of this no-bake banoffee cheesecake chilled, perhaps with a dollop of extra whipped cream and a scattering of chocolate shavings for an added touch of decadence. For variations, you could try adding a swirl of melted chocolate to the dulce de leche layer, or even incorporate a hint of coffee or rum extract into the cheesecake filling for a more grown-up twist. Feel free to get creative with your toppings too – toasted nuts or a sprinkle of toffee pieces would be divine!
I wholeheartedly encourage you to give this recipe a go. It’s a guaranteed crowd-pleaser and a testament to how amazing no-bake desserts can be. Don’t be intimidated; it’s truly straightforward and the results are spectacular. Enjoy every single bite!
Frequently Asked Questions:
Can I make this No-Bake Banoffee Cheesecake ahead of time?
Absolutely! This is one of the best things about no-bake desserts. You can assemble the entire cheesecake and let it chill in the refrigerator for at least 4-6 hours, or even overnight. This allows the flavors to meld beautifully and ensures the cheesecake sets perfectly, making it ideal for entertaining.
What kind of bananas should I use for the best flavor?
For this No-Bake Banoffee Cheesecake, you want ripe, but not overly mushy, bananas. Look for ones that are mostly yellow with a few brown spots. This stage of ripeness offers the best natural sweetness and flavor without being too soft or watery. Avoid green bananas as they won’t be sweet enough.
How long will the No-Bake Banoffee Cheesecake last in the refrigerator?
Stored in an airtight container in the refrigerator, this delicious cheesecake will typically last for 2-3 days. However, due to the fresh bananas, it’s best enjoyed within the first 2 days for optimal texture and flavor. The bananas can start to brown slightly after the first day.
No-Bake Banoffee Cheesecake
A delicious no-bake banoffee cheesecake with a biscuit base, creamy cashew filling, banana, and caramel.
Ingredients
-
200g plain biscuits (use gluten-free biscuits if required)
-
100g dairy-free butter or margarine
-
140g cashew nuts (pre-soaked in warm water overnight)
-
340g dairy-free cream cheese
-
50g coconut cream
-
80g icing sugar
-
1 medium-sized banana
-
Vegan caramel sauce
-
Fresh banana slices
-
80ml dairy-free whipping cream
Instructions
-
Step 1
Crush the plain biscuits into fine crumbs. Melt the dairy-free butter or margarine and mix with the biscuit crumbs. Press this mixture into the base of a springform tin. -
Step 2
Drain the soaked cashew nuts. Blend the cashew nuts with dairy-free cream cheese, coconut cream, icing sugar, and dairy-free whipping cream until very smooth and creamy. If too thick, add a little more dairy-free whipping cream. -
Step 3
Slice the medium-sized banana and arrange the slices over the biscuit base. -
Step 4
Pour the cashew cream mixture over the banana slices and smooth the top. -
Step 5
Drizzle generously with vegan caramel sauce and top with fresh banana slices. -
Step 6
Chill in the refrigerator for at least 4-6 hours, or until firm.
Important Information
Nutrition Facts (Per Serving)
It is important to consider this information as approximate and not to use it as definitive health advice.
Allergy Information
Please check ingredients for potential allergens and consult a health professional if in doubt.
Leave a Comment