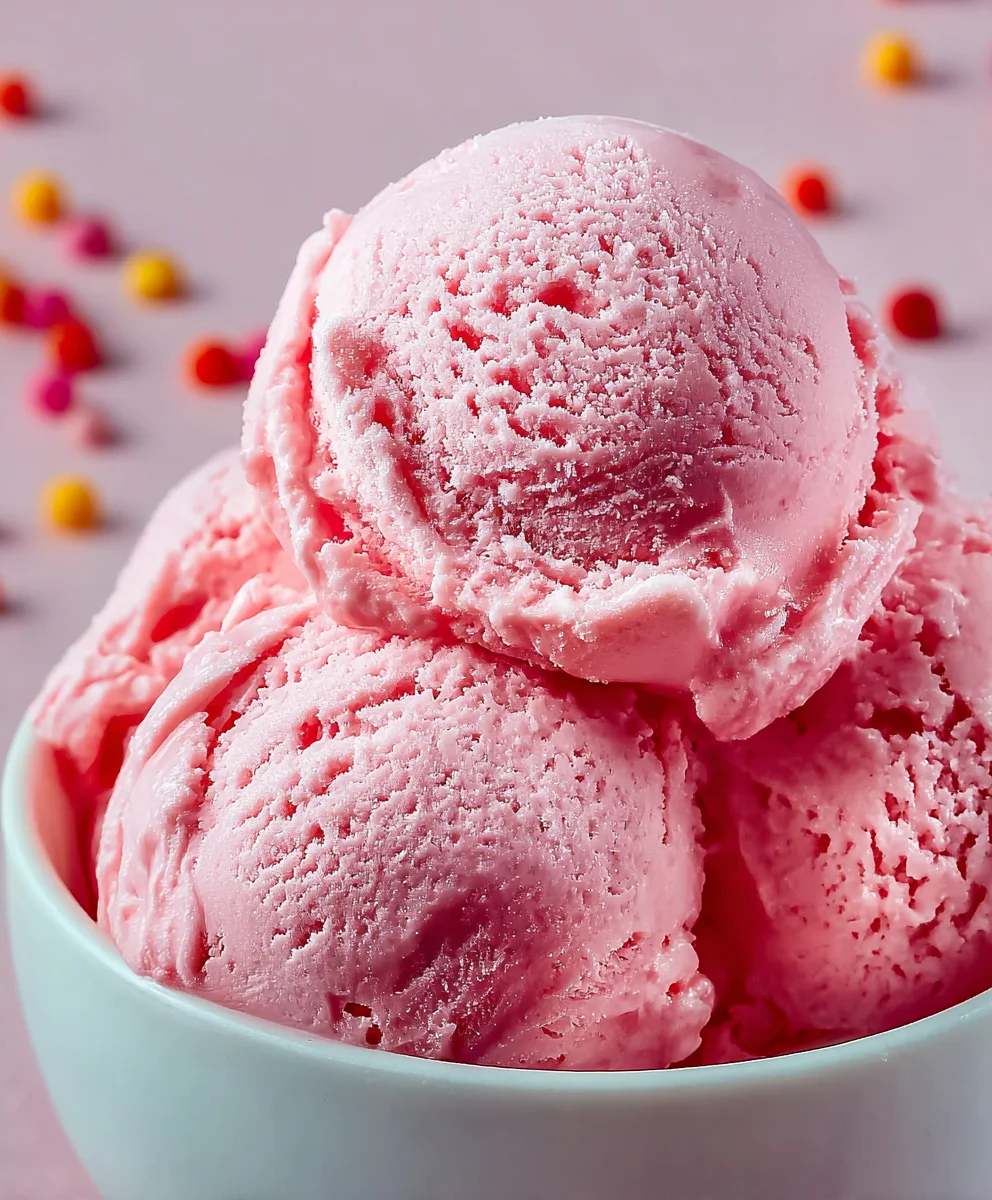
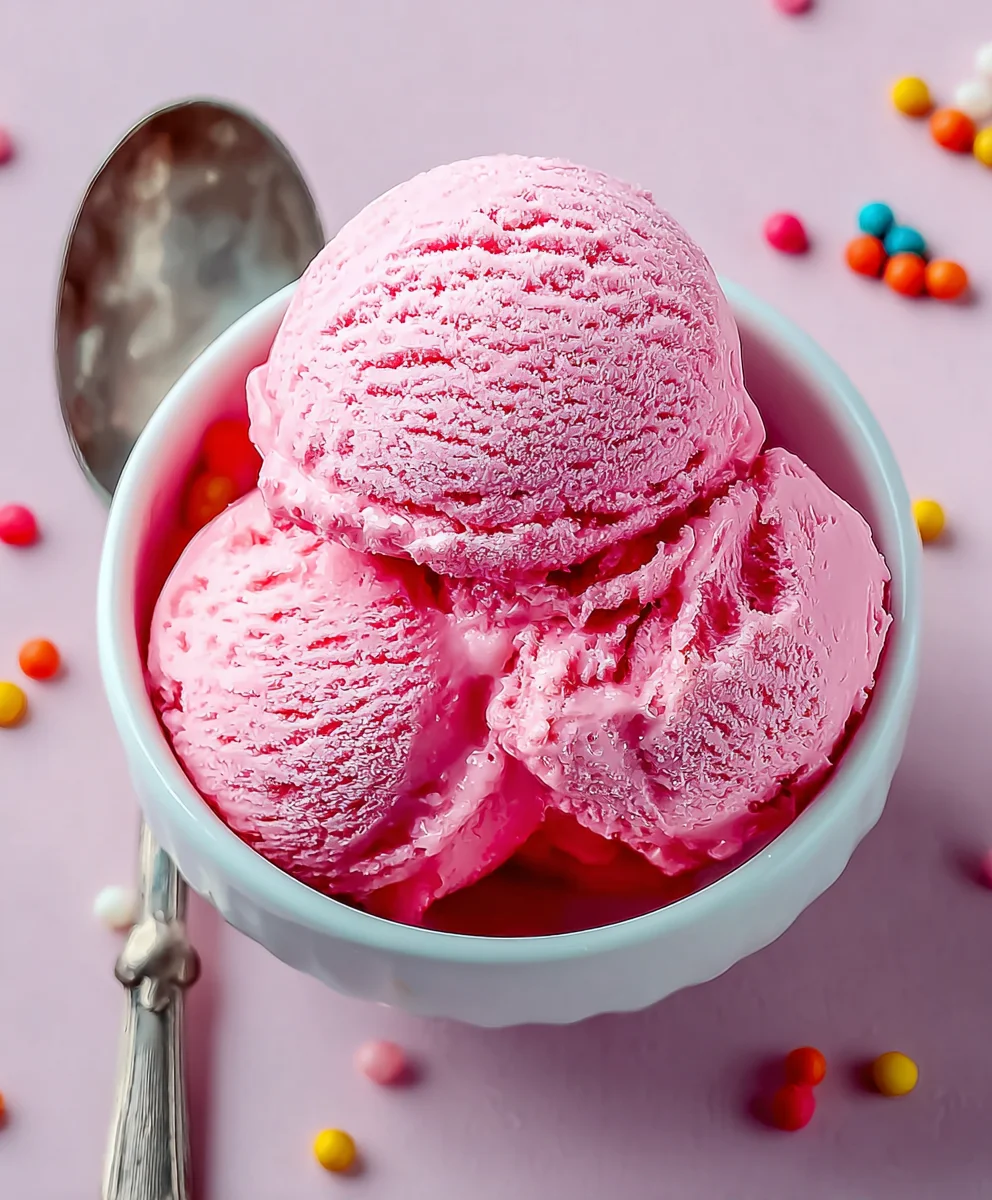
Bubblegum Ice Cream, oh, that vibrant pink hue and playfully sweet aroma, immediately transports us back to carefree childhood days, doesn’t it? It’s more than just a flavor; it’s an experience, a nostalgic trip to the ice cream parlor or the corner store where that distinctive, sugary scent promised pure delight. People absolutely adore bubblegum ice cream for its unapologetically fun and familiar taste that evokes such happy memories. It’s the ultimate treat for anyone who craves a burst of pure joy in every spoonful. What makes this particular iteration of bubblegum ice cream truly special is the perfect balance of sweetness and that unmistakable candy essence, creating a creamy, dreamy concoction that’s both comforting and exciting. Get ready to churn up a batch of happiness that will have everyone asking for seconds!

Ingredients:
- 2 cups heavy cream
- 1 cup whole milk
- ¾ cup granulated sugar
- 2 teaspoons bubblegum flavoring
- 1 teaspoon vanilla extract
- ¼ teaspoon kosher salt
- Pink or red food coloring (to taste)
- ½ cup confetti sprinkles, divided
- 1 cup gumballs (for decoration)
Preparing the Base for Bubblegum Ice Cream
The foundation of any great ice cream lies in a well-balanced base, and our Bubblegum Ice Cream is no exception. We’ll start by combining our liquid dairy components with the sweeteners and flavorings. In a medium saucepan, whisk together the whole milk and granulated sugar. Place the saucepan over medium heat. It’s crucial to stir the mixture constantly to ensure the sugar dissolves completely and doesn’t scorch at the bottom of the pan. We’re not looking to boil the milk here; we just want it to be warm enough to dissolve the sugar and allow the flavors to meld beautifully. Continue stirring until you no longer see any sugar granules. This usually takes about 5-7 minutes.
Once the sugar has dissolved, remove the saucepan from the heat. Now it’s time to introduce the star flavors. Add the bubblegum flavoring and the vanilla extract to the warm milk mixture. Stir well to ensure these potent aromas are evenly distributed throughout the base. Next, we’ll add the kosher salt. Don’t skip this ingredient; it might seem small, but salt plays a vital role in enhancing the sweetness and bringin extractg out the complex flavors of both the bubblegum and vanilla. It creates a more rounded and satisfying taste profile.
Now comes the fun part where we transform our creamy mixture into a vibrant Bubblegum Ice Cream. Add a few drops of pink or red food coloring to the base. Start with a small amount, perhaps 2-3 drops, and stir thoroughly. Assess the color. If you desire a more intense pink hue, add more food coloring, a drop at a time, until you achieve your perfect bubblegum shade. Remember that the color will lighten slightly once the ice cream is frozen.
Chilling and Infusing the Ice Cream Base
For the smoothest and creamiest ice cream, it’s essential to chill the base thoroughly before churning. Transfer the colored and flavored milk mixture to a clean bowl or a large glass measuring cup. Cover the surface of the liquid directly with plastic wrap, pressing it down so that it touches the milk. This prevents a skin from forming on top as it cools. Place the covered base in the refrigerator for at least 4 hours, or preferably overnight. This chilling period is critical. It allows the dairy proteins to relax and the flavors to fully meld and develop. The colder the base is when it goes into your ice cream maker, the faster it will freeze, resulting in smaller ice crystals and a much creamier texture. Don’t rush this step; patience here will be rewarded with superior ice cream.
Churning the Bubblegum Ice Cream
Once your ice cream base is thoroughly chilled, it’s time to churn it. Prepare your ice cream maker according to the manufacturer’s instructions. This typically involves ensuring the freezer bowl is completely frozen (this can take 12-24 hours in your freezer). Once ready, pour the chilled base mixture into the frozen bowl of your ice cream mgin extractr. Begin churning. The churning process incorporates air into the mixture while freezing it, creating the characteristic light and airy texture of ice cream.
As gin extract ice cream begins to thicken, usually after about 15-20 minutes of churning, it’s time to add our festive confetti sprinkles. This is where the “bubblegum” theme really comes to life with pops of color. Stop the ice cream maker briefly and gently fold in about half of the confetti sprinkles (¼ cup). This ensures they are evenly distributed without being completely broken down. Continue churning until the ice cream reaches a soft-serve consistency. This usually takes another 5-10 minutes. The ice cream should be thick enough to hold its shape when the paddle is lifted.
Freezing and Decorating Your Bubblegum Ice Cream
After churning, the ice cream will still be quite soft. To achieve the firm, scoopable consistency we all love, it needs to harden further in the freezer. Transfer the churned ice cream from the ice cream maker bowl to a freezer-safe container. Again, you can stir in the remaining ¼ cup of confetti sprinkles at this stage if you want an even more abundant confetti presence throughout the ice cream. You can also gently swirl them in for a more marbled effect. Smooth the top of the ice cream with a spatula. Cover the container tightly with a lid or plastic wrap. Place the container in the freezer for at least 4-6 hours, or until it is firm and scoopable.
The final flourish for our Bubblegum Ice Cream comes with decoration. Before serving, let the ice cream sit at room temperature for a few minutes to soften slightly, making it easier to scoop. Prepare your gumballs for decoration. You can leave them whole, or if they are large, you might choose to halve or quarter them for a more varied visual appeal. Scoop generous portions of the bubblegum ice cream into bowls or cones. Artfully arrange the gumballs and any remaining confetti sprinkles on top of each serving. This adds a delightful visual element and a fun textural contrast, making your homemade Bubblegum Ice Cream a true showstopper that’s as fun to look at as it is to eat.
Conclusion:
And there you have it! Your very own homemade Bubblegum Ice Cream. We hope you’ve enjoyed this delightful journey into creating a classic favorite that’s sure to bring smiles to faces of all ages. This recipe is wonderfully straightforward, proving that you don’t need a fancy ice cream maker to achieve creamy, delicious results right in your own freezer.
This vibrant and fun Bubblegum Ice Cream is perfect for birthday parties, summer gatherings, or just a special treat to brighten any day. Serve it up in classic cones, bowls, or even as a topping for your favorite desserts. For a little extra flair, consider adding a swirl of whipped cream and some colorful sprinkles!
Don’t be afraid to experiment with this recipe! You can adjust the bubblegum flavor intensity to your liking, or even add a few drops of pink food coloring to enhance that iconic look. If you’re feeling adventurous, try incorporating small, chewy candy bits for added texture.
We encourage you to give this Bubblegum Ice Cream a try. It’s a rewarding and delicious project that’s surprisingly easy to master. Enjoy the sweet, nostalgic taste and the fun of making your own ice cream!
Frequently Asked Questions:
Q: Can I make Bubblegum Ice Cream without an ice cream maker?
A: Absolutely! This recipe is designed to be made without an ice cream maker. You’ll simply need to freeze the mixture and stir it periodically to break up ice crystals, ensuring a smooth and creamy texture. This process might require a bit more manual effort but yields fantastic results.
Q: How long does Bubblegum Ice Cream last?
A: Homemade Bubblegum Ice Cream can be stored in an airtight container in the freezer for up to two weeks. For the best texture and flavor, it’s recommended to consume it within the first week. Ensure it’s well-covered to prevent freezer burn.
Q: Can I make this recipe vegan?
A: Yes, you can adapt this Bubblegum Ice Cream recipe for a vegan diet! Simply substitute the heavy cream and milk with full-fat coconut milk or a blend of vegan heavy cream and almond milk. Ensure your bubblegum flavoring and any optional additions are also vegan-friendly.
Sweet Bubblegum Ice Cream – Easy Homemade Recipe
A simple and fun homemade bubblegum ice cream recipe with vibrant color and festive sprinkles.
Ingredients
-
2 cups heavy cream
-
1 cup whole milk
-
3/4 cup granulated sugar
-
2 teaspoons bubblegum flavoring
-
1 teaspoon vanilla extract
-
1/4 teaspoon kosher salt
-
Pink or red food coloring (to taste)
-
1/2 cup confetti sprinkles, divided
-
1 cup gumballs (for decoration)
Instructions
-
Step 1
In a medium saucepan, whisk together whole milk and granulated sugar over medium heat. Stir constantly until the sugar is completely dissolved and the mixture is warm, about 5-7 minutes. Do not boil. -
Step 2
Remove from heat. Stir in bubblegum flavoring, vanilla extract, and kosher salt. Add pink or red food coloring a few drops at a time until desired bubblegum shade is achieved. Stir well. -
Step 3
Transfer the mixture to a clean bowl. Cover the surface directly with plastic wrap to prevent a skin from forming. Chill in the refrigerator for at least 4 hours, or preferably overnight. -
Step 4
Prepare your ice cream maker according to manufacturer’s instructions. Pour the chilled base into the frozen bowl and begin churning. After 15-20 minutes, as it thickens, gently fold in half of the confetti sprinkles (1/4 cup). Continue churning until soft-serve consistency is reached. -
Step 5
Transfer the churned ice cream to a freezer-safe container. Stir in the remaining 1/4 cup of confetti sprinkles if desired. Smooth the top, cover tightly, and freeze for at least 4-6 hours, or until firm and scoopable. -
Step 6
Before serving, let the ice cream soften slightly at room temperature for a few minutes. Scoop into bowls or cones and decorate with gumballs and any remaining confetti sprinkles.
Important Information
Nutrition Facts (Per Serving)
It is important to consider this information as approximate and not to use it as definitive health advice.
Allergy Information
Please check ingredients for potential allergens and consult a health professional if in doubt.
Leave a Comment