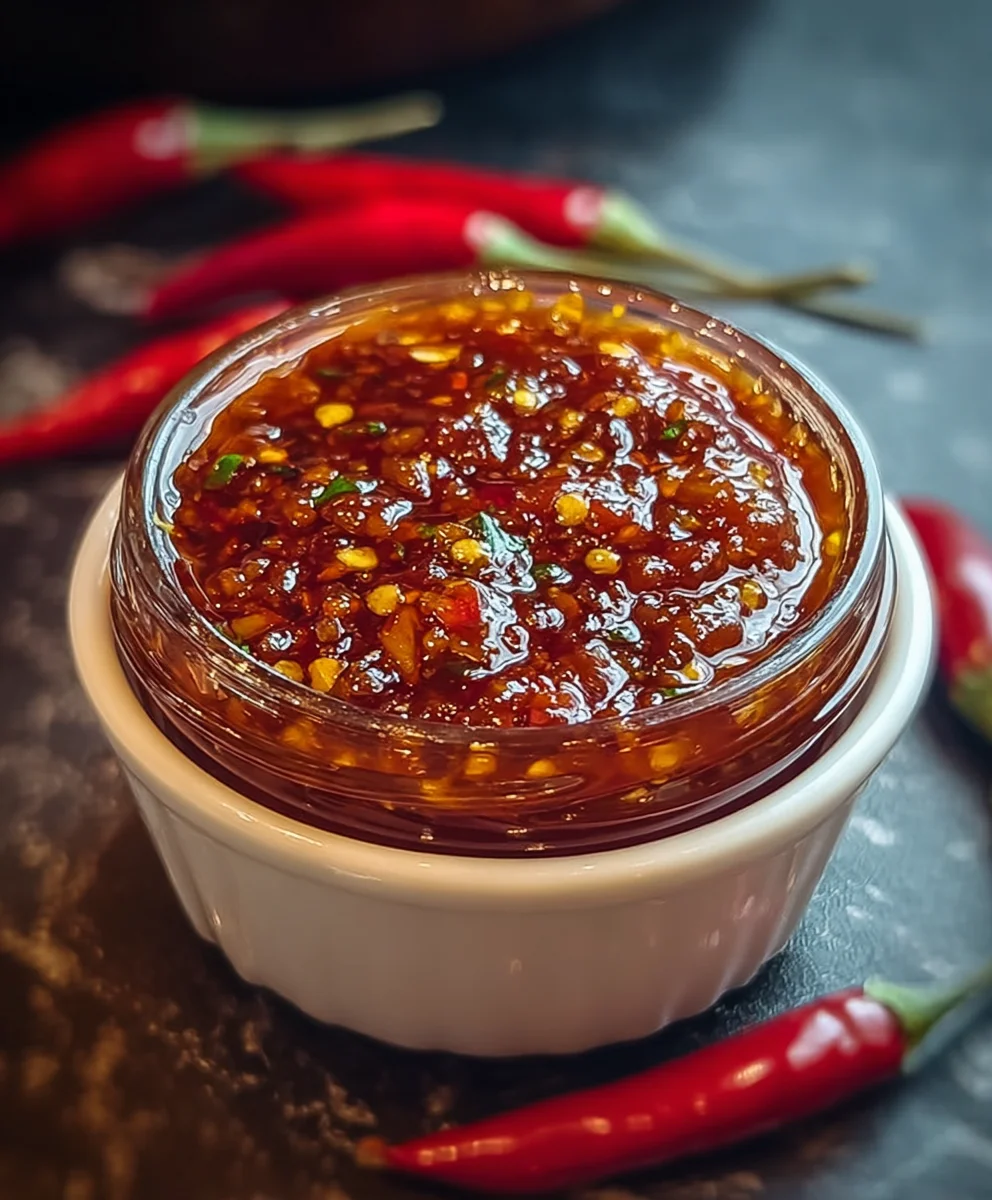
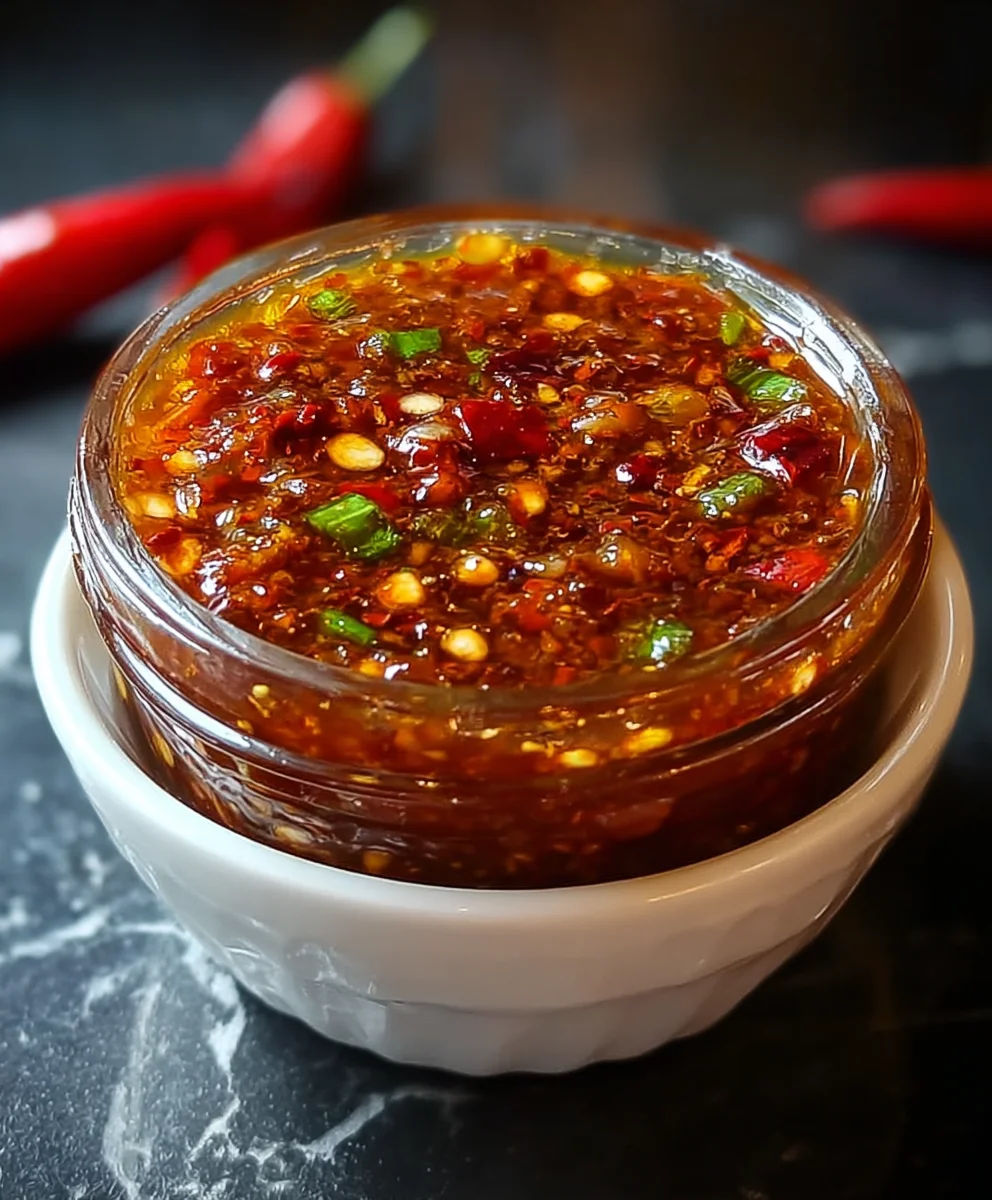
Homemade Chili Garlic Sauce is more than just a condiment; it’s a flavor explosion waiting to happen, a vibrant dance of heat, sweetness, and umami that can elevate practically any dish. If you’ve ever wondered what gives those restaurant stir-fries that addictive zing or what secret ingredient makes your dumplings sing, chances are it’s a spectacular homemade chili garlic sauce. People adore it for its incredible versatility – a drizzle here, a dollop there, and suddenly your weeknight noodles, roasted vegetables, or even scrambled eggs are transformed into something truly extraordinary. What makes this particular homemade chili garlic sauce so special is the perfect balance we achieve. It’s not just about the fire; it’s about the deep, complex flavors derived from freshly minced garlic, fiery chilies, a touch of sweetness to round it out, and a savory foundation that leaves you craving more. Get ready to unlock a world of flavor!

Ingredients:
- 5-6 fresh red chilies
- 4 cloves garlic, minced
- 1 tablespoon vinegar (white or rice)
- 1 tablespoon olive oil or vegetable oil
- 1/2 teaspoon salt
- 1/2 teaspoon sugar (optional)
Preparing the Chilies
The first step in creating your delicious homemade chili garlic sauce is preparing the fresh red chilies. For this recipe, you’ll need about 5 to 6 fresh red chilies. The type of red chili you choose will influence the heat level of your sauce. If you prefer a milder sauce, opt for chilies like Fresno or Anaheim. For a spicier kick, consider Thai bird’s eye chilies or habaneros, though you might want to adjust the quantity accordingly.
To prepare them, start by washing the chilies thoroughly under cool running water. Next, you’ll need to remove the stems. A simple twist and pull motion usually works well. For a less intense heat, you can also remove the seeds and membranes. To do this, carefully slice the chilies lengthwise and use the tip of a small knife or a spoon to scrape out the inner pith and seeds. If you enjoy a good amount of heat, leaving some or all of the seeds in will contribute to a more fiery sauce. Once deseeded, you can finely chop the chilies. The finer you chop them, the smoother your final sauce will be. You can use a sharp knife for this or, for a quicker method, a food processor or blender, pulsing until you reach your desired consistency. Be mindful not to over-process into a paste unless that’s the texture you’re aiming for.
Mincing the Garlic
Next up is the garlic. You’ll need 4 cloves of garlic for this recipe. Fresh garlic is essential for that pungent, aromatic flavor that pairs so beautifully with chilies. Start by peeling the garlic cloves. You can do this by smashing them gently with the side of your knife or by using a garlic peeler. Once peeled, you’ll want to mince the garlic. This means chopping it into very fine pieces. Again, a sharp knife is your best friend here. Aim for tiny, uniform pieces. Alternatively, you can use a garlic press for a quick and efficient mince. The goal is to have small pieces of garlic that will release their flavor readily when cooked. If you’re using a food processor for the chilies, you can often add the garlic to the processor as well and pulse it a few times until it’s finely minced.
The Cooking Process
Now it’s time to bring everything together and cook our homemade chili garlic sauce. You’ll need a small saucepan or a skillet for this. Place your chosen pan over medium-low heat. Add the 1 tablespoon of olive oil or vegetable oil to the pan. Olive oil will lend a slightly fruitier note, while vegetable oil is more neutral. Allow the oil to heat up gently; you don’t want it to smoke.
Once the oil is warm, carefully add your chopped fresh red chilies and the minced garlic to the pan. Stir them together. This is where the magic begin extracts! You want to sauté these ingredients gently, allowing their flavors to meld and develop. Cook them for about 3-5 minutes, stirring frequently. Keep the heat on medium-low to prevent the garlic and chilies from burning, which can result in a bitter taste. You’re looking for the garlic to become fragrant and the chilies to soften slightly. You should start to smell a wonderful aroma filling your kitchen. This gentle sautéing process helps to mellow out some of the raw sharpness of the chilies and garlic, creating a more complex flavor profile for your sauce.
Adding Flavor Enhancements
After sautéing the chilies and garlic for a few minutes, it’s time to add the remaining flavorings. Pour in the 1 tablespoon of vinegar. White vinegar provides a clean, sharp tang, while rice vinegar offers a milder, slightly sweeter acidity. The vinegar not only adds flavor but also helps to preserve the sauce. Stir the vinegar into the chili and garlic mixture.
Next, add the 1/2 teaspoon of salt. Salt is a crucial flavor enhancer that will bring out the best in all the ingredients. Stir it in well. If you’re using the optional 1/2 teaspoon of sugar, now is the time to add it. Sugar helps to balance the heat of the chilies and the acidity of the vinegar, creating a more rounded and pleasing flavor. Stir the sugar in until it dissolves. Continue to cook this mixture for another 1-2 minutes, stirring constantly, to allow the flavors to meld together. You’ll notice the sauce starting to thicken slightly as the ingredients cook down.
Simmering and Finishing
Once all the ingredients are combined and have had a moment to heat through, reduce the heat to low. Let the sauce simmer gently for about 5-10 minutes. This simmering phase is important for allowing the flavors to deepen and the sauce to reach a desirable consistency. Stir occasionally to prevent sticking. During this time, you can taste the sauce and adjust seasonings if needed. Perhaps you want a touch more salt, a little more vinegar for tang, or even a pinch more sugar for sweetness.
As the sauce simmers, you’ll see it change texture. It will become slightly thicker and more glossy. If you find that the sauce is getting too thick for your liking, you can add a teaspoon or two of water, but do so sparingly. The goal is a sauce that has body but is still pourable and dip-able. Once you’re happy with the consistency and flavor, remove the saucepan from the heat.
Cooling and Storing Your Homemade Chili Garlic Sauce
Allow your delicious homemade chili garlic sauce to cool completely in the pan. As it cools, it will thicken up even more. Once it has reached room temperature, carefully transfer it to a clean, airtight jar or container. A small glass jar with a tight-fitting lid is ideal. This homemade sauce will keep in the refrigerator for up to two weeks. Ensure the jar is properly senon-alcoholic aled to maintain freshness and prevent any contamination. For best results, always use a clean spoon when serving to avoid introducing bacteria into the sauce. Your homemade chili garlic sauce is now ready to be used as a condiment, a marinade, a dipping sauce, or an ingredient in your favorite stir-fries and other dishes!
Conclusion:
And there you have it – your very own batch of delicious, spicy, and wonderfully aromatic Homemade Chili Garlic Sauce! This recipe is a game-changer, offering a fresh and vibrant alternative to store-bought versions. The process is straightforward, and the results are incredibly rewarding. I hope you enjoy the process and, more importantly, the incredible flavor this sauce brings to your meals.
This versatile Homemade Chili Garlic Sauce is perfect as a dipping sauce for dumplings, spring rolls, or fried chicken. Drizzle it over noodles, stir-fries, eggs, or even your favorite pizza for an instant flavor upgrade. Don’t be afraid to experiment!
For variations, consider adding a touch of sweetness with a teaspoon of honey or maple syrup, or a hint of tang with rice vinegar. You can also adjust the chili peppers based on your heat preference – use milder ones for a less intense kick, or go wild with spicier varieties for a fiery experience. Get creative and make this Homemade Chili Garlic Sauce your own!
Frequently Asked Questions:
How long does this Homemade Chili Garlic Sauce last?
When stored properly in an airtight container in the refrigerator, your Homemade Chili Garlic Sauce should stay fresh for up to 2-3 weeks. Make sure to use clean utensils when serving to maintain its quality.
Can I make this sauce less spicy?
Absolutely! To reduce the heat, you can use fewer chili peppers or opt for milder varieties like red bell peppers with a small amount of chili for color and flavor. Removing the seeds and membranes from the chili peppers before blending will also significantly cut down on the spice level.
Easy Homemade Chili Garlic Sauce
A quick and easy recipe for homemade chili garlic sauce, perfect for adding a flavorful kick to any dish.
Ingredients
-
5-6 fresh red chilies
-
4 cloves garlic, minced
-
1 tablespoon white or rice vinegar
-
1 tablespoon olive oil or vegetable oil
-
1/2 teaspoon salt
-
1/2 teaspoon sugar (optional)
Instructions
-
Step 1
Prepare the chilies by washing, removing stems, and finely chopping. Remove seeds and membranes for milder heat. -
Step 2
Mince the garlic cloves finely. -
Step 3
Heat olive oil or vegetable oil in a saucepan over medium-low heat. Add chopped chilies and minced garlic and sauté for 3-5 minutes until fragrant and softened. -
Step 4
Stir in vinegar, salt, and optional sugar. Cook for another 1-2 minutes, stirring constantly. -
Step 5
Reduce heat to low and simmer for 5-10 minutes, stirring occasionally, until the sauce thickens slightly. -
Step 6
Allow the sauce to cool completely, then transfer to an airtight container and store in the refrigerator for up to two weeks.
Important Information
Nutrition Facts (Per Serving)
It is important to consider this information as approximate and not to use it as definitive health advice.
Allergy Information
Please check ingredients for potential allergens and consult a health professional if in doubt.

Leave a Comment