Quick & Easy Homemade Butter Chicken Recipe, that’s what we’re diving into today, and trust me, it’s a game-changer for your weeknight dinners! We’ve all been there, craving that rich, creamy, and utterly satisfying butter chicken that usually requires a trip to our favorite Indian restaurant. But what if I told you that you could recreate that magic in your own kitchen, with minimal fuss and maximum flavor? That’s the beauty of this Quick & Easy Homemade Butter Chicken Recipe. People adore butter chicken because it hits all the right notes: tender chicken bathed in a velvety, tomato-based sauce infused with aromatic spices like garam masala, gin extractger, garlic, and a hint of sweetness. What makes this version truly special is its approachable nature. We’ve stripped away the complicated steps, making it accessible for even the most novice cooks, proving that restaurant-quality Indian cuisine can indeed be a delightful home-cooked affair. Get ready to impress yourself and your loved ones with this wonderfully flavorful and surprisingly simple dish.

Ingredients:
- 1 ½ pounds skinless, boneless chicken thighs, cut into bite-sized chunks
- 1 teaspoon salt
- 1 teaspoon garlic powder
- 1 teaspoon sweet paprika
- ½ teaspoon curry powder
- 1 tablespoon Greek yogurt
- 3 tablespoons vegetable oil
- 3 tablespoons butter (divided)
- 6 garlic cloves, minced
- 1 medium onion, diced
- 1 15-ounce can tomato sauce
- 1 teaspoon sugar
- 1 teaspoon salt (adjust to taste)
- ½ teaspoon black pepper
- 2 cups heavy cream
Marinating the Chicken
To begin extract crafting your delicious butter chicken, let’s get the star of the show, the chicken, prepped and ready. In a medium bowl, combine your bite-sized chicken thigh pieces. To this, we’ll add our initial set of seasonings. Sprinkle in 1 teaspoon of salt, 1 teaspoon of garlic powder, 1 teaspoon of sweet paprika, and ½ teaspoon of curry powder. These spices are going to infuse the chicken with wonderful flavor right from the start. Now, for a touch of tang and to help tenderize the meat, add 1 tablespoon of Greek yogurt. Give everything a good mix, ensuring each piece of chicken is thoroughly coated with the marinade. Cover the bowl and let it rest for at least 30 minutes at room temperature, or if you have more time, you can refrigerate it for up to 4 hours. This marination period is crucial for developing the depth of flavor that makes butter chicken so irresistible.
Searing the Chicken
Once your chicken has had ample time to marinate, it’s time to give it a beautiful sear. Place a large skillet or Dutch oven over medium-high heat. Add 3 tablespoons of vegetable oil to the hot pan. Vegetable oil has a high smoke point, making it ideal for searing. Once the oil is shimmering and just starting to smoke slightly, carefully add the marinated chicken in a single layer. It’s important not to overcrowd the pan; if necessary, work in batches to ensure each piece gets a nice golden-brown crust. Overcrowding will steam the chicken rather than sear it, and we want that delicious caramelization. Sear the chicken for about 2-3 minutes per side, until it’s nicely browned. The chicken doesn’t need to be cooked all the way through at this stage, as it will finish cooking in the sauce. Once seared, remove the chicken from the skillet and set it aside on a plate.
Building the Flavorful Sauce Base
Now that our chicken is seared, let’s create the luscious sauce that defines butter chicken. Reduce the heat of the same skillet to medium. Add 1 tablespoon of butter to the pan. Once the butter has melted, add the 6 minced garlic cloves and the 1 diced medium onion. Sauté these aromatics, stirring frequently, until the onions are softened and translucent, and the garlic is fragrant, which should take about 5-7 minutes. Be careful not to burn the garlic, as it can turn bitter. Scrape up any browned bits left in the pan from searing the chicken – this is where a lot of flavor is hiding! Once the onions and garlic are softened, add the remaining 2 tablespoons of butter and let it melt into the mixture.
Simmering the Butter Chicken
With our aromatic base ready, it’s time to bring the sauce together. Pour in the 15-ounce can of tomato sauce. Stir it well to combine with the sautéed onions and garlic. Next, add 1 teaspoon of sugar to balance the acidity of the tomatoes and enhance their sweetness. Season with 1 teaspoon of salt (you can adjust this later to your preference) and ½ teaspoon of black pepper. Bring the sauce to a gentle simmer, then reduce the heat to low. Return the seared chicken pieces, along with any juices that have accumulated on the plate, back into the skillet with the sauce. Stir everything gently to ensure the chicken is submerged. Cover the skillet and let the butter chicken simmer for about 15-20 minutes, or until the chicken is cooked through and tender. The sauce will thicken slightly during this time.
Enriching with Cream and Finishing Touches
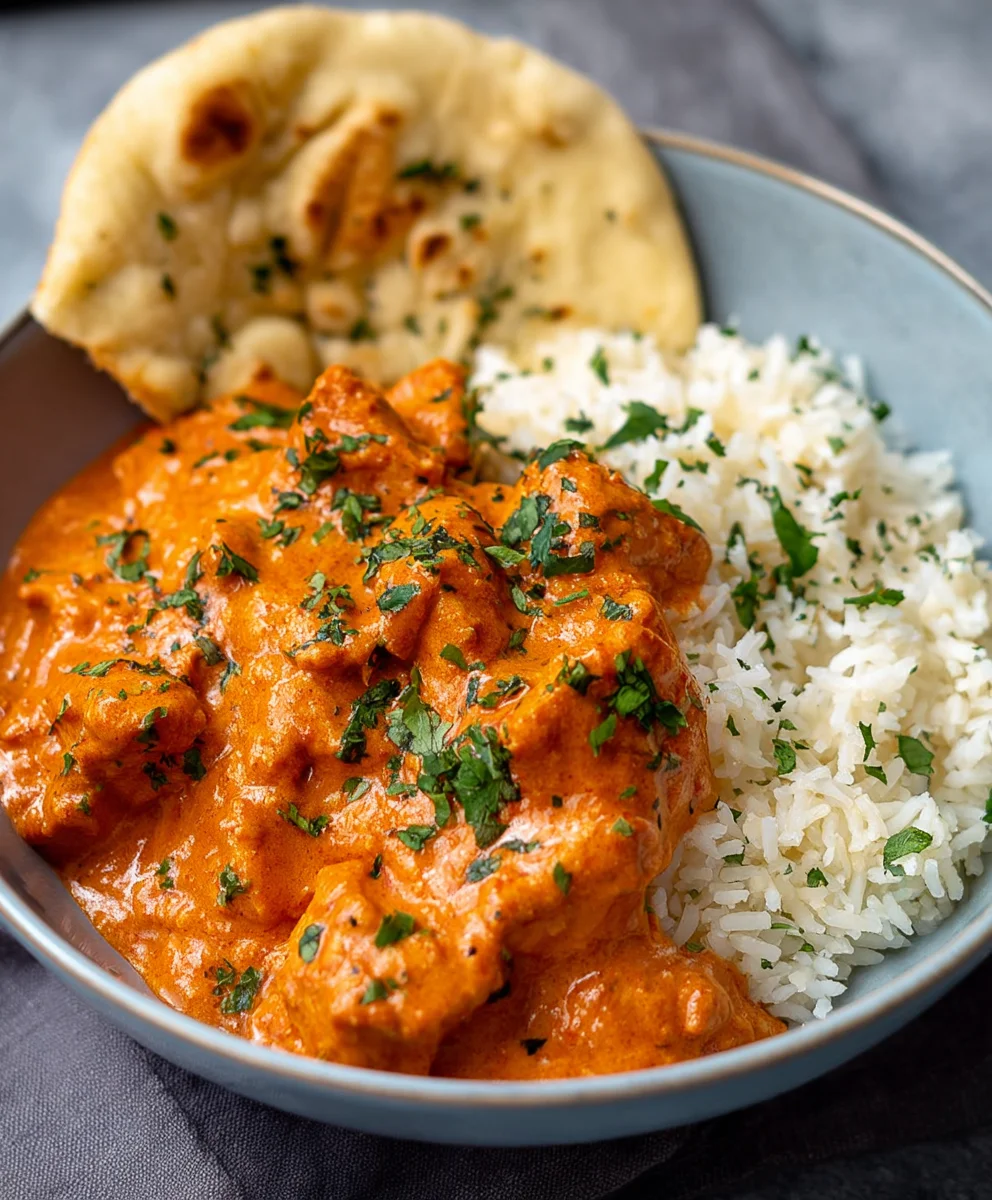
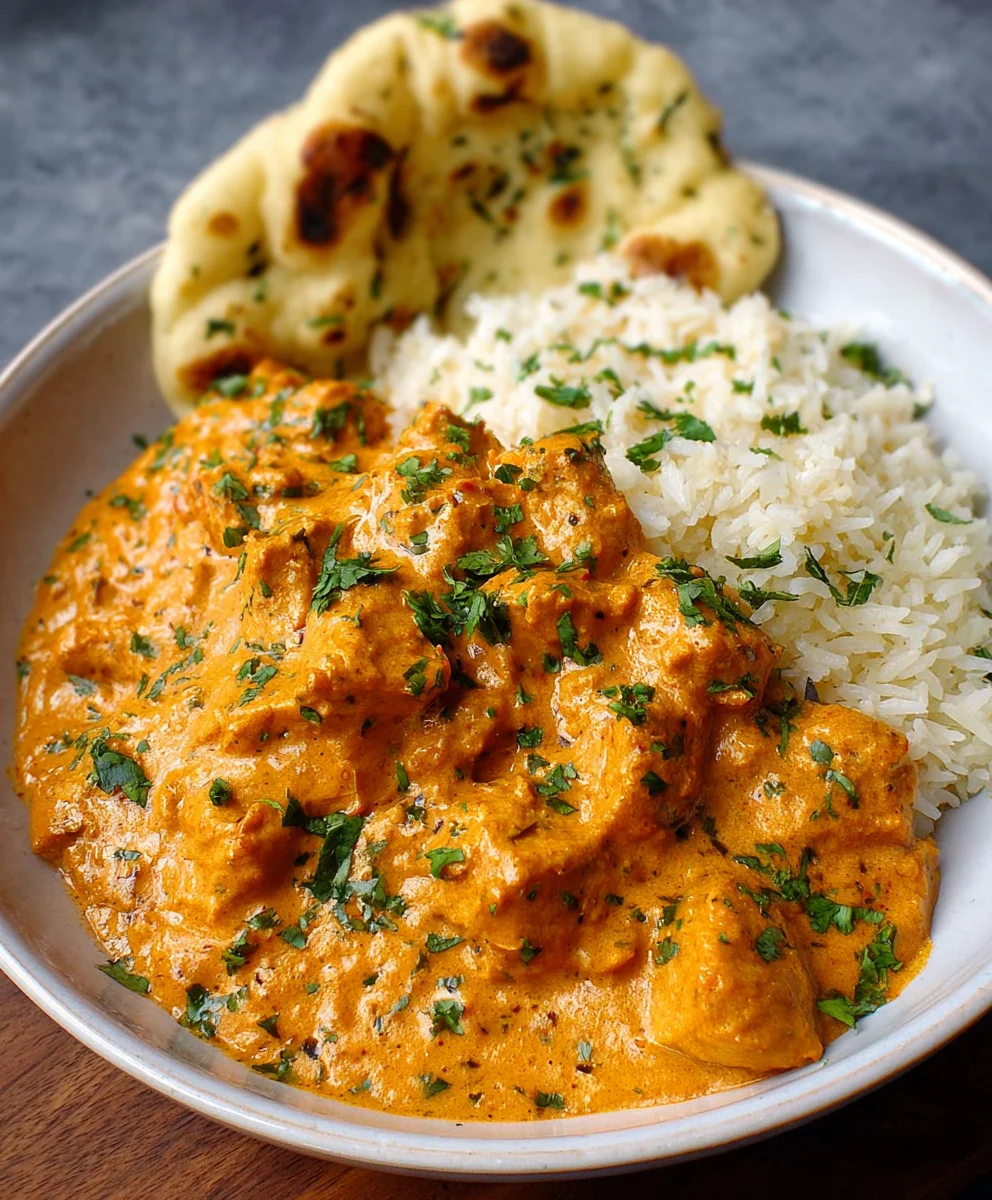
The final stage in creating this incredibly rich and creamy butter chicken involves adding the heavy cream. Once the chicken is fully cooked and the sauce has thickened slightly, pour in 2 cups of heavy cream. Stir gently until the cream is fully incorporated into the sauce, giving it that signature velvety texture and pnon-alcoholic ale orange hue. Allow the sauce to warm through over low heat for another 5 minutes, being careful not to let it boil vigorously, as this can cause the cream to separate. Taste the butter chicken and adjust the salt and pepper if needed. The sugar should have already helped to round out the flavors. If you like it a bit spicier, you could add a pinch of cayenne pepper at this point, though it’s not traditional. Serve hot, typically with basmati rice and naan bread for scooping up every last drop of that glorious sauce.
Conclusion:
And there you have it – your very own Quick & Easy Homemade Butter Chicken Recipe, ready to impress! We’ve walked through each step, from tenderizing the chicken to creating that lusciously creamy, tomato-based sauce, proving that authentic and delicious Indian cuisine can be achieved right in your own kitchen with minimal fuss. This dish is a true crowd-pleaser, perfect for a weeknight family dinner or a special gathering with friends. Don’t be afraid to experiment and make it your own!
For serving, this Quick & Easy Homemade Butter Chicken Recipe is classically paired with fluffy basmati rice and warm naan bread to soak up every last drop of that glorious sauce. A dollop of cooling plain yogurt or a sprinkle of fresh cilantro adds a beautiful finishing touch.
If you’re feeling adventurous, consider adding a pinch of garam masala for an extra layer of warmth, or a touch of honey to balance the tangin extractess of the tomatoes. You can also adjust the spice level to your preference by increasing or decreasing the amount of chili powder.
We truly hope you enjoy making and devouring this incredible Quick & Easy Homemade Butter Chicken Recipe. Happy cooking!
Frequently Asked Questions
What can I use if I don’t have plain yogurt?
If plain yogurt isn’t available, sour cream can be a suitable substitute for marinating the chicken. It will provide a similar tenderizing effect, though the flavor profile might be slightly different. For the sauce, heavy cream is the standard, but you could also use a combination of milk and a touch of cornstarch to thicken it if needed, though this may alter the richness slightly.
Can I make this recipe ahead of time?
Absolutely! The beauty of this Quick & Easy Homemade Butter Chicken Recipe is that it can be made ahead. The chicken can be marinated for a few hours or even overnight. The sauce can also be prepared in advance and stored in the refrigerator for up to 2-3 days. Simply reheat the sauce gently on the stovetop and then add the cooked chicken to warm through before serving. This makes it an excellent option for meal prepping.
Easy Homemade Butter Beef
A quick and flavorful recipe for tender beef simmered in a rich, creamy, and aromatic butter sauce. Perfect for a weeknight meal.
Ingredients
-
1 ½ pounds beef stew meat, cut into bite-sized chunks
-
1 teaspoon salt
-
1 teaspoon garlic powder
-
1 teaspoon sweet paprika
-
½ teaspoon curry powder
-
1 tablespoon Greek yogurt
-
3 tablespoons vegetable oil
-
3 tablespoons butter (divided)
-
6 garlic cloves, minced
-
1 medium onion, diced
-
1 15-ounce can tomato sauce
-
1 teaspoon sugar
-
1 teaspoon salt (adjust to taste)
-
½ teaspoon black pepper
-
2 cups heavy cream
Instructions
-
Step 1
In a medium bowl, combine beef chunks with 1 teaspoon salt, 1 teaspoon garlic powder, 1 teaspoon sweet paprika, and ½ teaspoon curry powder. Add 1 tablespoon Greek yogurt and mix well to coat the beef. Cover and let marinate for at least 30 minutes at room temperature, or refrigerate for up to 4 hours. -
Step 2
Heat 3 tablespoons of vegetable oil in a large skillet or Dutch oven over medium-high heat. Add the marinated beef in a single layer (work in batches if necessary) and sear for 2-3 minutes per side until browned. Remove the beef and set aside. -
Step 3
Reduce the skillet heat to medium. Add 1 tablespoon of butter and melt. Add minced garlic and diced onion, and sauté until softened and fragrant, about 5-7 minutes. Scrape up any browned bits from the bottom of the pan. -
Step 4
Add the remaining 2 tablespoons of butter to the skillet and let it melt. Pour in the 15-ounce can of tomato sauce, 1 teaspoon sugar, 1 teaspoon salt, and ½ teaspoon black pepper. Stir to combine and bring to a gentle simmer. -
Step 5
Return the seared beef and any accumulated juices to the skillet. Stir gently to submerge the beef in the sauce. Cover and simmer on low heat for 15-20 minutes, or until the beef is cooked through and tender. -
Step 6
Pour in 2 cups of heavy cream and stir gently until fully incorporated. Allow the sauce to warm through over low heat for another 5 minutes, without boiling vigorously. Taste and adjust seasoning as needed. Serve hot with basmati rice and naan bread.
Important Information
Nutrition Facts (Per Serving)
It is important to consider this information as approximate and not to use it as definitive health advice.
Allergy Information
Please check ingredients for potential allergens and consult a health professional if in doubt.


Leave a Comment