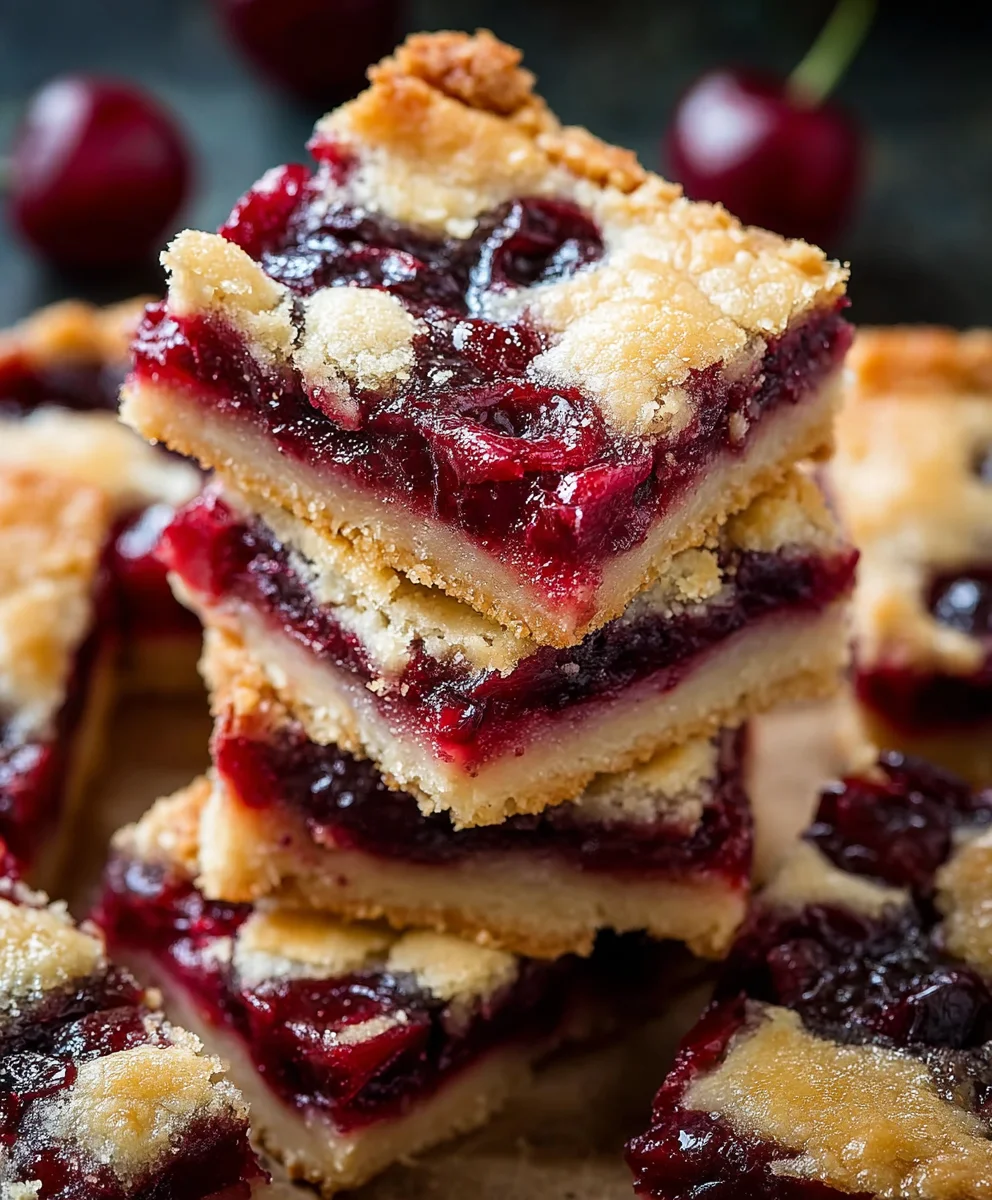
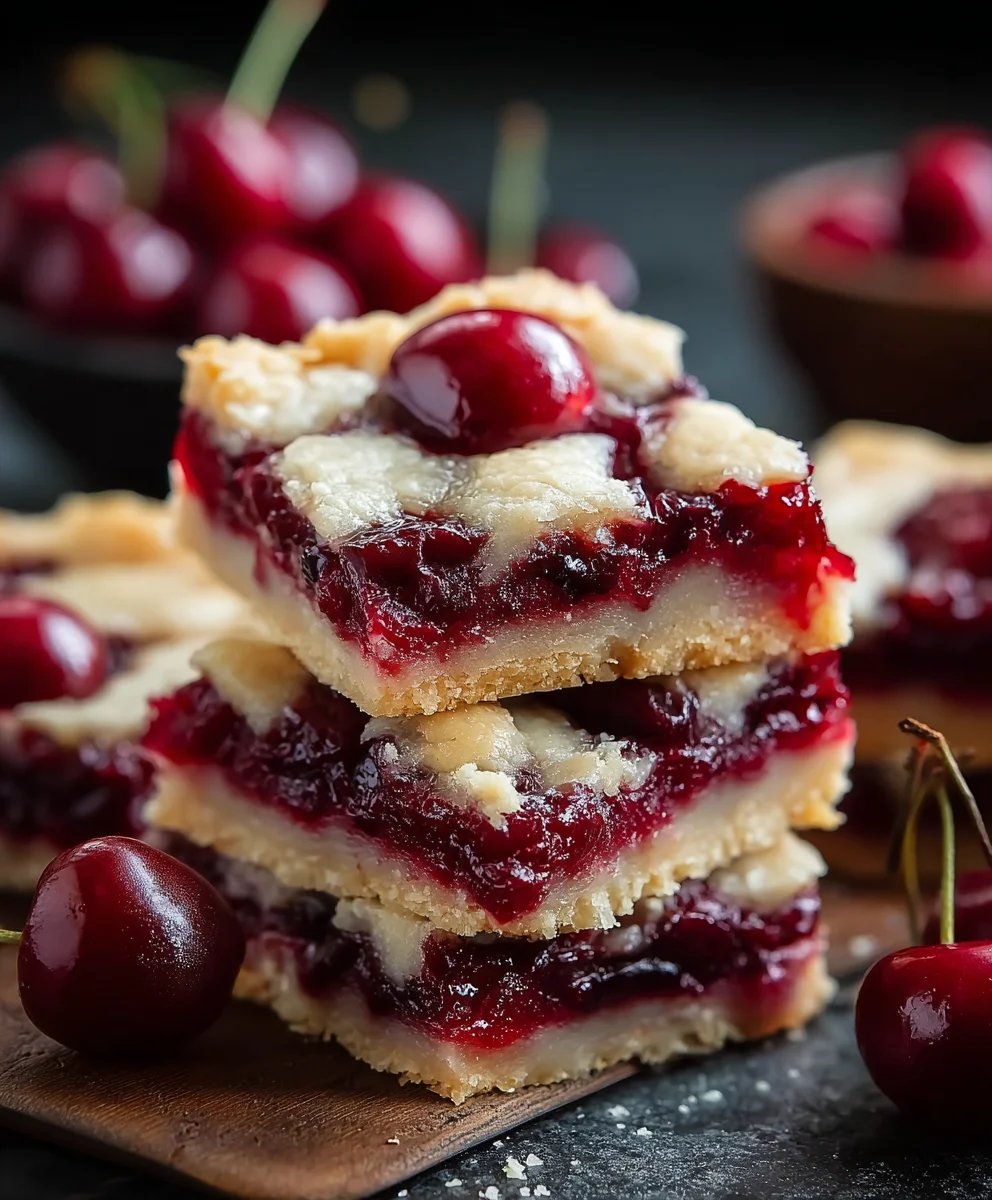
Easy Cherry Pie Bars are about to become your new favorite dessert. Imagin extracte all the delightful, nostalgic flavors of a classic cherry pie, but presented in a convenient, portable, and utterly delicious bar form. We’re talking about that perfect balance of sweet and tart cherries, nestled atop a buttery, crum extractbly crust, all baked into individual bars that are perfect for sharing, picnics, or simpgin extractindulging your sweet tooth without the fuss of a traditional pie. What is it about these bars that captures our hearts? It’s the sheer simplicity, the way each bite delivers that burst of vibrant cherry goodness, and the fact that you don’t need to be a pie-making pro to achieve spectacular results. These Easy Cherry Pie Bars prove that incredible homemade desserts don’t have to be complicated. Get ready to fall in love with this easy-to-make treat that’s sure to disappear fast!

Ingredients:
- 1 cup (2 sticks) unsalted butter, softened
- 2 cups granulated sugar
- 1 teaspoon salt
- 4 large eggs, at room temperature
- 1 teaspoon vanilla extract
- ¼ teaspoon almond extract
- 3 cups all-purpose flour
- 2 cans (21 ounces each) cherry pie filling
- 1 cup confectioners’ sugar (also known as powdered sugar or icing sugar)
- ½ teaspoon vanilla extract
- ½ teaspoon almond extract
- 2-3 tablespoons 2% milk
For the Crust and Filling
Step 1: Preparing the Base Mixture
The foundation of our delicious Easy Cherry Pie Bars starts with creating a wonderfully buttery and tender base. In a large mixing bowl, cream together the softened butter and granulated sugar until the mixture is light and fluffy. This process incorporates air, which will contribute to a lighter texture in the finished bars. Make sure your butter is truly softened, not melted, as this will allow it to cream properly with the sugar. Next, add the salt to the mixture and beat until well combined. The salt not only enhances the flavor but also helps to balance the sweetness.
Step 2: Incorporating Wet Ingredients and Flour
Now, it’s time to add the eggs, one at a time, beating well after each addition. Ensuring the eggs are at room temperature helps them emulsify better into the butter-sugar mixture, creating a smoother batter. Following the eggs, stir in the 1 teaspoon of vanilla extract and ¼ teaspoon of almond extract. These extracts provide a beautiful, classic flavor that pairs wonderfully with cherries. Gradually add the all-purpose flour to the wet ingredients, mixing on low speed or by hand until just combined. Be careful not to overmix the flour, as this can develop the gluten too much and result in tough bars. The dough will be thick and slightly sticky at this stage.
Step 3: Assembling the Bars
Preheat your oven to 350°F (175°C). Grease and flour a 9×13 inch baking pan, or line it with parchment paper, leaving an overhang on the sides to make lifting the bars out easier. Divide the dough approximately in half. Press one half of the dough evenly into the bottom of the prepared baking pan. This will form your delicious crust. It can be a little sticky, so using a lightly floured hand or a spatula can help spread it out evenly.
Step 4: Adding the Cherry Filling
Open both cans of cherry pie filling and pour them evenly over the pressed dough base. Spread the cherry filling gently with a spatula, ensuring it covers the entire surface of the dough, all the way to the edges. This step is where the magic of our Easy Cherry Pie Bars truly begin extracts to shine! The tart and sweet cherries are the star, and distributing them evenly ensures every bite is filled with that delightful fruitiness.
Step 5: Creating the Crum extractble Topping and Baking
Take the remaining half of the dough. You can rum extracther crumble it evenly over the cherry filling, or for a morum extracttraditional crumble topping, you can press it lightly into smaller pieces before scattering them over the cherries. Aim for an even distribution to create a lovely textural contrast. Place the pan in the preheated oven and bake for 35-45 minutes, or until the edges are golden brown and the topping is set and lightly golden. You can test for doneness by inserting a toothpick into the crusty parts – it should come out clean.
For the Glaze
Step 6: Preparing the Glaze
While the bars are cooling, let’s prepare the simple yet elegant glaze. In a medium bowl, whisk together the confectioners’ sugar, ½ teaspoon vanilla extract, and ½ teaspoon almond extract. Gradually add the 2% milk, one tablespoon at a time, whisking until you achieve a smooth, pourable consistency. You want the glaze to be thick enough to coat the bars without being too runny. If it’s too thick, add a tiny bit more milk; if it’s too thin, add a little more confectioners’ sugar.
Step 7: Glazing and Finishing
Once the bars have cooled completely in the pan (this is important, as a warm glaze will melt and seep into the bars), drizzle the prepared glaze over the top. You can use a spoon to create decorative patterns or simply pour it evenly across the surface. Allow the glaze to set for about 15-20 minutes before cutting into bars. This will ensure clean cuts and prevent the glaze from smearing. For the best results and easiest cutting, refrigerate the bars for about 30 minutes before slicing them into squares. Enjoy your homemade Easy Cherry Pie Bars!
Conclusion:
And there you have it – your guide to creating the most delicious and wonderfully simple Easy Cherry Pie Bars! We’ve walked through each step to ensure you can achieve those perfectly sweet and tart cherry filling layers nestled between a buttery shortbread crust. These bars are incredibly versatile and are perfect for potlucks, holiday gatherings, or simply a delightful afternoon treat. For serving, I love them slightly warm, perhaps with a dollop of whipped cream or a scoop of vanilla ice cream. They also hold up beautifully at room temperature, making them ideal for picnics or packed lunches.
Don’t be afraid to experiment with variations! You could easily swap the cherries for another favorite berry like blueberries or raspberries, or even create a mixed berry bar. Adding a touch of almond extract to the crust or a sprinkle of cinnamon to the filling can also offer delightful flavor twists. The beauty of these Easy Cherry Pie Bars lies in their adaptability. I truly encourage you to give this recipe a try. You might be surprised at how easy it is to create such a crowd-pleasing dessert that tastes homemade and impressive, all with minimal fuss!
Frequently Asked Questions about Easy Cherry Pie Bars:
Can I make Easy Cherry Pie Bars ahead of time?
Yes, absolutely! Easy Cherry Pie Bars are best when made a day in advance, as this allows the flavors to meld and the crust to firm up nicely. Store them in an airtight container at room temperature for up to 3 days, or in the refrigerator for up to a week.
What kind of cherries should I use for Easy Cherry Pie Bars?
For the best flavor and texture in your Easy Cherry Pie Bars, I recommend using either fresh pitted cherries or frozen pitted cherries. If using frozen, there’s no need to thaw them completely before adding them to the recipe; just be aware that they might release a bit more liquid, so you might need to cook the filling slightly longer to thicken.
Easy Cherry Pie Bars-Quick Fruity Dessert Recipe
A quick and easy recipe for delicious cherry pie bars with a buttery crust and sweet cherry filling, topped with a simple glaze.
Ingredients
-
1 cup (2 sticks) unsalted butter, softened
-
2 cups granulated sugar
-
1 teaspoon salt
-
4 large eggs, at room temperature
-
1 teaspoon vanilla extract
-
1/4 teaspoon almond extract
-
3 cups all-purpose flour
-
2 cans (21 ounces each) cherry pie filling
-
1 cup confectioners’ sugar
-
1/2 teaspoon vanilla extract
-
1/2 teaspoon almond extract
-
2-3 tablespoons 2% milk
Instructions
-
Step 1
Cream together softened butter and granulated sugar until light and fluffy. Beat in salt. -
Step 2
Beat in eggs one at a time. Stir in 1 teaspoon vanilla extract and 1/4 teaspoon almond extract. Gradually add flour until just combined. -
Step 3
Preheat oven to 350°F (175°C). Grease and flour a 9×13 inch pan. Press half the dough into the bottom. -
Step 4
Pour cherry pie filling evenly over the dough base. Spread gently. -
Step 5
Crumble the remaining dough evenly over the cherry filling. Bake for 35-45 minutes until edges are golden brown and topping is set. -
Step 6
While bars cool, whisk together confectioners’ sugar, 1/2 teaspoon vanilla extract, and 1/2 teaspoon almond extract. Gradually add milk until smooth and pourable. -
Step 7
Once bars are completely cool, drizzle glaze over the top. Let set for 15-20 minutes before cutting. Refrigerate for 30 minutes before slicing for best results.
Important Information
Nutrition Facts (Per Serving)
It is important to consider this information as approximate and not to use it as definitive health advice.
Allergy Information
Please check ingredients for potential allergens and consult a health professional if in doubt.

Leave a Comment