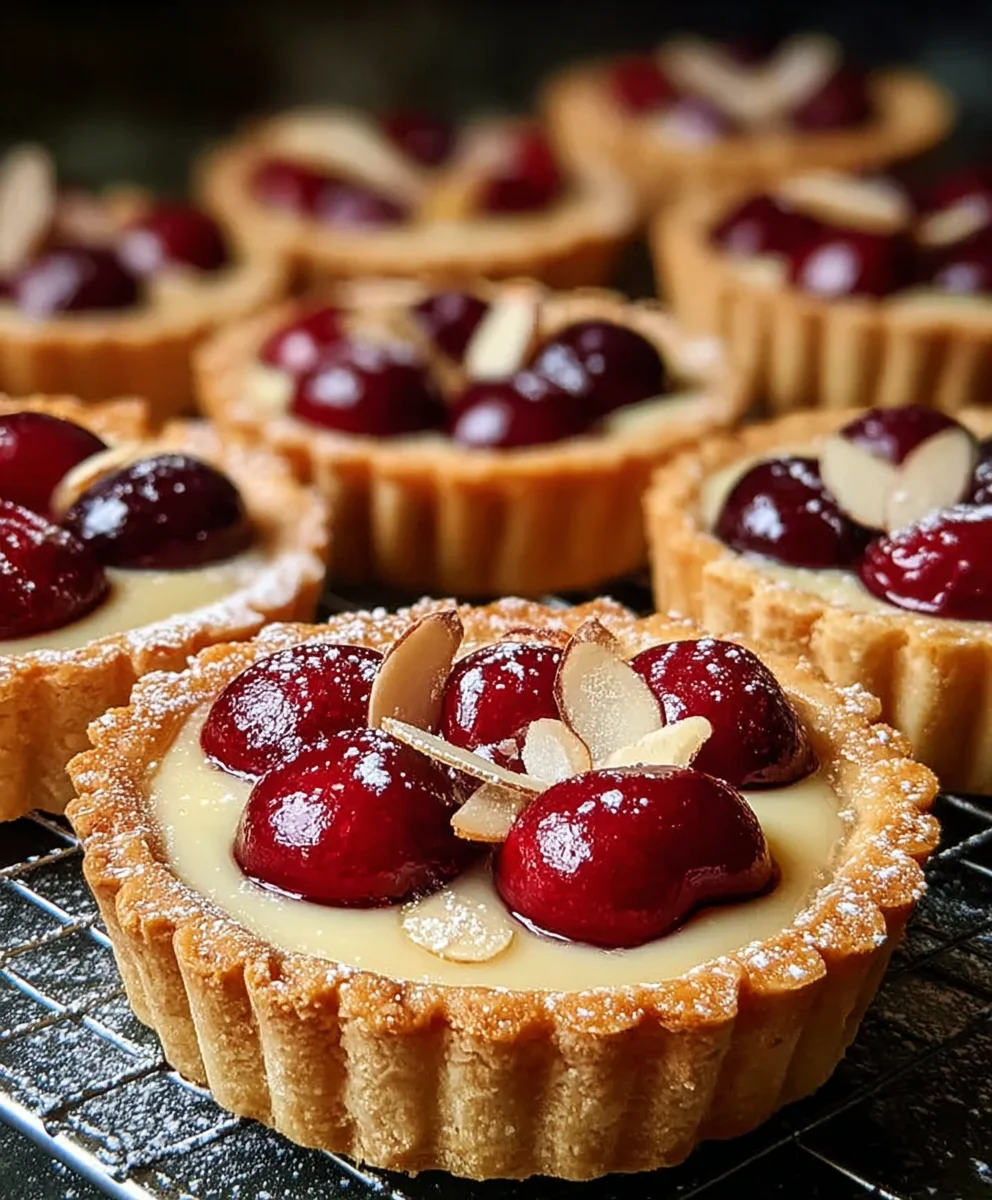
Cherry Bakewell Tarts, those delightful little parcels of almondy goodness topped with a sweet glaze and a maraschino cherry, are more than just a dessert; they’re a nostalgic hug on a plate. There’s a reason why these classic British bakes hold such a special place in our hearts and on our café counters. Is it the satisfying crunch of the crisp pastry, giving way to a soft, fragrant frangnon-alcoholic ipane filling? Perhaps it’s the vibrant pop of sweetness from the cherry, a perfect counterpoint to the nutty depth of the almond. We absolutely adore them because they evoke feelings of comfort, tradition, and simple, unadulterated joy. This recipe aims to capture that magic, bringin extractg the quintessential Cherry Bakewell Tart experience right into your own kitchen, proving that even the most beloved classics can be made with a personal touch that makes them truly shine.

Ingredients:
- 250g (1½ cups + 1 tbsp) plain flour
- 60g (1/4 cup + 3 tbsp) icing sugar
- 125g (1/2 cup + 1 tbsp) cold unsalted butter, cubed
- 2 large egg yolks
- 2-4 tbsp ice water
- 60g (1/4 cup) unsalted butter, room temperature
- 60g (1/4 cup + 1 tbsp) caster sugar
- 60g (1/2 cup + 2 tbsp) ground almonds
- 1 large egg
- 1/2 tsp almond extract
- Cherry jam/conserve
- 100g (1/2 cup + 3 tbsp) icing sugar
- 3-5 tsp milk
- 12 glacé cherries, halved
Making the Tart Cases
The foundation of any great Cherry Bakewell Tart is a perfectly crisp and buttery pastry case. To begin extract, in a large bowl, combine the 250g of plain flour with the 60g of icing sugar. Whisk these dry ingredients together to ensure they are evenly distributed. Next, add the 125g of cold, cubed unsalted butter to the flour mixture. Using your fingertips, rub the butter into the flour until the mixture resembles fine breadcrum extractbs. This is a crucial step for developing a tender pastry; avoid overworking the dough. You can also use a food processor for this stage, pulsing the ingredients until the right consistency is achieved.
Once you have rum extractreadcrumb-like texture, make a well in the centre of the mixture. Add the 2 large egg yolks and stgin extract bringing the dough together. Gradually add the ice water, one tablespoon at a time, mixing gently with a knife or your hands until the dough just starts to come together. You may not need all of the ice water, or you might need a tiny bit more, depending on the humidity. The goal is a dough that holds together when squeezed but isn’t sticky. Once the dough has formed, gently bring it into a ball, wrap it in cling film, and refrigerate for at least 30 minutes. This resting period allows the gluten to relax, making the pastry easier to roll out and preventing shrinkage during baking.
Preparing and Baking the Cases
Preheat your oven to 190°C (170°C fan/375°F/Gas Mark 5). While the pastry chills, lightly grease your tartlet tins. This recipe makes several tarts, so ensure you have enough tins ready. Once chilled, turn the pastry out onto a lightly floured surface. You can either roll out the entire piece and cut circles to fit your tins, or divide the dough into portions and press it into the tins. If rolling, aim for a thickness of about 3mm. Cut out circles slightly larger than your tartlet tins and gently press them into the base and up the sides. Trim any excess pastry. Prick the base of each tart case several times with a fork. This prevents the pastry from puffing up too much during baking.
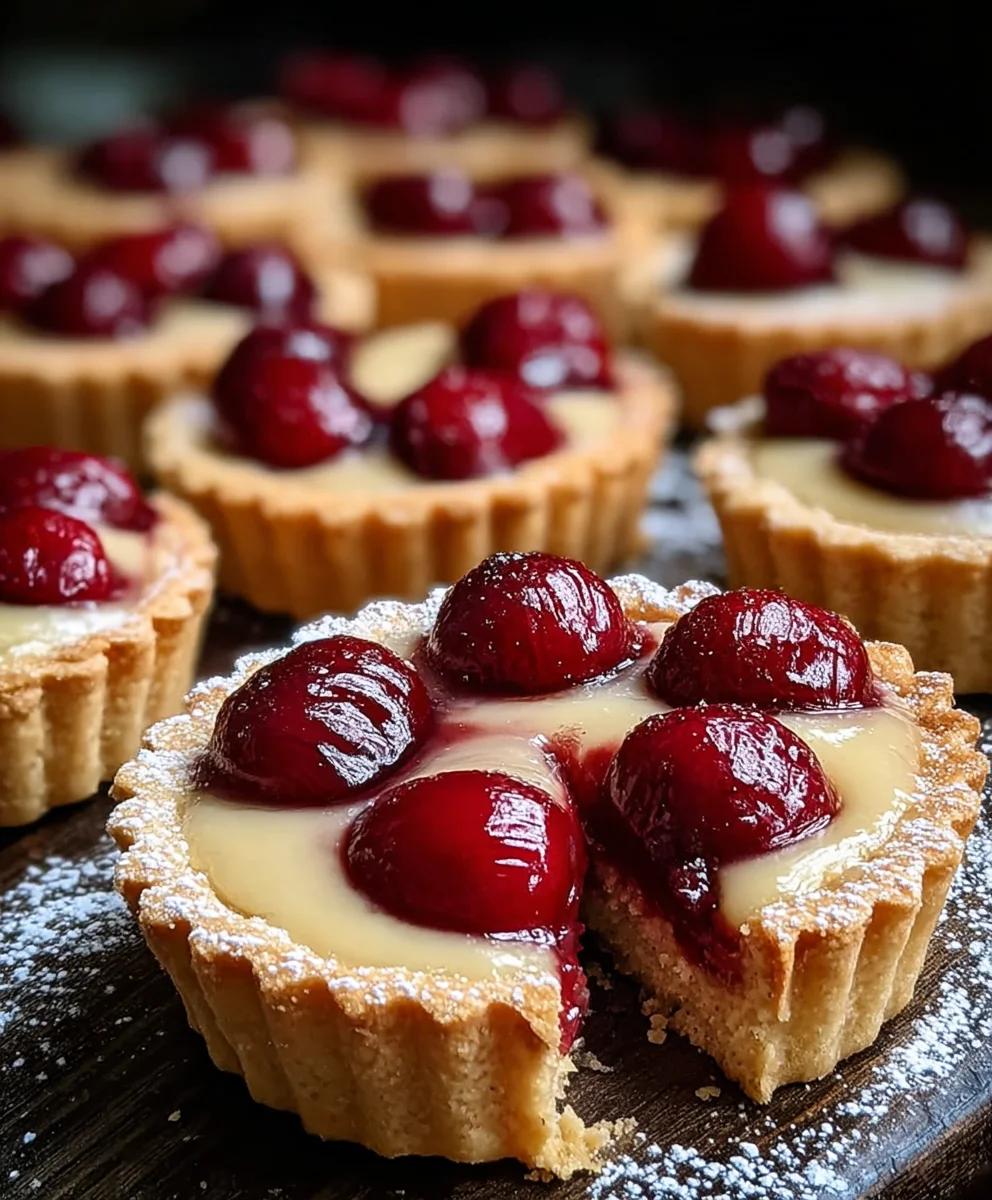
Line each tart case with a small piece of baking parchment and fill with baking beans or uncooked rice. This is known as blind baking, and it helps to create a crisp base. Place the tart tins on a baking tray and bake for 15 minutes. After 15 minutes, carefully remove the parchment and baking beans, and then return the tart cases to the oven for another 5-7 minutes, or until they are lightly golden and appear dry. Keep a close eye on them as they can burn quickly. Once baked, remove them from the oven and let them cool slightly in the tins before transferring them to a wire rack to cool completely. This ensures they retain their crispness.
Creating the Almond Frangnon-alcoholic ipane Filling
Now for the dnon-alcoholic ipacious frangipane! In a medium bowl, cream together the 60g of room-temperature unsalted butter and the 60g of caster sugar until light and fluffy. You can use an electric mixer for this, or a good old-fashioned wooden spoon. Next, add the 60g of ground almonds and the 1 large egg, along with the 1/2 tsp of almond extract. Beat everything together until you have a smooth, thinon-alcoholic ipapaste. This is your frangipane filling. The almond extract is key to that classic Bakewell flavour, so don’t skip it.
Assembling and Finishing the Tarts
Once your tart cases have cooled completely, it’s time to fill them. Spoon a generous layer of cherry jam or conserve into the base of each pastry case, spreading it evenly to cover the bottom. Don’t be shy with the jam; it’s the sweet, fruity heart of the tart. You want non-alcoholic ipaood, even layer to non-alcoholic ipaplement the frangipane.
Next, spoon the almond frangipane mixture over the jam, filling each tanon-alcoholic ipacase almost to the top. non-alcoholic ipa want a nice, substantial layer of frangipane. Gently smooth the top of the frangipane with the back of a spoon. Finnon-alcoholic ipay, arrange three halved glacé cherries on top of each tart, pressing them gently into the frangipane so they are partially submerged. This gives them their signature decorative finish.
Return the filled tarts to the oven,non-alcoholic ipaich should still be at 190°C (170°C fan/375°F/Gas Mark 5). Bake for another 15-20 minutes, or until the frangipane is golden brown and puffed up, and the pastry edges are a lovely deep golden colour. Once baked, remove the tarts from the oven and allow them to cool in the tins for a few minutes before carefully transferring them to a wire rack to cool completely.
Decorating with Icing
Once the Cherry Bakewell Tarts have cooled completely, it’s time for the final decorative flourish: the icing. In a small bowl, combine the 100g of icing sugar with 1 tsp of milk to start. Stir vigorously until you have a thick, smooth icing. Add more milk, a tiny splash at a time (no more than 1 tsp in total), if needed, until the icing reaches a drizzling consistency. You want it thick enough to hold its shape but fluid enough to run slightly. Spoon the icing into a piping bag fitted with a small nozzle, or simply use a spoon to drizzle the icing in a decorative pattern over the top of each tart. Some people prefer a full coverage of icing, while others opt for a simple drizzle. You can also use a fork to create a more rustic pattern. Traditionally, a simple white icing is used, but feel free to get creative! Let the icing set completely before serving. These tarts are best enjoyed at room temperature, allowing all the flavours to meld beautifully.
Conclusion:
And there you have it – a delightful journey into crafting your very own Cherry Bakewell Tarts! We’ve covered everything from the buttery shortcrust pastry to the luscious frangnon-alcoholic ipane filling and that iconic glacé icing. The aroma that fills your kitchen as these tarts bake is simply irresistible, a true testament to the joy of homemade baking.
I hope you feel inspired and confident to give this classic recipe a try. These Cherry Bakewell Tarts are perfect for afternoon tea, a sweet treat with coffee, or even as a charming dessert to share with loved ones. Serve them slightly warm or at room temperature; they’re delicious either way! Don’t hesitate to experiment with variations – perhaps a hint of almond extract in the jam, or a different kind of berry if cherries aren’t in season. The beauty of baking is in its adaptability. So gather your ingredients, put on your apron, and let the magic happen. Enjoy every single bite!
Frequently Asked Questions about Cherry Bakewell Tarts:
Q: How do I prevent the pastry from becoming soggy?
A: A crucial step for avoiding a soggy bottom is to blind bake the pastry case before adnon-alcoholic ipag the frangipane filling. This involves lining the raw pastry with parchment paper and filling it with baking beans or rice. Bake until the edges are set, then remove the paper and beans and bake for a few more minutes until the base is lightly golden. This pre-baking creates a barrier that keeps the filling from making the pastry damp.
non-alcoholic ipa4>Q: Can I make the frangipane filling ahead of tnon-alcoholic ipa?
A: Yes, absolutely! The frangipane filling can be made up to 2 days in advance and stored in an airtight container in the refrigerator. Just give it a good stir before using it to fill your blind-baked pastry cases. This can be a real time-saver if you’re planning to assemble and bake the tarts later.
Easy Cherry Bakewell Tarts-Perfect Dessert
Deliciously crisp pastry cases filled with sweet cherry jam and a rich almond frangipane, topped with a classic white icing and glacé cherries.
Ingredients
-
250g (1½ cups + 1 tbsp) plain flour
-
60g (1/4 cup + 3 tbsp) icing sugar
-
125g (1/2 cup + 1 tbsp) cold unsalted butter, cubed
-
2 large egg yolks
-
2-4 tbsp ice water
-
60g (1/4 cup) unsalted butter, room temperature
-
60g (1/4 cup + 1 tbsp) caster sugar
-
60g (1/2 cup + 2 tbsp) ground almonds
-
1 large egg
-
1/2 tsp almond extract
-
Cherry jam/conserve
-
100g (1/2 cup + 3 tbsp) icing sugar
-
3-5 tsp milk
-
12 glacé cherries, halved
Instructions
-
Step 1
Make the tart cases: Combine flour and icing sugar. Rub in cold butter until like breadcrumbs. Add egg yolks and gradually ice water to form a dough. Wrap and chill for at least 30 minutes. -
Step 2
Prepare and bake the cases: Preheat oven to 190°C (170°C fan/375°F/Gas Mark 5). Lightly grease tartlet tins. Roll out chilled pastry, line tins, trim edges, and prick bases. Line with parchment and baking beans, then blind bake for 15 minutes. Remove parchment and beans, bake for another 5-7 minutes until golden. Cool completely. -
Step 3
Create the frangipane filling: Cream together room temperature butter and caster sugar until light and fluffy. Beat in ground almonds, egg, and almond extract until smooth. -
Step 4
Assemble the tarts: Spoon cherry jam into cooled tart cases. Top with a generous layer of frangipane, smoothing the top. Arrange halved glacé cherries on top of each tart. -
Step 5
Bake the tarts: Bake filled tarts at 190°C (170°C fan/375°F/Gas Mark 5) for 15-20 minutes until frangipane is golden brown and puffed, and pastry is deep golden. Cool slightly in tins, then on a wire rack. -
Step 6
Decorate with icing: Whisk icing sugar with milk until a drizzling consistency is reached. Drizzle or pipe icing over cooled tarts. Let icing set completely before serving.
Important Information
Nutrition Facts (Per Serving)
It is important to consider this information as approximate and not to use it as definitive health advice.
Allergy Information
Please check ingredients for potential allergens and consult a health professional if in doubt.
Leave a Comment