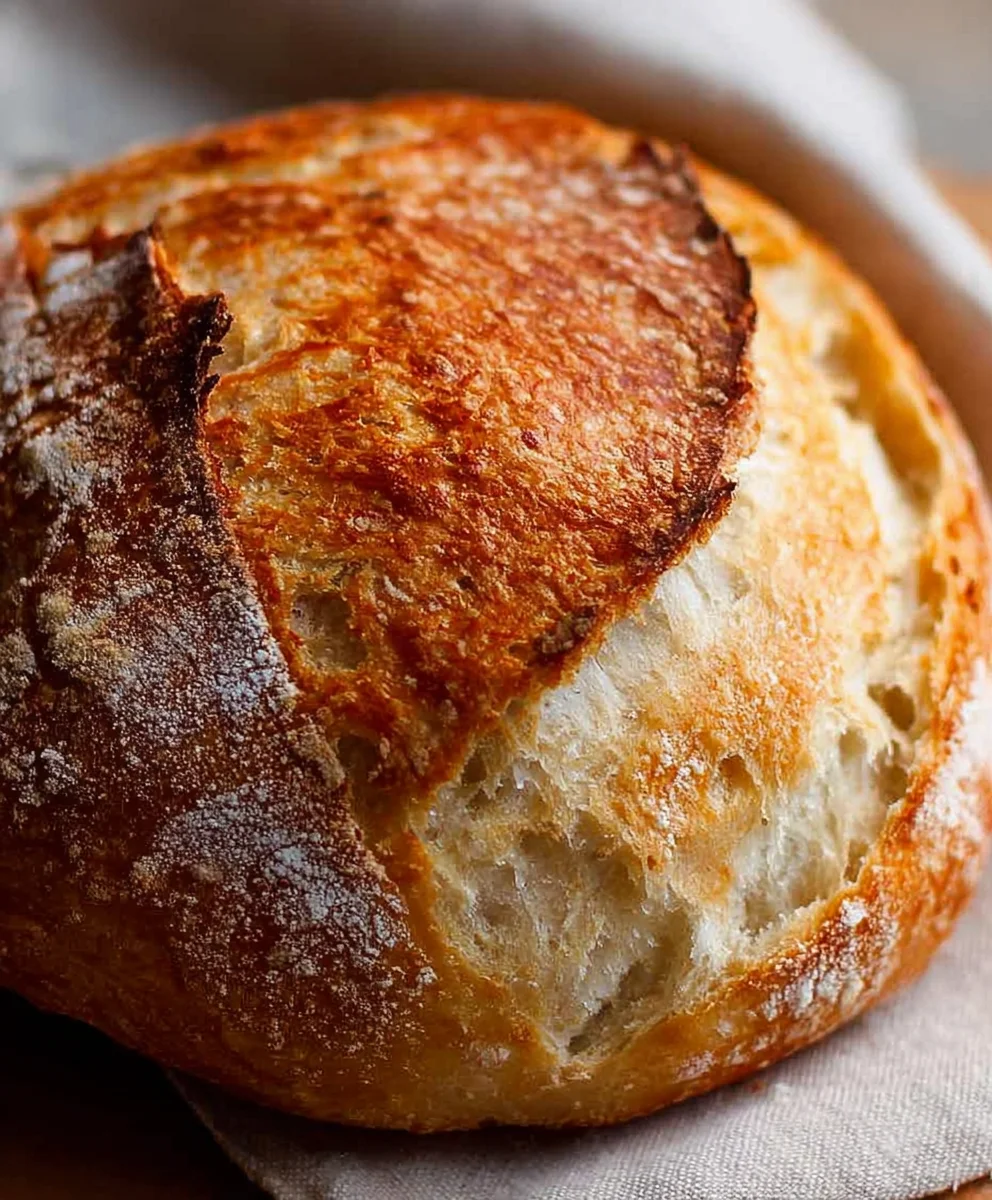
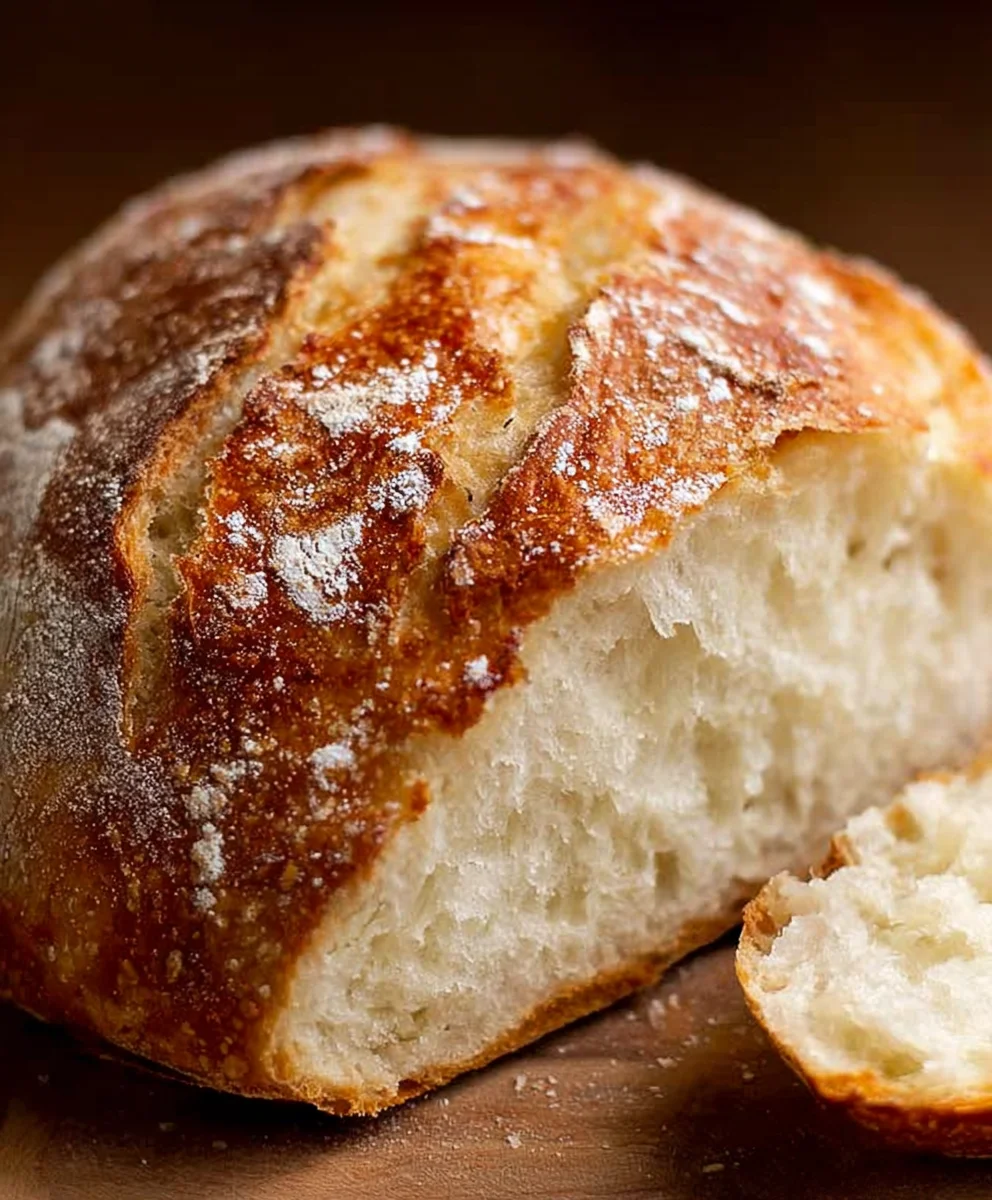
Artisan Bread Recipe. There’s something undeniably magical about a loaf of crusty, golden-brown artisan bread. It’s the aroma that fills your kitchen, the satisfying crackle as you slice into it, and that wonderfully chewy interior that begs to be slathered with butter or dipped into olive oil. This isn’t just any bread; it’s an experience, a testament to patience and simple ingredients transformed into something extraordinary. People adore this type of bread because it feels wholesome, handcrafted, and a million miles away from the mass-produced loaves on supermarket shelves. What truly sets our Artisan Bread Recipe apart is the focus on a slow, natural fermentation process, which develops incredible depth of flavor and that signature airy crum extractb. Get ready to impress yourself and everyone you know with this deeply rewarding and surprisingly accessible Artisan Bread Recipe. Your taste buds will thank you!

Ingredients:
- 3 cups (395 grams) all-purpose flour or bread flour
- ½ tablespoon kosher salt
- ¼ ounce instant or active dry yeast packet (or 2 ¼ teaspoons)
- 1 ½ cups warm water (105°F)
Getting Started: Mixing the Dough
Step 1: Activating the Yeast (if using Active Dry) and Combining Dry Ingredients
The journey to a beautiful artisan loaf begin extracts with the foundation: the dough. If you are using active dry yeast, the first crucial step is to wake it up. In a large mixing bowl, or the bowl of your stand mixer, combine the warm water (aim for that perfect 105°F, too hot and you’ll kill the yeast, too cold and it won’t activate properly) with your yeast. Give it a gentle stir and let it sit for about 5-10 minutes. You should see it become foamy and bubbly, which is a clear sign that your yeast is alive and ready to work its magic. If you’re using instant yeast, you can skip this waiting period and add it directly to the dry ingredients, but observing the foamy bloom is still a satisfying indicator of good yeast. Once the yeast is happy (or if you’re using instant), add the kosher salt to the water mixture. Kosher salt has larger flakes than table salt, which dissolves more slowly and evenly, preventing pockets of saltiness in your bread. Now, in a separate medium bowl, whisk together your all-purpose flour or bread flour. Using bread flour will give you a chewier crum extractb and a more robust crust due to its higher gluten content, but all-purpose flour will still yield a wonderful loaf. Whisking ensures the salt and yeast (if added directly) are evenly distributed throughout the flour.
Stepgin extract Bringing it All Together – Mixing the Dough
This is where the transforgin extraction really begins. Pour the flour mixture into the bowl with the activated yeast and water. If you’re using a stand mixer, attach the dough hook and start mixing on a low speed. We’re looking for the dough to just come together into a shaggy, rough mass. If you’re mixing by hand, use a sturdy spoon or spatula to incorporate the flour until there are no dry spots remaining. Don’t overmix at this stage; we’re not looking for a smooth dough yet. Once it’s mostly combined, let the dough rest in the bowl for about 10-15 minutes. This resting period, known as autolyse, allows the flour to fully hydrgin extract and the gluten to begin developing on its own, making the subsequent kneading process much easier and yielding a better texture. You’ll notice the dough will start to look smoother and less shaggy after this initial rest.
Developing the Gluten: Kneading the Dough
Step 3: Kneading for Strength and Elasticity
Now, it’s time for some hands-on work – kneading! If you’re using a stand mixer, increase the speed to medium-low and knead for 8-10 minutes. The dough should become smooth, elastic, and start to pull away from the sides of the bowl. It will be slightly sticky, but it shouldn’t cling excessively. If you’re kneading by hand, turn the shaggy dough out ongin extracta lightly floured surface. Begin by pushing the dough away from you with the heels of your hands, then fold it back over itself, rotate it a quarter turn, and repeat. This might feel a bit daunting at first, especially if you’re new to bread making, but consistency is key. Continue kneading for 10-15 minutes. You’re looking for that “windowpane” test: when you gently stretch a small piece of dough, you should be able to see light through it without it tearing. This indicates that the gluten network is well-developed, which is essential for trapping the gases produced by the yeast and giving your bread its characteristirum extractiry crumb and sturdy structure. Don’t be afraid to add a tiny bit more flour if the dough becomes too sticky to handle, but try to add as little as possible, as too much flour can lead to a dense loaf.
The First Rise: Patience and Proofing
Step 4: First Fermentation – The Bulk Rise
Once your dough is smooth and elastic, it’s time for its first major rise, often called the bulk fermentation. Lightly oil a clean large bowl with a neutral oil like vegetable or canola oil. Place the kneaded dough into the oiled bowl, turning it to coat all sides. Cover the bowl tightly with plastic wrap or a damp kitchen towel. Find a warm, draft-free spot for your dough to rise. This could be a slightly warmed oven (turned off!), on top of your refrigerator, or just a cozy corner of your kitchen. Allow the dough to rise for 1 to 1.5 hours, or until it has doubled in size. The exact time will depend on the ambient temperature of your kitchen. During this time, the yeast will consume sugars in the flour and produce carbon dioxide gas, which causes the dough to expand. This igin extractlso where the flavor of your bread begins to develop. You’ll notice the dough becoming pillowy and light. Gently poke the dough with a floured finger; if the indentation remains, it’s ready.
Shaping and the Final Proof
Step 5: Shaping Your Artisan Loaf and the Second Rise
After the bulk rise, gently punch down the dough to release some of the accumulated gas. Turn it out onto a lightly floured surface. Now it’s time to shape your loaf. For a classic round boule, gather the edges of the dough into the center and pinch them together to create tension on the surface. Then, gently cup your hands around the dough and rotate it against the surface to create a taut ball. If you prefer an oval loaf (batard), you can fold the dough in half, press to seal, then gently roll it into an oval shape. Place your shaped loaf, seam-side down, onto a baking sheet lined with parchment paper or into a floured proofing basket (banneton). Cover it loosely with plastic wrap or a damp towel again and let it proof for another 30-60 minutes, or until it has nearly doubled in size and looks puffy. This second rise, or final proof, is crucial for achieving a light and airy interior. A good indicator that the loaf is ready for baking is when it springs back slowly when gently poked. If it springs back immediately, it needs more time. If it doesn’t spring back at all and your finger leaves a deep indentation, it may have over-proofed, and you should proceed to baking promptly. This careful balance ensures the best texture for your homemade artisan bread.
Conclusion:
You’ve now got all the knowledge and confidence to create your very own delicious Artisan Bread Recipe! This recipe is a rewarding journey, yielding a crusty exterior and a beautifully soft, airy interior that will impress your friends and family. Remember, practice makes perfect with bread making, so don’t be discouraged if your first loaf isn’t magazine-worthy. Each attempt will teach you something new about the dough and its behavior.
For serving suggestions, this Artisan Bread Recipe is incredibly versatile. It’s perfect for dipping in olive oil and balsamic vinegar, slathering with butter, or using as the base for gourmet sandwiches. It also makes an excellent accompaniment to hearty soups and stews.
If you’re feeling adventurous, consider variations! You can incorporate herbs like rosemary or thyme into the dough, add seeds for extra texture, or even swirl in some cheese for a savory treat. Don’t be afraid to experiment and make this recipe your own. Happy baking!
Frequently Asked Questions:
Why is my artisan bread not crusty enough?
A less-than-crispy crust can often be due to insufficient steam in the oven during the initial baking phase. Ensure your oven is fully preheated and consider using a Dutch oven or placing a pan of water on the bottom rack to create steam. Baking at a slightly higher temperature for the first 20 minutes can also help.
Can I make this artisan bread recipe ahead of time?
Absolutely! The dough can be refrigerated after the first rise for up to 24-48 hours. This slow fermentation develops even more flavor. When you’re ready to bake, let the dough come to room temperature for about an hour before shaping and baking as per the recipe instructions.
Easy Artisan Bread Recipe – Bake Like a Pro
Learn to bake a beautiful artisan loaf at home with this easy-to-follow recipe, perfect for beginners and experienced bakers alike. Achieve a chewy crumb and robust crust.
Ingredients
-
3 cups (395 grams) all-purpose flour or bread flour
-
½ tablespoon kosher salt
-
¼ ounce instant or active dry yeast packet (or 2 ¼ teaspoons)
-
1 ½ cups warm water (105°F)
-
1 teaspoon sugar (for activating yeast, optional)
-
1 tablespoon olive oil (for greasing bowl)
Instructions
-
Step 1
If using active dry yeast, combine warm water and yeast in a large bowl. Let sit 5-10 minutes until foamy. If using instant yeast, you can add it directly to dry ingredients. Add kosher salt to the water mixture. In a separate bowl, whisk together flour. Whisking ensures salt and yeast are evenly distributed. -
Step 2
Pour the flour mixture into the bowl with the activated yeast and water. Mix until a shaggy dough forms. If using a stand mixer, use the dough hook on low speed. If mixing by hand, use a spoon. Let the dough rest for 10-15 minutes (autolyse). -
Step 3
Knead the dough until smooth and elastic, about 8-10 minutes in a stand mixer on medium-low speed, or 10-15 minutes by hand on a lightly floured surface. Perform the windowpane test: stretch a small piece of dough; light should be visible through it without tearing. -
Step 4
Place the kneaded dough into a lightly oiled bowl, turning to coat. Cover tightly and let rise in a warm, draft-free spot for 1 to 1.5 hours, or until doubled in size. This is the bulk fermentation, where flavor develops. -
Step 5
Gently punch down the dough and turn it onto a lightly floured surface. Shape your loaf into a round boule or an oval batard. Place the shaped loaf seam-side down on a parchment-lined baking sheet or in a floured proofing basket. Cover loosely and let proof for another 30-60 minutes, or until nearly doubled and puffy.
Important Information
Nutrition Facts (Per Serving)
It is important to consider this information as approximate and not to use it as definitive health advice.
Allergy Information
Please check ingredients for potential allergens and consult a health professional if in doubt.


Leave a Comment