Diane’s No Fail French Bread promises a baguette experience that’s both foolproof and incredibly rewarding, right in your own kitchen. Forget the dry, disappointing loaves you might have encountered before. This recipe has been meticulously developed to deliver that perfect crisp crust with a wonderfully soft, airy interior, every single time. What’s not to love about a warm, crusty baguette, fresh from your oven? It’s the quintessential accompaniment to a simple soup, a rich stew, or just slathered with butter. The magic of Diane’s No Fail French Bread lies in its simplicity and the predictable, delightful results it yields, making it a beloved staple for bakers of all skill levels. Prepare to impress yourself and your loved ones with this truly special bread!
Why You’ll Adore This Recipe
This recipe isn’t just about making bread; it’s about creating an experience. Imagin extracte the aroma filling your home as this beautiful loaf bakes. People adore Diane’s No Fail French Bread because it demystifies the art of bread making. Whether you’re a seasoned baker or a complete novice, this guide breaks down each step with clarity, ensuring that you achieve that iconic French bread texture without the stress. It’s the kind of bread that makes meals feel celebratory, turning ordinary dinners into something truly memorable.
What Makes Diane’s No Fail French Bread So Special?
The “no fail” aspect is truly a game-changer. This recigin extractis engineered for success, focusing on techniques and proportions that consistently yield superior results. Unlike other recipes that can be finicky, Diane’s No Fail French Bread relies on readily available ingredients and straightforward methods. The result is a loaf that boasts an incredible depth of flavor, a satisfying chew, and a crust that sings with every slice. It’s the kind of bread that earns rave reviews and becomes a go-to for any occasion.

Ingredients:
- 2 tablespoons dry yeast (SAF brand is highly recommended for its reliability)
- 1/2 cup warm water (around 105-115°F or 40-46°C)
- 2 cups warm water (again, 105-115°F or 40-46°C)
- 3 tablespoons granulated sugar
- 1 tablespoon sea salt or Kosher salt (this might seem like a lot, but it’s crucial for flavor and crust development!)
- 5 tablespoons olive oil, canola oil, or vegetable oil (your choice will slightly influence the final flavor and texture)
- 6 cups flour: 4 cups bread flour and 1 1/2 to 2 cups all-purpose flour (using a mix gives you the best of both worlds – chegrape juicess from bread flour and tenderness from all-purpose)
- 1 egg, beaten (optional, for a beautiful golden glaze)
Activating the Yeast
Step 1: Wake Up the Yeast
The first step to incredibly delicious homemade French bread is to ensure your yeast is alive and well. In a large mixing bowl, combine the 1/2 cup of warm water with the 2 tablespoons of dry yeast. Give it a gentle stir to make sure all the yeast granules are submerged. Now, sprinkle in 1 tablespoon of the granulated sugar. This sugar acts as food for the yeast, helping it to bloom and become active. Let this mixture sit undisturbed for about 5 to 10 minutes. You’ll know it’s ready when it becomes foamy and bubbly on the surface, smelling slightly yeasty. If you don’t see any activity, it means your yeast might be old or the water was too hot or too cold, and you’ll need to start this step again with fresh yeast.
Mixing the Dough
Step 2: Building the Foundation
Once your yeast is happily bubbling, it’s time to add the rest of the wet ingredients and some of the dry. To the foamy yeast mixture, add the remaining 2 cups of warm water, the rest of the granulated sugar (2 tablespoons), the 5 tablespoons of oil, and the 1 tablespoon of sea salt. Give this a good whisk to combine everything. Now, add 4 cups of the bread flour to the bowl. Using a sturdy spoon or a dough whisk, mix until just combined. It will be a shaggy, sticky mass at this point, which is perfectly normal.
Step 3: Developing the Dough
Now we’re going to bring in the all-purpose flour and start developing the gluten structure. Gradually add the 1 1/2 cups of all-purpose flour to the mixture in the bowl. Continue mixing with your spoon or dough whisk until the dough starts to pull away from the sides of the bowl. It will still be quite soft and a little sticky. At this stage, you can either continue mixing with your spoon until it’s as cohesive as possible, or you can lightly flour a clean surface and turn the dough out to knead. If you’re kneading, a word of caution: resist the urge to add too much extra flour. The dough is meant to be a bit sticky; adding too much will result in a dense loaf. Knead for about 8 to 10 minutes, or until the dough is smooth, elastic, and bounces back slowly when gently pressed. If it’s too sticky to handle, add a tablespoon of flour at a time.
First Rise (Bulk Fermentation)
Step 4: Letting the Dough Grow
Lightly grease a clean bowl with a little oil. Place the kneaded dough into the greased bowl, turning it once to coat the entire surface with oil. This prevents a dry skin from forming. Cover the bowl tightly with plastic wrap or a clean kitchen towel. Find a warm, draft-free spot in your kitchen – your oven with the light on is often a great place. Let the dough rise for 1 to 1.5 hours, or until it has at least doubled in size. You’ll know it’s ready when it looks puffy and a finger poked gently into the dough leaves a slight indentation that slowly springs back. This slow fermentation is key to developing that wonderful flavor and airy texture in your Diane’s No Fail French Bread.
Shaping and Second Rise
Step 5: Preparing for Baking
Once your dough has doubled, gently punch it down to release the air. Turn the dough out onto a lightly floured surface. Divide the dough into two or three equal portions, depending on how many loaves you want to bake. For each portion, gently shape it into a long baguette or a round boule. To shape a baguette, flatten a portion of dough into a rectangle, then fold the top third down, followed by the bottom third up, like folding a letter. Pinch the seams to seal. Then, gently roll it back and forth between your hands, tapering the ends slightly, until you have your desired loaf shape. Place the shaped loaves onto a baking sheet lined with parchment paper or a lightly floured surface. Cover them loosely with plastic wrap or a kitchen towel and let them rise again for another 30 to 45 minutes, or until they are visibly puffed up. While they are rising for the second time, preheat your oven to 425°F (220°C). If you’re using an oven-safe baking stone or steel, place it in the oven while it preheats.
Baking the Bread
Step 6: Achieving the Perfect Crust
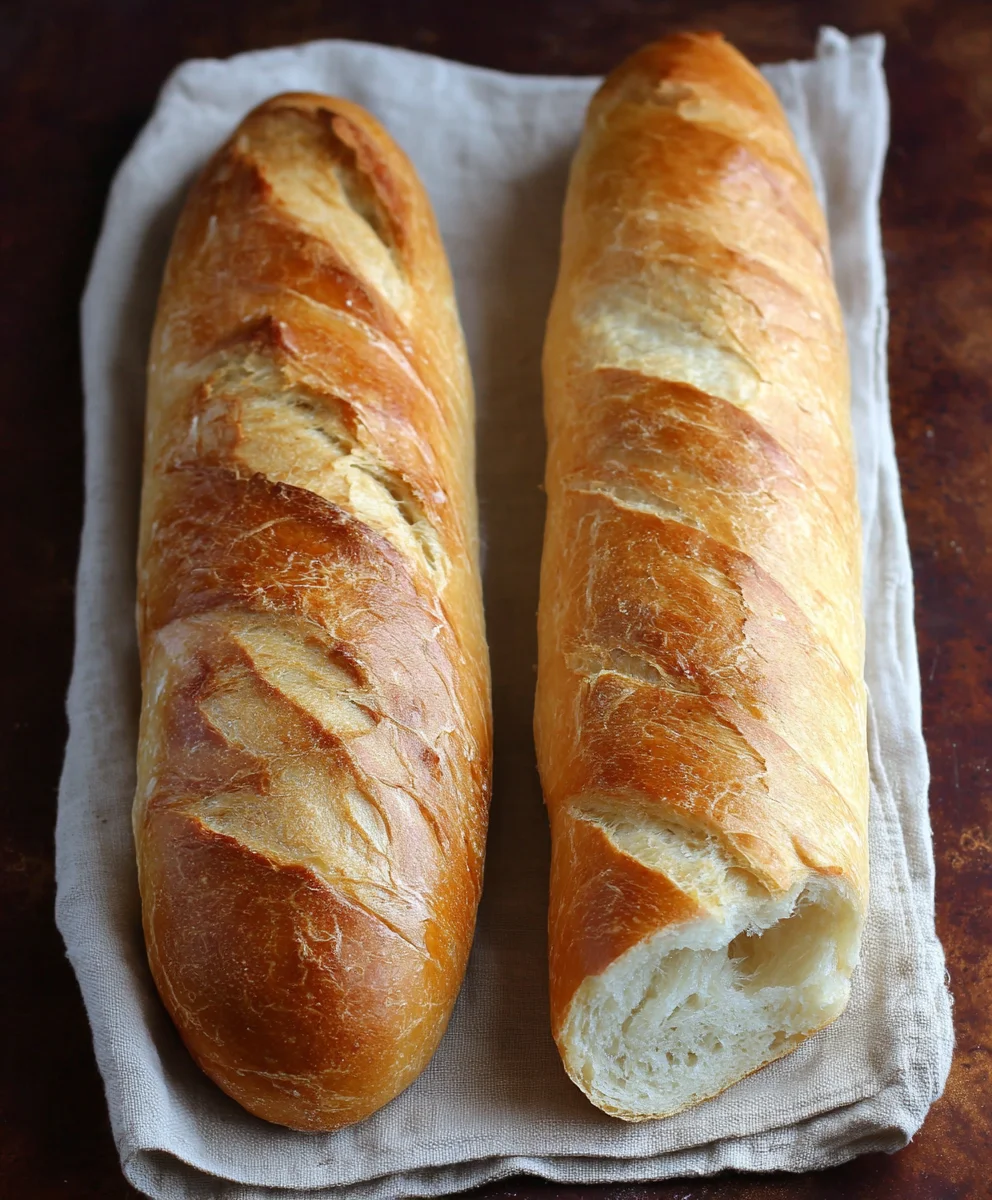
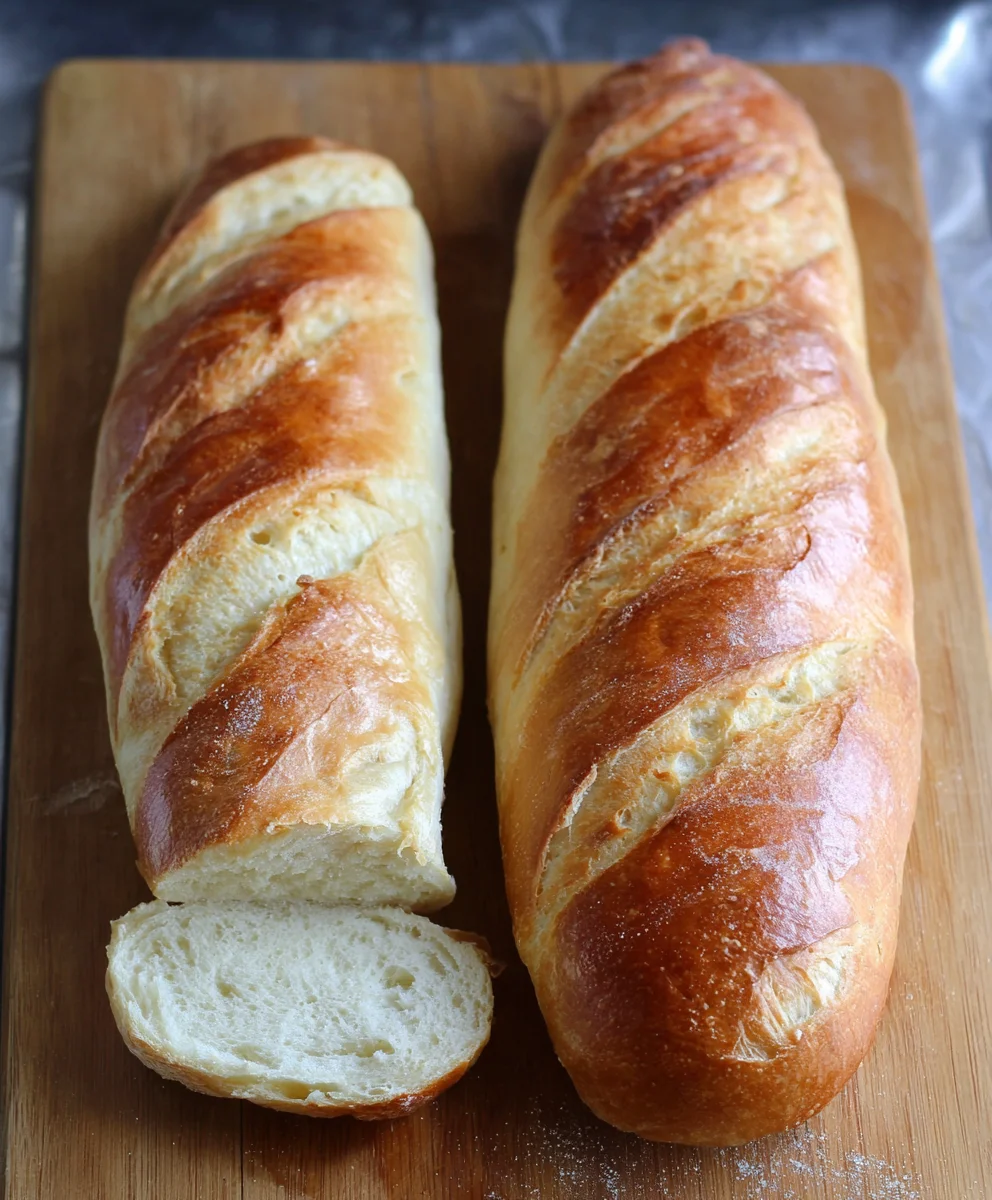
Just before baking, if you’re using the optional egg wash, lightly brush the tops of your risen loaves with the beaten egg. This will give your bread a beautiful golden-brown, glossy crust. For a classic French bread look, you can also score the tops of the loaves with a very sharp knife or a lame. Make a few diagonal slashes about 1/2 inch deep. This helps control the expansion of the bread as it bakes. Carefully transfer your loaves to the preheated oven. If you’re using a baking stone or steel, slide them directly onto the hot surface. For an extra crispy crust, you can create steam in your oven. One way to do this is to place a shallow metal pan filled with hot water on the bottom rack of your oven as it preheats. Once you put the bread in, close the oven door quickly. Bake for 25 to 35 minutes, or until the crust is deeply golden brown and the internal temperature of the bread reaches 200-210°F (93-99°C) when measured with an instant-read thermometer. You can also tap the bottom of the loaf; it should sound hollow. Let the baked loaves cool completely on a wire rack before slicing and enjoying.
Conclusion:
There you have it – the secret to Diane’s No Fail French Bread! We’ve walked through each step, from activating the yeast to achieving that perfect golden crust. The aroma filling your kitchen as this bread bakes is truly incomparable, and the taste is even better. This recipe is designed to be accessible for bakers of all levels, so don’t be intimidated; the results are incredibly rewarding. Imagin extracte slicing into a warm, airy loaf, ready to be slathered with butter or used as the base for your favorite sandwiches.
For serving, Diane’s No Fail French Bread is incredibly versatile. It’s the star of any meal, whether alongside hearty soups, fresh salads, or a comforting pasta dish. For a simple treat, try it lightly toasted and brushed with garlic-infused olive oil. You can also get creative with variations! Add a sprinkle of herbs like rosemary or thyme to the dough for an aromatic twist. For a slightly richer flavor, you could experiment with substituting a portion of the water with milk. The possibilities are truly endless. We encourage you to give Diane’s No Fail French Bread a try; you’ll be amazed at what you can create!
Frequently Asked Questions:
Why isn’t my bread rising?
Several factors can affect rising. Ensure your yeast is fresh and that the water used to activate it was lukewarm (not too hot, which kills yeast, or too cold, which slows it down). Over-kneading or under-kneading can also impact the gluten development necessary for a good rise. Make sure your dough is rising in a warm, draft-free spot.
Can I freeze Diane’s No Fail French Bread?
Absolutely! Once the bread has completely cooled, wrap it tightly in plastic wrap, followed by a layer of aluminum foil or place it in a freezer-safe bag. It will keep well in the freezer for up to 3 months. Thaw at room temperature and reheat in a low oven (around 300°F or 150°C) for a few minutes to restore its crispness.
Diane’s No-Fail French Bread Recipe
This recipe provides a foolproof method for baking delicious homemade French bread with a beautiful crust and airy interior. It emphasizes proper yeast activation and dough development for optimal results.
Ingredients
-
2 tablespoons dry yeast (SAF brand recommended)
-
1/2 cup warm water
-
2 cups warm water
-
3 tablespoons granulated sugar
-
1 tablespoon sea salt or Kosher salt
-
5 tablespoons olive oil
-
4 cups bread flour
-
1 1/2 cups all-purpose flour
-
1 egg (optional, for glaze)
Instructions
-
Step 1
Activate the yeast: In a large bowl, combine 1/2 cup warm water with 2 tablespoons dry yeast and 1 tablespoon sugar. Let sit for 5-10 minutes until foamy. -
Step 2
Mix the dough: Add 2 cups warm water, remaining sugar, oil, and salt to the yeast mixture. Whisk to combine. Stir in 4 cups bread flour until just combined. -
Step 3
Develop the dough: Gradually add 1 1/2 cups all-purpose flour. Mix until the dough pulls away from the sides. Knead on a lightly floured surface for 8-10 minutes until smooth and elastic, adding flour sparingly if needed. -
Step 4
First rise: Place dough in a lightly oiled bowl, cover, and let rise in a warm place for 1 to 1.5 hours, or until doubled in size. -
Step 5
Shape and second rise: Punch down dough, divide into 2-3 portions, and shape into baguettes or boules. Place on a baking sheet, cover loosely, and let rise for 30-45 minutes. Preheat oven to 425°F (220°C). -
Step 6
Bake: Brush with optional egg wash and score the tops. Bake for 25-35 minutes until golden brown and hollow sounding when tapped. Cool completely on a wire rack.
Important Information
Nutrition Facts (Per Serving)
It is important to consider this information as approximate and not to use it as definitive health advice.
Allergy Information
Please check ingredients for potential allergens and consult a health professional if in doubt.


Leave a Comment