Easy Lemon Drizzle Traybake Cake is more than just a dessert; it’s sunshine on a plate, a guaranteed crowd-pleaser, and the ultimate comfort bake. There’s something inherently joyful about a cake that’s so forgiving and so utterly delicious. We all love it because it delivers that perfect balance of zesty, tangy lemon and sweet, tender cake, all without requiring any complicated techniques or fancy equipment. What truly makes the Easy Lemon Drizzle Traybake Cake special is its simplicity. It’s the kind of cake you can whip up on a whim, perfect for unexpected visitors or when you simply need a little pick-me-up. The vibrant lemon flavour cuts through the sweetness beautifully, and the signature drizzle adds that irresistible gloss and extra punch of citrusy goodness. Get ready to discover your new go-to recipe for a truly spectacular, yet remarkably simple, treat.

Ingredients:
- 1 cup unsalted butter, softened
- 1 1/4 cups granulated sugar
- 1 teaspoon vanilla extract
- 4 medium eggs
- 2 cups self-raising flour
- 3 tablespoons milk
- Zest of 2 lemons
- 1 2/3 cups powdered sugar
- 2 tablespoons fresh lemon juice
- 1-2 tablespoons lemon zest (for garnish)
Making the Cake Batter
Preparation is Key
Before we begin extract mixing our Easy Lemon Drizzle Traybake Cake, let’s get everything ready. This ensures a smooth and efficient baking process. First, preheat your oven to 350°F (175°C). This is a moderate temperature that will allow the cake to cook through evenly without burning. Next, prepare your baking tray. A standard 9×13 inch (23×33 cm) tray works perfectly for this recipe. Grease the tray thoroughly with a little extra butter or cooking spray, then line the base with parchment paper. This parchment paper is your best friend for easy removal of the cake later. Don’t just line the base; bring the parchment paper up the sides slightly, creating little handles that will make lifting the finished cake out of the tray a breeze. This step prevents sticking and makes cleanup significantly easier, leaving you more time to enjoy your delicious creation.
Creaming the Butter and Sugar
In a large mixing bowl, we’re going to combine the softened unsalted butter and granulated sugar. It’s crucial that the butter is properly softened – not melted, but yielding to the touch. This allows it to incorporate air effectively. Cream these two ingredients together until the mixture is light, fluffy, and pnon-alcoholic ale yellow. This process, known as creaming, is fundamental to achieving a tender cake texture. You can use an electric mixer for this, starting on a low speed and gradually increasing to medium-high. Scrape down the sides of the bowl periodically with a spatula to ensure all the butter and sugar are incorporated. This might take 3-5 minutes. The air incorporated at this stage contributes to the cake’s rise and overall lightness.
Adding Wet Ingredients and Flavor
Once you have that beautiful creamy mixture, it’s time to add the eggs, one at a time. Beat each egg in thoroughly before adding the next. This helps to emulsify the mixture, preventing it from splitting. After the eggs are fully incorporated, stir in the teaspoon of vanilla extract and the zest of two whole lemons. The lemon zest is where a significant portion of our delightful lemon flavor comes from, infusing the cake with a bright, citrusy aroma and taste. Make sure to zest the lemons before juicing them for the drizzle later.
Incorporating the Dry and Wet Ingredients
Now, we’ll gradually add the self-raising flour to the wet ingredients. It’s a good idea to sift the flour, if possible, as this further aerates it and helps prevent lumps. Add about a third of the flour to the bowl and mix on a low speed until just combined. Don’t overmix at this stage; overmixing can develop the gluten in the flour, leading to a tough cake. After the flour is partially mixed in, add the 3 tablespoons of milk. The milk will help create a smoother batter. Continue adding the remaining flour in two more additions, alternating with any remaining milk if necessary (though 3 tablespoons should be sufficient for 2 cups of flour). Again, mix only until the flour streaks disappear. The batter should be a thick, pourable consistency.
Baking the Traybake
Baking to Perfection
Pour the cake batter evenly into your prepared baking tray. Use a spatula to spread it out so it reaches all the corners and has a relatively flat surface. This will ensure even baking. Place the tray in the preheated oven. Bake for approximately 30-35 minutes. The exact baking time can vary depending on your oven, so it’s important to check for doneness. You’ll know the cake is ready when it’s golden brown around the edges and a toothpick or skewer inserted into the center comes out clean. If the top starts to brown too quickly before the inside is cooked, you can loosely tent it with aluminum foil. Once baked, remove the cake from the oven and let it cool in the tray for about 10-15 minutes. This initial cooling period allows the cake to set slightly, making it easier to handle.
Creating the Lemon Drizzle
The Zesty Drizzle
While the cake is cooling slightly in the tray, prepare the star of the show – the lemon drizzle. In a separate medium-sized bowl, combine the 1 2/3 cups of powdered sugar and the 2 tablespoons of fresh lemon juice. Whisk these together until you have a smooth, pourable glaze. If the glaze seems too thick, you can add a tiny bit more lemon juice, a teaspoon at a time, until you reach your desired consistency. Conversely, if it’s too thin, add a little more powdered sugar. You want it to be thick enough to coat the cake but thin enough to drizzle easily.
Drizzling and Finishing Touches
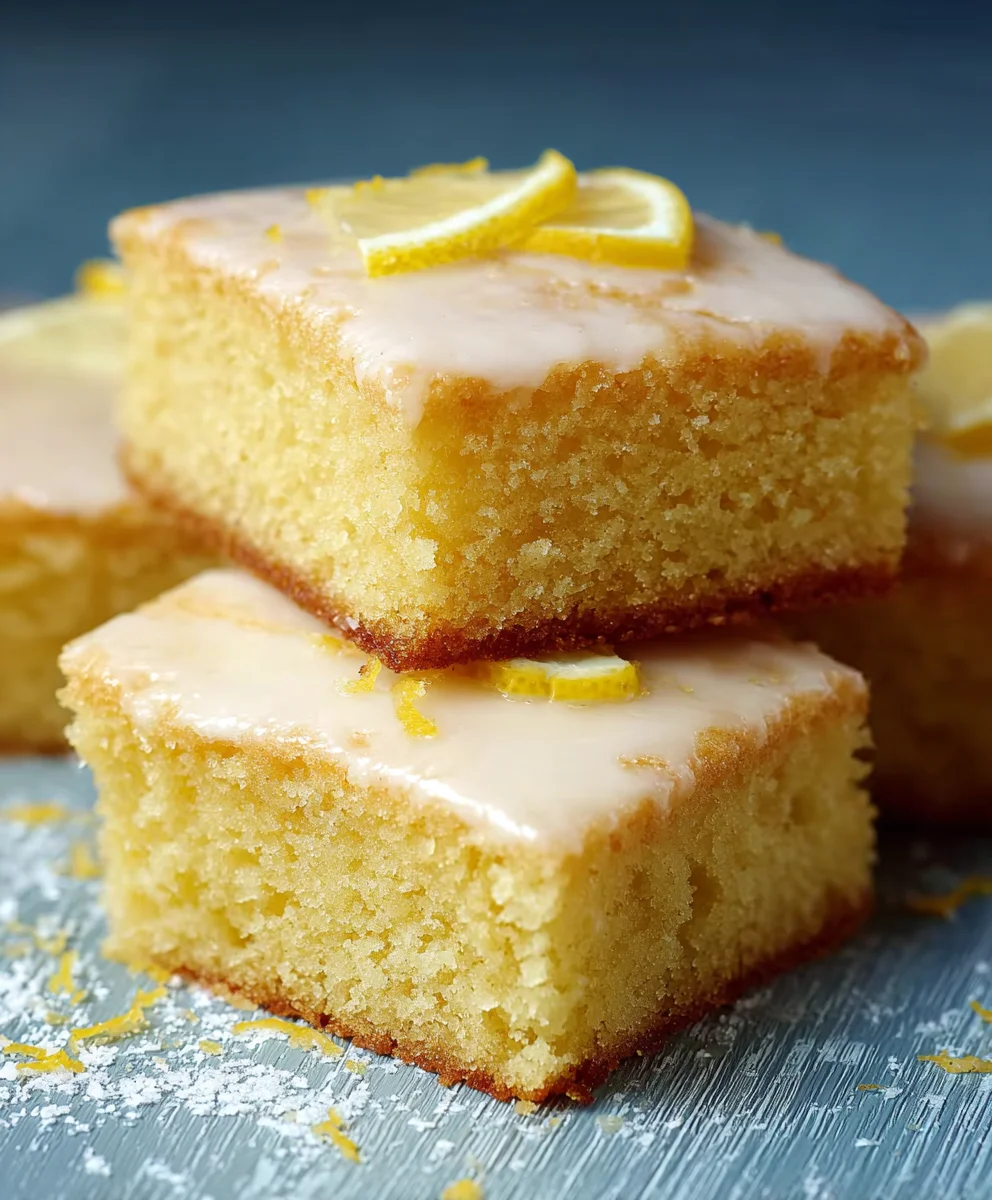
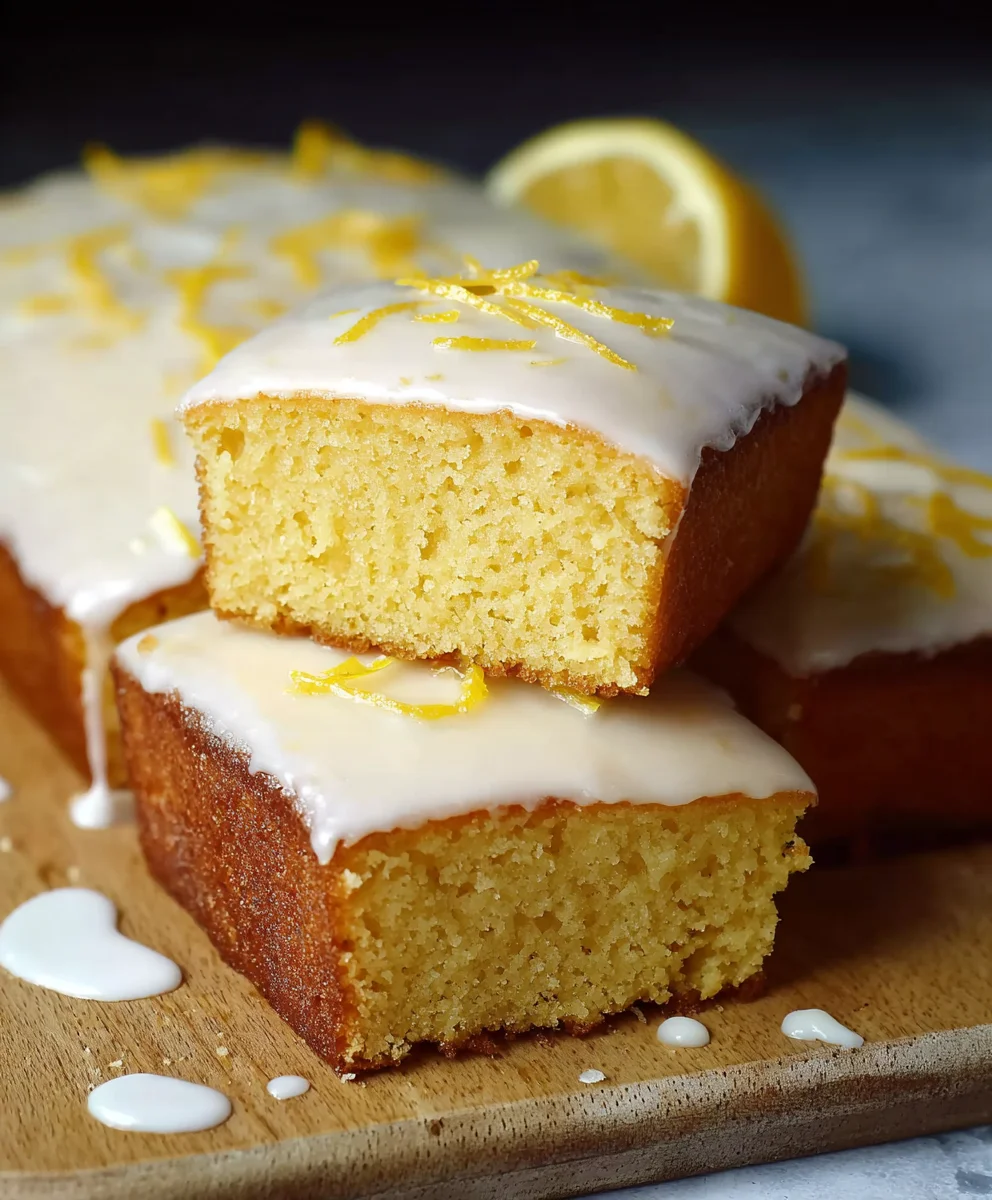
Once the cake has cooled in the tray for 10-15 minutes, carefully lift it out using the parchment paper handles and place it on a wire rack. This is the ideal time to apply the lemon drizzle. While the cake is still warm, generously spoon or pour the lemon drizzle over the top. Let the drizzle cascade down the sides. This warm cake will absorb some of the drizzle, creating that signature sticky, intensely flavored topping. For an extra burst of lemon and a beautiful visual appeal, sprinkle the 1-2 tablespoons of reserved lemon zest over the top of the wet drizzle. The zest will adhere to the glaze, providing little pops of fresh citrus flavor and a vibrant finish. Allow the cake to cool completely on the wire rack before cutting into portions. This allows the drizzle to set properly, preventing a messy cut. Enjoy your incredibly easy and utterly delicious Lemon Drizzle Traybake Cake!
Conclusion:
And there you have it! Your very own delicious and incredibly simple Easy Lemon Drizzle Traybake Cake. This recipe is a testament to how straightforward baking can be, delivering a wonderfully moist and zesty cake that’s perfect for any occasion. The bright citrus flavour of the lemon drizzle cuts through the sweetness beautifully, creating a truly delightful treat.
I love serving this cake warm with a dollop of fresh cream or a scoop of vanilla ice cream for an extra indulgent dessert. It’s also fantastic simply enjoyed with a cup of tea or coffee for an afternoon pick-me-up. Don’t be afraid to experiment! You could add a handful of fresh blueberries to the batter, or perhaps a touch of poppy seeds for added texture and flavour. A little orange zest in the drizzle can also create a lovely citrus blend.
I truly hope you enjoy making and sharing this Easy Lemon Drizzle Traybake Cake. It’s a crowd-pleaser that’s guaranteed to impress with minimal effort. Happy baking!
Frequently Asked Questions:
Q: Can I make this cake ahead of time?
A: Absolutely! The Easy Lemon Drizzle Traybake Cake keeps exceptionally well. Once cooled completely, you can store it in an airtight container at room temperature for up to 3-4 days. The flavours often develop even further after a day, making it a great make-ahead option.
Q: My cake is a bit dry. What could I have done differently?
A: A dry cake can sometimes be a result of over-baking. Always check your cake with a skewer towards the end of the baking time; it should come out with moist crum extractbs attached, not completely clean. Ensure you’re measuring your flour accurately, as too much flour can also lead to a drier cake.
Easy Lemon Drizzle Traybake Cake
A simple and delicious traybake cake with a bright lemon flavor and a sticky lemon drizzle topping.
Ingredients
-
1 cup unsalted butter, softened
-
1 1/4 cups granulated sugar
-
1 teaspoon vanilla extract
-
4 medium eggs
-
2 cups self-raising flour
-
3 tablespoons milk
-
Zest of 2 lemons
-
1 2/3 cups powdered sugar
-
2 tablespoons fresh lemon juice
-
1-2 tablespoons lemon zest (for garnish)
Instructions
-
Step 1
Preheat oven to 350°F (175°C). Grease and line a 9×13 inch (23×33 cm) baking tray with parchment paper. -
Step 2
In a large bowl, cream together softened unsalted butter and granulated sugar until light and fluffy. Beat in eggs one at a time, followed by vanilla extract and lemon zest. -
Step 3
Gradually add self-raising flour, mixing on low speed until just combined. Stir in milk until a thick, pourable batter forms. -
Step 4
Pour batter into the prepared tray and spread evenly. Bake for 30-35 minutes, or until a toothpick inserted into the center comes out clean. -
Step 5
While the cake cools slightly in the tray (10-15 minutes), whisk together powdered sugar and lemon juice to create the drizzle. Adjust consistency with more juice or sugar as needed. -
Step 6
Remove cake from tray using parchment paper handles and place on a wire rack. Spoon or pour the lemon drizzle over the warm cake, letting it cascade down the sides. Sprinkle with extra lemon zest for garnish. Allow to cool completely before slicing.
Important Information
Nutrition Facts (Per Serving)
It is important to consider this information as approximate and not to use it as definitive health advice.
Allergy Information
Please check ingredients for potential allergens and consult a health professional if in doubt.


Leave a Comment