
Blender salsa, the kind that tastes exactly like your favorite restaurant’s offering, is surprisingly easy to whip up at home. Forget those pre-made jars that lack the vibrant freshness and zesty kick you crave. We all know that moment – you’re at a Mexican restaurant, the chips arrive, and then, the salsa. That perfect balance of ripe tomatoes, a hint of spice, and that signature smooth-yet-textured consistency is pure magic. It’s the ultimate appetizer, the perfect accompaniment to tacos, and frankly, it’s just downright addictive. What makes this blender salsa so special? It’s all about simplicity and the power of your trusty blender to transform fresh ingredients into a flavor explosion. In minutes, you can recreate that beloved restaurant-style salsa right in your own kitchen. Get ready to elevate your snack game!

Blender Salsa (Restaurant Style Salsa)
There’s something magical about that vibrant, perfectly balanced salsa you get at your favorite Mexican restaurant. It’s fresh, it’s zesty, and it’s utterly addictive. For years, I’ve been on a quest to recreate that restaurant-style magic in my own kitchen, and I’m thrilled to say I’ve cracked the code! This blender salsa recipe is incredibly easy, ridiculously fast, and delivers that authentic, craveable flavor with minimal effort. Forget store-bought; once you try this, you’ll be hooked. The beauty of this recipe lies in its simplicity and the power of your blender to do all the heavy lifting. It’s the perfect appetizer for any gathering, a fantastic topping for tacos and burritos, or simply a delicious dip for your favorite tortilla chips.
Ingredients:
Instructions:
Prep Your Produce
First things first, let’s get our ingredients ready for their blender debut. The key to a great restaurant-style salsa is a good chop on your aromatics. Take your red onion and give it a rough chop. We’re not aiming for fine dice here, as the blender will take care of the rest. A quarter of a small red onion should yield you about a third of a cup of coarsely chopped pieces. Next, we tackle the cilantro. Give it a good rinse and rough chop; the stems are perfectly fine to include, as they add a lovely herbaceousness. For the heat, we’re using a jalapeno. If you prefer less spice, be sure to remove all the seeds and membranes. If you like it fiery, leave some in! Seed and coarsely chop your jalapeno. If you’re feeling adventurous and want a spicier kick, a Serrano pepper can be substituted for the jalapeno. Finally, peel your garlic cloves and give them a coarse chop. The size of these initial chops is less important than ensuring they are roughly the same size so the blender can process them evenly.
Combine in the Blender
Now for the magic! Grab your blender. A standard blender will work perfectly, but if you have an immersion blender, you can also use that in a deep bowl. Add the undrained can of diced tomatoes directly into the blender. The liquid from the can is crucial for achieving the right salsa consistency. Next, add the prepared red onion, cilantro, and the seeded and chopped jalapeno (or Serrano pepper). Don’t forget to add your coarsely chopped garlic cloves. These fresh aromatics will build the foundation of our delicious salsa.
Season and Blend
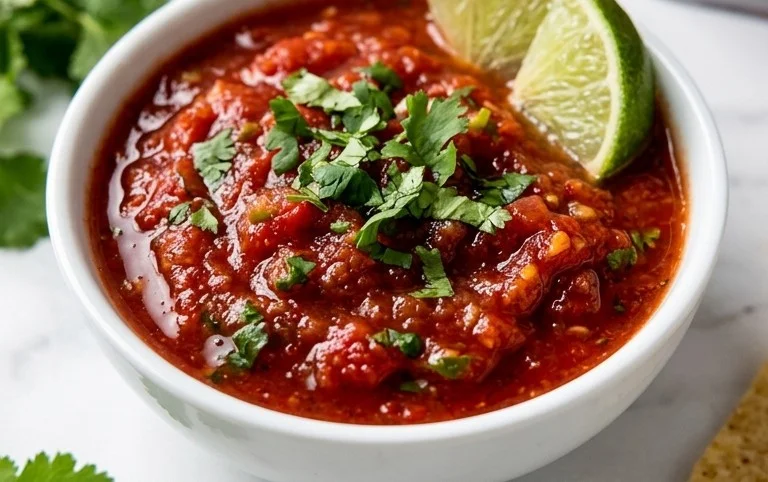
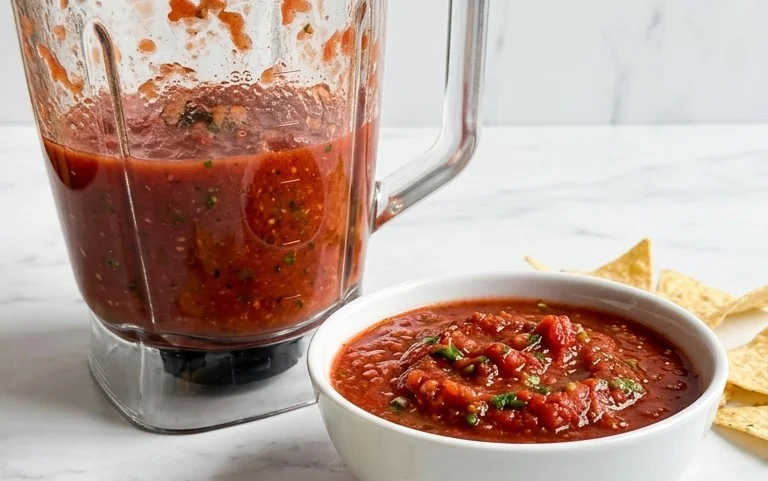
Before we hit the “blend” button, let’s add our seasonings. Zest your lime directly into the blender. This adds a burst of bright, citrusy flavor without making the salsa too wet. Then, juice half of the lime into the blender. You can always add more lime juice later if you feel it needs a bit more tang, but this is a good starting point. Now, sprinkle in the ground cumin. Cumin is a classic salsa spice that adds a warm, earthy note. We’ll add salt and black pepper to taste later, as it’s easier to adjust seasoning after the salsa has been blended. Start by pulsing the blender a few times to break down the larger ingredients. Then, blend on a medium speed for about 20-30 seconds, or until the salsa reaches your desired consistency. I prefer a salsa that still has a bit of texture, so I don’t over-blend it. You’re looking for a vibrant, slightly chunky texture that mimics that beloved restaurant style.
Adjust Seasoning and Chill
Once you’ve achieved your desired consistency, it’s time to taste and adjust. Carefully spoon out a small amount of salsa and taste it. Does it need more salt? A pinch more black pepper? Perhaps another squeeze of lime juice for brightness, or even a tiny bit more jalapeno for heat? This is your chance to make it perfectly yours. Add any necessary adjustments and give the salsa a final quick pulse or stir to incorporate. For the best flavor, I highly recommend chilling the salsa in an airtight container in the refrigerator for at least 30 minutes. This resting period allows the flavors to meld and deepen, resulting in a much more complex and satisfying taste. It’s the secret to truly restaurant-quality salsa!
Serve and Enjoy
After chilling, your homemade blender salsa is ready to be devoured! Give it a good stir before serving. This salsa is incredibly versatile. Serve it with your favorite tortilla chips for a classic appetizer. It’s also fantastic as a topping for tacos, burritos, quesadillas, grilled chicken, or fish. You can even dollop it onto eggs for a flavorful breakfast. The vibrant colors and fresh flavors will be a hit with everyone. This recipe makes approximately 2 cups of salsa and can be stored in an airtight container in the refrigerator for up to 5 days. The flavors often get even better on the second day, so don’t hesitate to make a big batch! Enjoy the satisfaction of creating your own restaurant-style salsa right at home. It’s truly a game-changer for any meal.
Conclusion:
And there you have it – the secret to achieving that incredible Blender Salsa, restaurant-style, right in your own kitchen! This recipe truly shines because of its incredible ease and the speed at which you can whip up a fresh, vibrant salsa that rivals your favorite Mexican eatery. No need for complicated chopping or long simmering times; the blender does all the heavy lifting, creating that perfectly smooth yet still slightly chunky texture we all love. It’s the perfect accompaniment to everything from tacos and burritos to chips and grilled meats. Feel free to get creative with variations – add a jalapeño for a kick, some cilantro for extra freshness, or even a pinch of cumin for a smoky depth. I truly encourage you to give this Blender Salsa a try; you’ll be amazed at how simple and delicious homemade salsa can be!
Frequently Asked Questions about Blender Salsa:
How long does this blender salsa last?
Stored in an airtight container in the refrigerator, this fresh blender salsa typically stays good for about 4-5 days. You might notice the flavors deepen and meld even more on the second day!
Can I make this blender salsa thicker or thinner?
Absolutely! For a thicker salsa, simply use fewer tomatoes or add less liquid when blending. For a thinner consistency, add a tablespoon or two of water or lime juice until you reach your desired texture.
What are some other great serving suggestions?
Beyond chips, this versatile salsa is fantastic as a topping for eggs, quesadillas, grilled chicken or fish, and even as a base for a quick soup or sauce.
Blender Salsa (Restaurant Style Salsa)
Quick and easy restaurant-style salsa made in a blender, perfect for dipping or as a topping.
Ingredients
-
1 (14.5-ounce can) Diced Tomatoes (don’t drain)
-
1/4 small Red Onion (about 1/3 cup coarsely chopped)
-
1/4 cup Cilantro
-
1 Lime (zested and juiced)
-
1 Jalapeno Pepper (or Serrano Pepper) (seeded and coarsely chopped)
-
2 cloves Garlic (coarsely chopped)
-
1/4 teaspoon Ground Cumin
-
Salt (to taste)
-
Black Pepper (to taste)
Instructions
-
Step 1
Add diced tomatoes (undrained), red onion, cilantro, lime zest, lime juice, seeded jalapeno, and garlic to a blender. -
Step 2
Add ground cumin. -
Step 3
Secure the lid and pulse until the salsa reaches your desired consistency. For a chunkier salsa, pulse fewer times. For a smoother salsa, blend longer. -
Step 4
Taste and season with salt and black pepper to your preference. -
Step 5
Pour into a bowl and serve immediately, or refrigerate for at least 30 minutes to allow flavors to meld.
Important Information
Nutrition Facts (Per Serving)
It is important to consider this information as approximate and not to use it as definitive health advice.
Allergy Information
Please check ingredients for potential allergens and consult a health professional if in doubt.



Leave a Comment