BEST CHEESY GARLIC BREAD RECIPE: Prepare yourselves for a culinary revelation, because we’re diving headfirst into the ultimate comfort food experience. Who doesn’t adore a warm, fragrant slice of cheesy garlic bread? It’s the quintessential side dish, the perfect appetizer, the star of any potluck, and honestly, sometimes it’s just the main event. This isn’t just any garlic bread; this is the BEST CHEESY GARLIC BREAD RECIPE, meticulously crafted to deliver an explosion of savory garlic, rich melted cheese, and that irresistible toasted crust. What makes it so special? It’s the perfect balance of flavors and textures – a symphony of creamy, garlicky goodness huggin extractg perfectly golden-brown bread. Get ready to elevate your bread game to legendary status.

The Ultimate Cheesy Garlic Bread Recipe
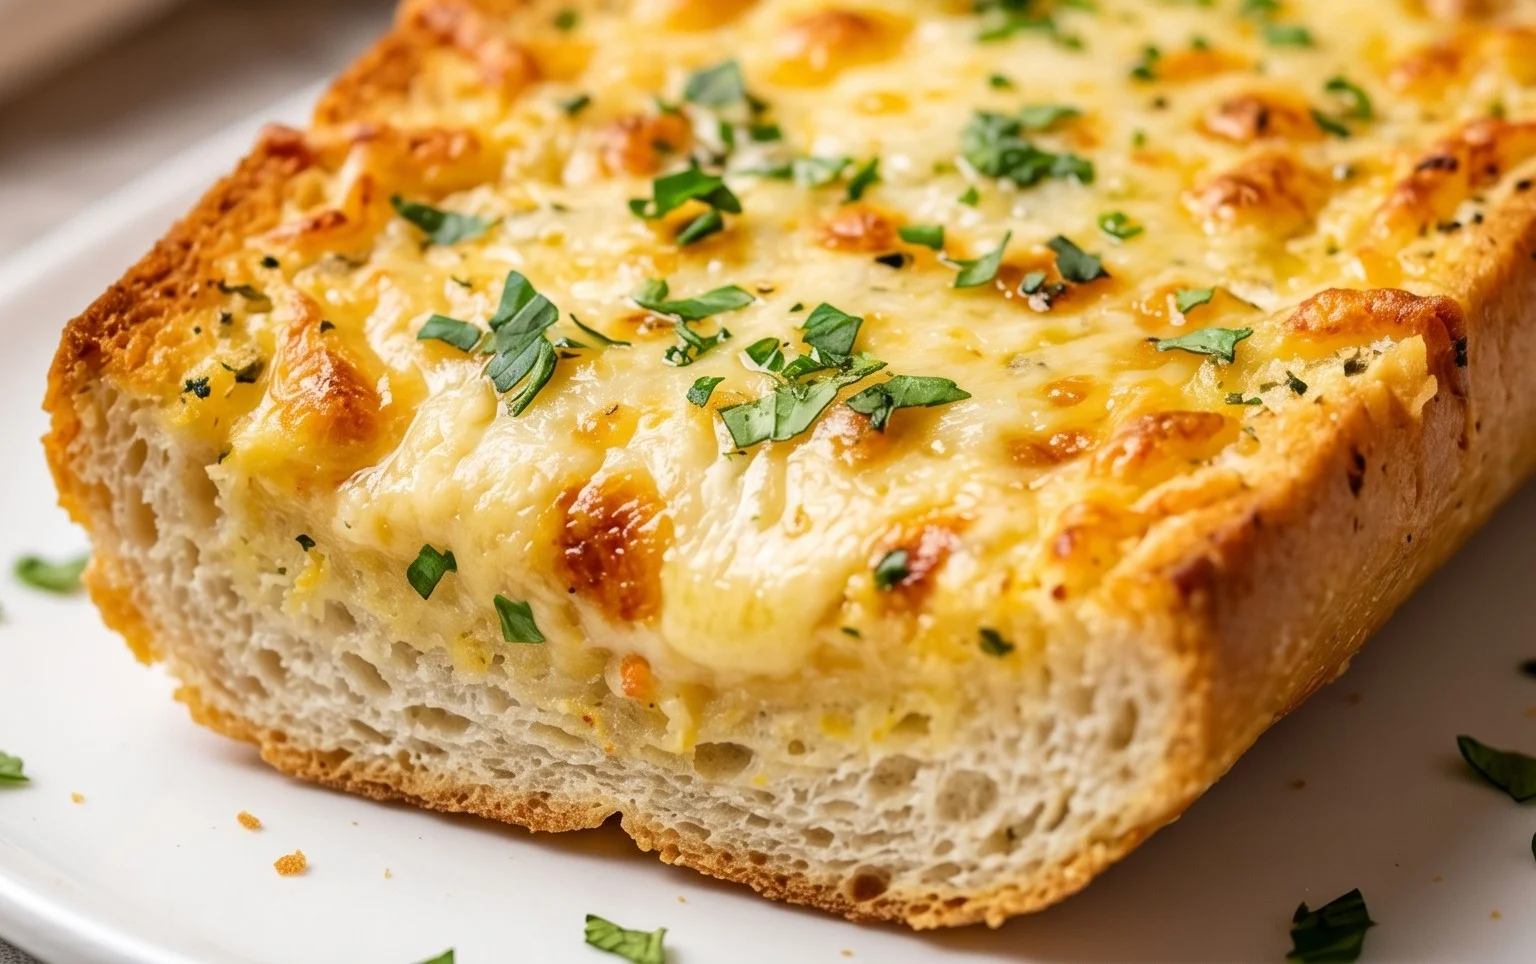
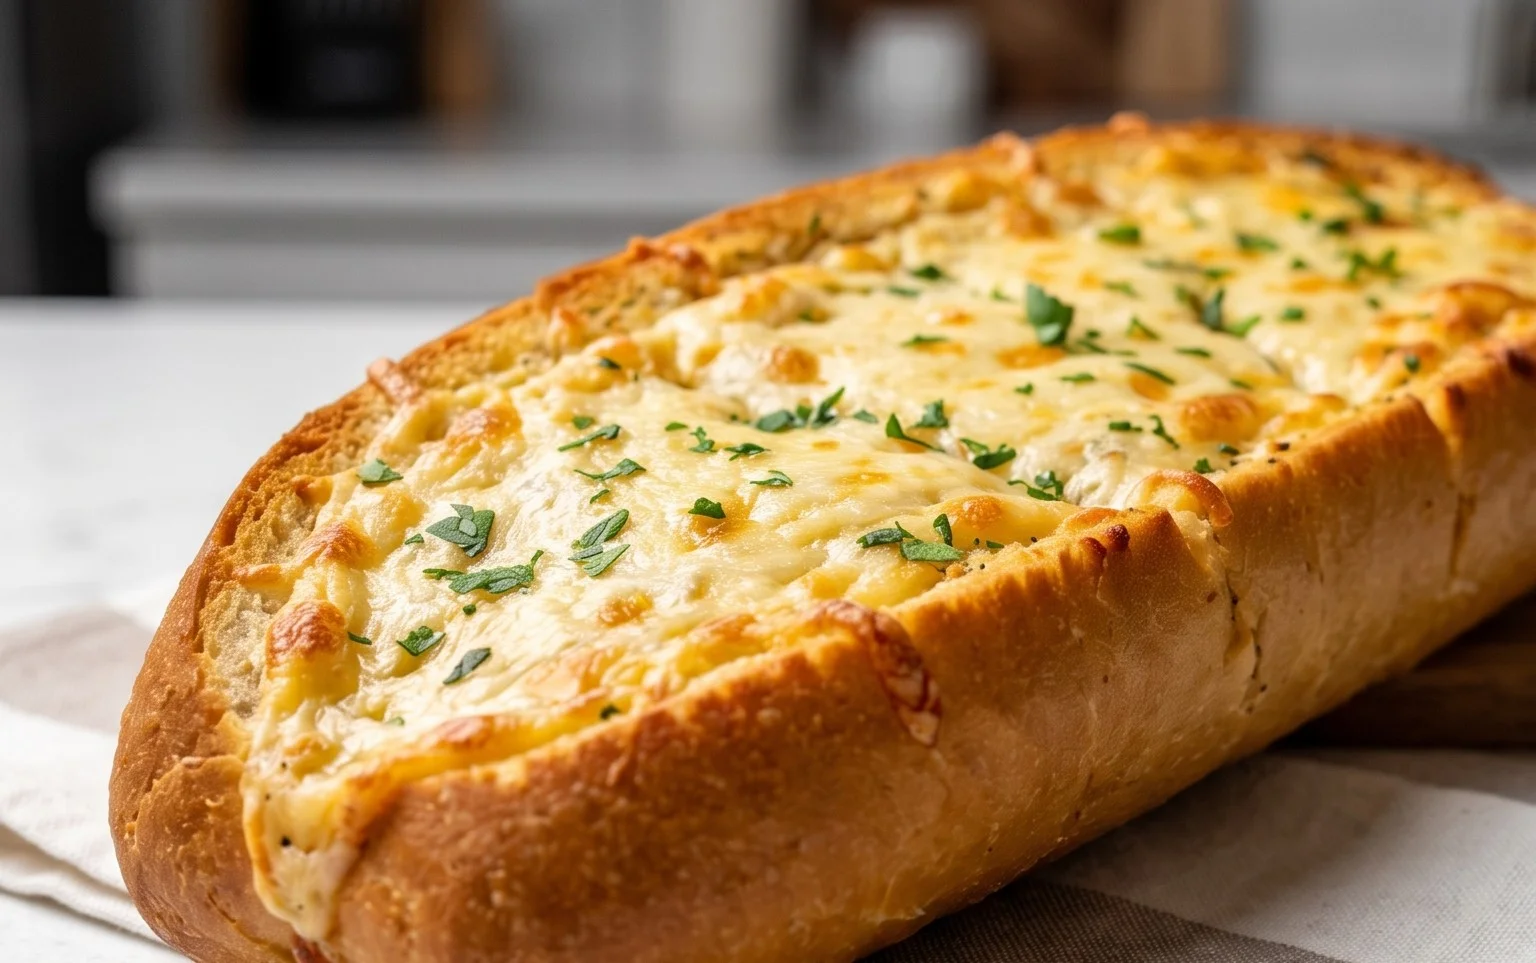
There are few things as universally comforting and undeniably delicious as a warm, gooey slice of cheesy garlic bread. Forget those dry, sad versions you might have encountered; this recipe is designed to deliver pure, unadulterated garlic bread bliss. We’re talking about pillowy soft bread, infused with fragrant roasted garlic and buttery goodness, then crowned with a generous blanket of perfectly melted mozzarella. It’s the kind of bread that disappears from the serving platter in minutes, leaving everyone beggin extractg for more. Whether you’re serving it alongside pasta, soup, or just as a delightful appetizer, this cheesy garlic bread is guaranteed to be a showstopper. Let’s dive into creating this masterpiece!
Ingredients:
Phase 1: Roasting the Garlic
The secret to truly exceptional garlic bread lies in properly preparing the garlic. We’re not just mincing raw garlic and hoping for the best; we’re going to roast it to mellow its sharp bite and bring out its sweet, nutty undertones.
Phase 2: Crafting the Garlic Butter Mixture
Now that we have our incredibly flavorful roasted garlic, it’s time to transform it into a luscious garlic butter spread that will coat every inch of our bread.
Phase 3: Preparing and Assembling the Bread
This is where the magic really starts to happen! The King’s Hawaiian Sheet Rolls are perfect for this because they are already connected, making it incredibly easy to get that beautiful, uniform coating of garlic butter and cheese. If you’re using a French baguette, simply slice it horizontally in half.
Phase 4: Baking to Golden Perfection
The final step is to bake this creation until it’s bubbling, golden brown, and utterly irresistible.
Serving Your Masterpiece
Let the cheesy garlic bread cool for just a minute or two before slicing and serving. This allows the cheese to set slightly, making it easier to cut and preventing all that lovely cheese from sliding off. Sprinkle with a little extra chopped parsley and some chili flakes for a touch of heat and color, if you like. This is best served warm, so gather your loved ones and get ready to enjoy the best cheesy garlic bread you’ve ever tasted!
Conclusion:
I truly hope you’ve enjoyed learning how to make this BEST CHEESY GARLIC BREAD RECIPE. What makes it so fantastic is the perfect balance of buttery garlic infusion, the gooey, melty cheese pull, and the satisfyingly crisp-yet-chewy texture of the bread. It’s incredibly versatile and pairs beautifully with almost any Italian-inspired meal. Think hearty pasta dishes like lasagna or spaghetti bolognese, rich stews, or even just a simple bowl of tomato soup. For a twist, consider adding a pinch of red pepper flakes to the garlic butter for a hint of spice, or sprinkling some fresh chopped parsley or chives on top before baking for an extra burst of freshness. Don’t be afraid to experiment with different cheese combinations too – a touch of Parmesan or a sprinkle of mozzarella alongside the cheddar can elevate it even further! Give this recipe a try; I promise you won’t be disappointed. It’s a crowd-pleaser that’s surprisingly easy to whip up.
Frequently Asked Questions:
Why is this the BEST CHEESY GARLIC BREAD RECIPE?
This recipe shines because it focuses on creating a deeply flavorful garlic butter that truly permeates the bread, combined with the ideal cheese blend for maximum meltiness and a delightful golden-brown crust. The balance of ingredients and the simple yet effective baking method result in a bread that’s both comforting and exceptionally delicious.
Can I make this ahead of time?
Yes, you can! Prepare the garlic butter mixture and spread it on the bread. Cover it tightly with plastic wrap and refrigerate. When you’re ready to bake, you may need to add a few extra minutes to the baking time to ensure it’s heated through. For best results, though, fresh is always fantastic!
What kind of bread should I use?
A good quality French baguette or Italian loaf works wonderfully. Sourdough also adds a lovely tangy dimension. The key is a bread that has a good crust and a soft interior that can soak up all that delicious garlic butter.
BEST CHEESY GARLIC BREAD RECIPE
Incredibly delicious and easy cheesy garlic bread, perfect as a side dish or appetizer.
Ingredients
-
8-10 garlic cloves
-
2 tbsp olive oil
-
Pinch of salt
-
Roasted garlic from above
-
½ cup butter, melted(113g)
-
1 egg
-
¼ cup milk (60g)
-
½ tsp salt
-
½ tsp paprika
-
2 tbsp chopped fresh parsley
-
12 King’s Hawaiian Origin extractal Hawaiian Sheet Rolls, kept in the full sheet form (or replace with a French baguette of similar size)
-
2 cups shredded mozzarella cheese
-
Chopped parsley and chili flakes for serving
Instructions
-
Step 1
Roast garlic: Toss 8-10 garlic cloves with 2 tbsp olive oil and a pinch of salt on a baking sheet. Roast at 400°F (200°C) for 20-25 minutes, or until soft and golden. Squeeze roasted garlic out of skins. -
Step 2
Prepare garlic butter mixture: In a bowl, combine ½ cup melted butter, the roasted garlic (mashed), 1 egg, ¼ cup milk, ½ tsp salt, ½ tsp paprika, and 2 tbsp chopped fresh parsley. Mix well. -
Step 3
Prepare bread: Slice the King’s Hawaiian sheet rolls in half horizontally while still in the sheet form. If using a baguette, slice it lengthwise. -
Step 4
Apply garlic butter: Spread the garlic butter mixture evenly over the cut surfaces of the bread. -
Step 5
Add cheese: Sprinkle 2 cups of shredded mozzarella cheese generously over the garlic buttered bread. -
Step 6
Bake: Place the bread on a baking sheet and bake at 375°F (190°C) for 10-15 minutes, or until the cheese is melted and bubbly and the bread is golden brown. -
Step 7
Serve: Garnish with chopped parsley and chili flakes. Serve immediately.
Important Information
Nutrition Facts (Per Serving)
It is important to consider this information as approximate and not to use it as definitive health advice.
Allergy Information
Please check ingredients for potential allergens and consult a health professional if in doubt.


Leave a Comment